Left-Handed Crochet: Complete Beginner's Guide
Everything a left-handed crocheter needs to get started — from holding your hook the right way to reading patterns designed for righties.

Being left-handed never has to hold you back in crochet. In fact, some of the most wonderfully productive crafters out there are lefties — they've simply learned a few clever tricks to translate a right-handed craft world into something that feels totally natural. If you've ever sat down with a hook, tried to follow a tutorial, and felt like your hands were fighting you, this guide is exactly what you've been waiting for.
How left-handed crochet actually works
The mirror method is your new best friend
Every crochet stitch you'll ever need — chain, single crochet, double crochet, magic ring — works exactly the same way for lefties. The only real difference is direction. Where a right-handed crocheter moves from right to left across a row, you'll move from left to right. When you reach the end of a row, you turn your work in the opposite direction from what right-handed tutorials show.
Think of it like reading a book reflected in a mirror: all the same words are there, just flipped. This means every written crochet pattern you encounter is perfectly usable — stitch counts, yarn-overs, and increases are all identical. You don't need special left-handed patterns. You just need to mirror the physical movements.
The most practical way to learn is to watch right-handed video tutorials and either hold your device up to a mirror, flip the video horizontally using your phone's editing tools, or simply mentally reverse what you see. Many left-handed beginners find it helpful to pause videos frequently and practice each movement slowly before speeding up.
Holding your hook and yarn
Comfort and control start here
Your hook goes in your left hand — that's the hand that drives the hook through the stitch and pulls up loops. Your right hand feeds and tensions the yarn. There are two common grip styles that work beautifully for lefties:
The pencil grip holds the hook between your left thumb and index finger, much like you'd hold a pencil to write. Many beginners find this grip intuitive and easy to pick up. The knife grip wraps your fingers over the top of the hook like you're gripping a dinner knife; it gives extra leverage for tighter yarn or thicker hooks and is often favored for long crochet sessions because it reduces hand fatigue.
Try both during your first practice session and notice which one lets you keep a steadier rhythm. You can also switch between grips depending on the project — some crafters use a pencil grip for delicate amigurumi work and a knife grip for chunky blankets. Check out our full guide on how to hold a crochet hook for illustrated details on both techniques.
For yarn tension, drape the yarn over your right index finger, loop it around your right pinky for control, and let it flow from the skein across your palm. The goal is consistent, gentle resistance — not a death grip. If your yarn keeps slipping or feels impossible to control, experiment with wrapping it an extra time around your pinky or passing it under your ring finger first.
Your first left-handed stitches
Build confidence one loop at a time
Start with the slip knot — it's the same for everyone. Make a loop in your yarn, push a small second loop through the first, and tighten it gently onto your hook. From there, practice your chain stitch: yarn over (bring the yarn from your right hand over the hook), pull through the loop on the hook. Repeat until your chain feels even and rhythmic.
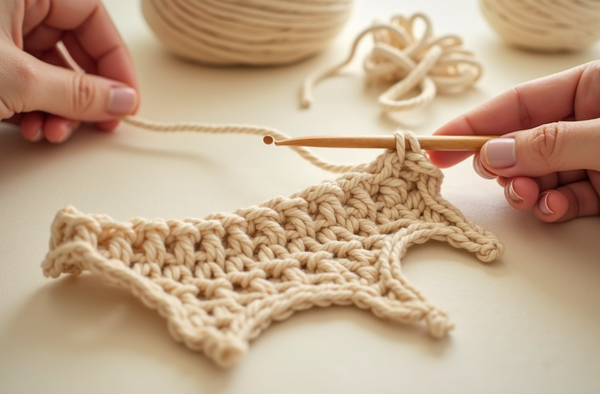
Once your chain feels comfortable, try the single crochet. Insert your hook into a chain stitch from front to back, yarn over and pull up a loop (two loops on hook), yarn over again and pull through both loops. Working left to right, you'll find the motion becomes automatic surprisingly quickly. Give yourself a full practice swatch — at least 20 stitches across and 10 rows — before judging your progress.
The double crochet is the next big milestone and opens up the vast majority of crochet patterns. Yarn over before inserting your hook, pull up a loop (three loops on hook), yarn over and pull through two loops, yarn over and pull through the remaining two loops. That's it. As a left-hander you perform each yarn-over and pull-through in the exact same sequence — just mirrored in direction across your work.
Working in the round is often where left-handed beginners feel an extra surge of confidence: because you join rounds with a slip stitch and continue going around, the directional difference almost disappears. Amigurumi — crocheted in continuous rounds from a magic ring — is genuinely one of the friendliest starting points for lefties.
Reading patterns as a left-handed crocheter
No special decoder ring required
Written patterns (the kind that say "sc 6, inc, sc 2" etc.) are entirely direction-neutral. The stitch abbreviations, repeat brackets, and round counts all apply equally to you. The only thing to remember is that whenever a pattern says "work across to the end of the row," you'll be moving left to right while a right-handed crocheter moves right to left — but the finished fabric looks identical.
Crochet charts (symbol diagrams) do require a little more attention. Right-handed crocheters typically read flat rows from right to left on odd rows and left to right on even rows. As a left-hander, you'll reverse that: read odd rows left to right and even rows right to left. Rounds are read counterclockwise for right-handers, so you'll read them clockwise. Our guide to reading crochet symbol charts walks through this in detail with visual examples.
If you come across a construction technique described with directional language — "insert hook from right to left," for example — simply reverse the direction. The structural result (the stitch being formed) will be the same.
"Being left-handed in a right-handed craft world just means you get to see things from a delightfully different angle — and your finished stitches are every bit as beautiful." — Ava, MrsCrochetWorld
Perfect first projects for left-handed beginners
Choose a project that lets you practice the basics while making something you'll actually love

No-Sew Amigurumi Bundle — 50 Patterns
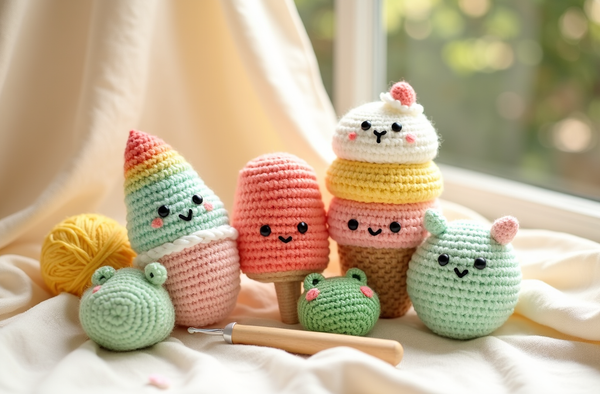
Best for beginnersWorking in the round is one of the easiest ways for left-handers to find their rhythm because direction becomes almost irrelevant — you just keep going around. This 50-pattern no-sew bundle is built entirely on that principle, with simple shapes and no seaming required. Read more about the no-sew amigurumi technique before you dive in.

Free Giraffe Amigurumi Pattern
Free PDF downloadNothing builds confidence faster than finishing your very first project, and a free pattern takes the pressure right off. This no-sew giraffe is worked entirely in the round with basic single crochet and magic ring increases — ideal for a left-handed beginner practicing new motions. Once you've crocheted this little giraffe, check out our guide on easy amigurumi patterns for beginners to keep the momentum going.

Granny Square Bag — PDF + Video Tutorial
Confidence builderOnce you've got single and double crochet down, granny squares are a beautiful next step. Each square is worked in the round from the center out, which keeps things manageable for lefties, and joining squares into a bag gives you a satisfying, wearable finished object. The included video tutorial makes it easy to mirror the movements. Browse our full crochet bags collection when you're ready for more.
Six things every left-handed beginner should know
Little details that make a big difference
Hook ergonomics matter
Ergonomic hooks with a soft grip handle reduce hand strain during longer sessions. Look for hooks labeled "comfort grip" or "soft grip" — they make a noticeable difference over a few hours of left-handed crocheting.
Yarn choice is a shortcut
Smooth, light-colored acrylic yarn is forgiving for beginners. You can see your stitches clearly, count rows easily, and frog (undo) mistakes without the yarn felting or tangling. Once you're confident, experiment with cotton for amigurumi.
Count stitches obsessively at first
Left-handed beginners sometimes add or lose stitches at row turns because the direction reversal is new. Count every stitch at the end of each row for your first three projects. Use a stitch marker on the first and last stitch to track your edges. Our guide on counting stitches and rows has practical tips.
Tension will even out
Uneven tension is completely normal in the first few weeks. Resist the urge to over-tighten — it makes your hook harder to insert and your finished fabric stiff. Aim for loops that slide smoothly along the hook without needing to be forced. Check our tips on getting even tension.
Mirror or flip tutorial videos
Most phone video editors let you flip a clip horizontally in seconds. Recording yourself on your phone and then flipping the playback is another great way to check your own technique as if you were watching a dedicated left-handed tutorial.
Ready for a full roadmap?
Our complete beginner guide to crochet walks through every foundational skill in order — from your very first slip knot all the way to finishing a complete project. It's written to work for lefties too.
Ava's top tips for left-handed crochet success
- Learn from left-handed creators when you can. Search specifically for "left-handed crochet tutorial" on YouTube — a growing community of lefty crafters post dedicated content that lets you follow along without mirroring anything at all.
- Use stitch markers generously. Place a marker at the beginning of every round and at both ends of every row until the correct turning direction feels second nature. Markers are cheap; frogging a full project is heartbreaking.
- Practice the magic ring early. The magic ring is the foundation of virtually all amigurumi and many hats. Once you can form one left-handed without hesitation, circular projects open up completely. If it gives you trouble, try the magic ring alternatives — a simple chain-and-join works beautifully too.
- Don't skip swatching. A gauge swatch tells you whether your tension matches the pattern. Left-handed tension can differ from right-handed tension even with the same hook size, so swatching is especially worthwhile before starting a garment or sized project.
- Mistakes are just learning moments. Even experienced crafters fix crochet mistakes regularly. Keep a blunt-tipped tapestry needle nearby so you can gently undo stitches row by row if needed — it's much faster than ripping out a whole section.
- Join a community. Online crochet groups have dedicated left-hander threads where members share tips, video links, and encouragement. Community support is one of the fastest routes from frustrated beginner to confident crocheter.
Ready to pick up your hook?
Every stitch gets easier with practice, and we're here with beautiful patterns designed to grow with you — from your very first chain to finished amigurumi you'll be proud to display or gift.
Get a free pattern Shop beginner patternsFrequently asked questions
Is crochet harder to learn if you're left-handed?
Not really — it just requires a small mental adjustment at the start. Left-handed crocheters use identical stitches and tension principles; they simply mirror the direction of work. Most left-handed beginners reach comfortable confidence within the same timeframe as right-handed beginners, especially when they practice with dedicated left-handed video tutorials or mirror right-handed ones.
Do I need special left-handed crochet patterns?
No. All written crochet patterns — whether they list stitch counts, abbreviations, or row-by-row instructions — are equally usable by left-handers. The stitch movements are mirrored, but the stitch names, counts, and sequences stay exactly the same. You only need to be aware of directional language in construction instructions and reverse it mentally.
Which hand holds the crochet hook if I'm left-handed?
Your left hand holds the hook. Your right hand feeds and tensions the yarn. This is the mirror of right-handed crochet, where the hook is in the right hand and the yarn is managed by the left hand. Both the pencil grip and the knife grip work well for left-handed hook holding.
How do I read crochet symbol charts as a left-hander?
For flat rows, read odd (right-side) rows from left to right and even (wrong-side) rows from right to left — the reverse of right-handed convention. For rounds, follow the chart clockwise rather than counterclockwise. The symbols themselves mean the same thing regardless of which direction you read them.
Can I learn from right-handed crochet tutorials?
Yes, and many left-handers do exactly that. The simplest approach is to watch the tutorial on your phone, then use the phone's video editor to flip the footage horizontally before watching. You can also hold a small mirror beside your screen to see a mirrored version in real time. Pause frequently and practice each movement before continuing.
Will my finished crochet look different from a right-handed crocheter's work?
For most stitches, the finished fabric looks essentially identical. Some stitches have a slight twist or lean that reverses when worked left-handed — for example, single crochet posts may lean the opposite direction — but in practice, especially for amigurumi and home decor projects, this difference is invisible to the eye.
What is the easiest first project for a left-handed beginner?
Amigurumi worked in the round is one of the most beginner-friendly options for lefties because continuous rounds largely eliminate the directional row-turning challenge. A small, simple shape like a free giraffe or hedgehog pattern gives you hundreds of single crochet repetitions to build muscle memory without the complexity of increases and decreases in flat rows.
How do I increase and decrease stitches left-handed?
Increases and decreases work by the same principle as right-handed crochet. A left-handed increase simply means working two stitches into the same stitch while moving left to right. A left-handed decrease (crochet two together) inserts the hook into two consecutive stitches and pulls through both in sequence. The stitch count result is identical. Our guide on how to increase and decrease in amigurumi covers both techniques with step-by-step instructions.