Top 10 Easy Amigurumi Patterns for Beginners — Start Crocheting Cute Plushies Today
You don't need years of experience to make adorable stuffed animals. These ten beginner-friendly patterns will have you finishing your first plushie in a single weekend.


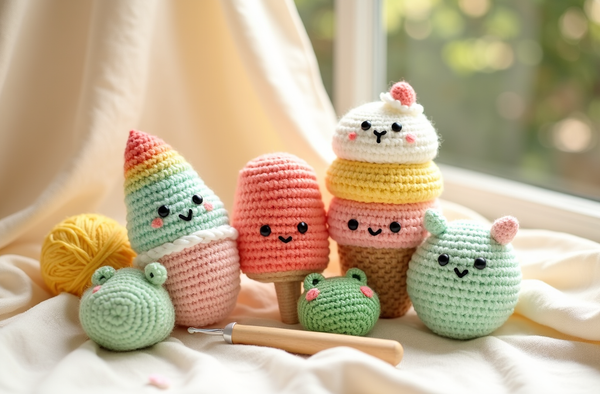
A peek at what you can make
Amigurumi — the Japanese art of crocheting tiny stuffed creatures — looks impossibly cute and, at first glance, impossibly hard. The good news? Most amigurumi pieces are built from just a handful of stitches worked in continuous rounds. If you can single crochet and start a magic ring, you already have the two skills that unlock 90% of all amigurumi patterns.
What makes an amigurumi pattern "beginner-friendly"?
Not all amigurumi are created equal. Here's what to look for before you cast on.
A truly beginner-friendly amigurumi pattern shares four traits: it uses only single crochet (sc) and basic increases and decreases, it has few separate pieces to sew together, its finished size is small enough to stuff easily, and the written instructions include stitch counts at the end of every round. When you're choosing your first project, scan the pattern for those stitch counts — they're your safety net. Learn more about what to expect in our complete amigurumi guide.
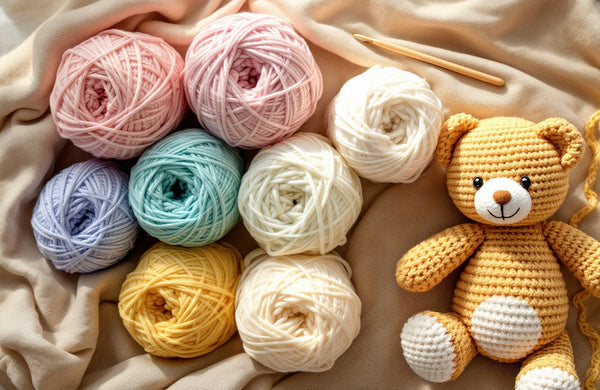
Essential supplies before you start
You need very little to get going: a 2.5 mm or 3.5 mm crochet hook (check your yarn label), worsted or DK weight acrylic yarn, polyester fiberfill stuffing, a yarn needle, and a pair of safety eyes. That's it. One small bag of supplies opens the door to hundreds of creatures.
"Every expert amigurumi maker started with a lumpy little ball that only they could love. Make yours anyway — it's the best first step."— Ava, MrsCrochetWorld
Three pattern picks to start your collection
Each of these bundles is designed with new crocheters in mind — clear instructions, low sew, big results.
50 No-Sew Amigurumi Patterns Bundle
Best starter bundleFifty creatures, zero sewing stress. Every body part is crocheted directly onto the main piece so you never have to wrestle with a yarn needle again. Perfect for anyone who wants to understand no-sew techniques from the ground up. One PDF, endless possibilities.

4-in-1 Dinosaur Amigurumi Bundle
Kid-favorite themeFour dinos — including a T-Rex and a Stegosaurus — all sized to finish in a few hours each. The chunky shapes and rounded bodies make them ideal for practicing crocheting in the round. A great gift project and a confidence builder rolled into one prehistoric package.
Care Bears Amigurumi Pattern — 4 in 1
Fan-favorite charactersBring four beloved bears to life with a pattern written in clear US crochet terms. The tummy symbols are embroidered so you'll also pick up basic surface embellishment skills along the way. Browse the full amigurumi collection once you've finished all four.
The top 10 easy amigurumi types for beginners
These creature categories consistently appear on beginner-friendly pattern lists — and for good reason.
Round bears and rabbits
Simple spherical bodies with minimal shaping. A bear is essentially three circles (head, body, ears) plus limbs — the perfect introduction to magic rings and even stuffing technique.
Chunky dinosaurs
Big, forgiving stitches and bold colors hide tension inconsistencies beautifully. Dinosaurs also give you practice with standing legs — a useful skill for almost every future amigurumi project.
Frogs and toads
The classic starter amigurumi for a reason: a round green body, two bead eyes on top, and four stubby legs. Read the pattern once, grab some lime green yarn, and you'll have a frog by evening.
Hedgehogs and spiky friends
A round body with textured "spines" created by pulling up loops through the fabric — no extra pieces to attach. Great for practicing the spike stitch in a low-stakes context.
Flower and food amigurumi
Strawberries, donuts, and sunflowers are beginner goldmines: small scale, bright colors, and near-zero assembly. They also make popular gifts and quick craft fair items.
Ready for more?
Once you've finished two or three of the above, you're already an intermediate crocheter. Our complete beginner guide lays out your next milestones so you always know what skill to tackle next.
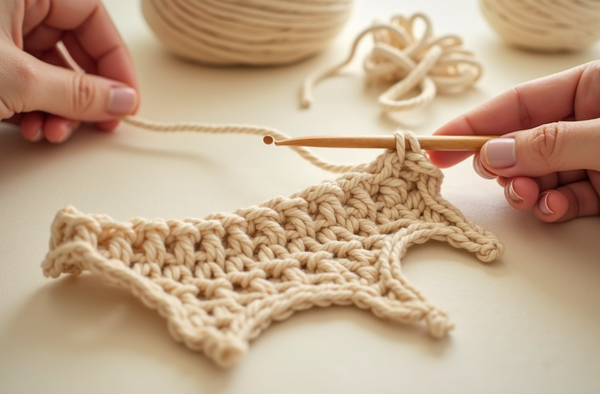
5 tips to nail your first amigurumi
- Use a slightly smaller hook than the yarn label suggests. Tighter stitches mean no stuffing peeking through the gaps — aim for a firm, dense fabric rather than a drapey one.
- Place a stitch marker in the first stitch of every round. Amigurumi is worked in a continuous spiral, not joined rows. Moving your marker up each round is the simplest way to keep your count accurate.
- Stuff as you go, not all at once at the end. Pushing fiberfill into a nearly-closed piece is frustrating. Add a little stuffing every few rounds so the final closure is relaxed and even.
- Don't rush the safety eyes. Once they're locked in, they're locked in. Lay the eyes in place, step back, look at it from across the room, then click them home.
- Finish your ends inside the body. Thread each tail onto your yarn needle and weave it through the stuffing several times before trimming. The stuffing holds the yarn in place better than any knot.
Grab a free pattern and start today
The best time to make your first amigurumi is right now. Pick up one of our free patterns to test the waters, or browse the full beginner-friendly collection to find a creature that sparks joy.
Get a free pattern Shop amigurumi patternsFrequently asked questions
What is the easiest amigurumi to crochet for a complete beginner?
A simple round animal like a frog or a bear is usually the easiest starting point. These shapes use only single crochet worked in continuous rounds, with straightforward increases to grow the sphere and decreases to close it. They require very few separate pieces and minimal sewing, so you can focus entirely on mastering the basic round before adding complexity.
Do I need to know how to crochet before attempting amigurumi?
A tiny bit of foundation knowledge helps. You should be comfortable making a slip knot, chaining, and working single crochet stitches in a row before tackling amigurumi in the round. Most beginners reach that baseline within a day or two of practice. Our beginner crochet guide walks you through those exact skills before introducing amigurumi.
What yarn weight is best for beginner amigurumi?
Worsted weight (weight 4) acrylic is the most forgiving choice. It works up quickly, is widely available in every color imaginable, holds its shape well when stuffed, and is easy to frog (unravel) if you make a mistake. Avoid fuzzy or bulky yarns for your first project — they make it hard to see individual stitches.
What hook size should I use for amigurumi?
Most amigurumi patterns written for worsted weight yarn recommend a 3.5 mm to 4.0 mm hook, which is slightly smaller than the yarn label suggests. This creates a tighter fabric with no gaps, so the stuffing stays hidden. If you can see the white stuffing through your stitches, go down half a size.
How long does it take to crochet a small amigurumi?
A small round creature — roughly the size of a tennis ball — typically takes a beginner two to four hours spread across one or two sessions. Larger or more complex characters with many separate parts can take a full weekend. The more you practice, the faster each round goes.
Can I sell amigurumi I make from a purchased PDF pattern?
It depends on the pattern's terms of use. Many independent designers, including those at MrsCrochetWorld, allow you to sell a limited number of handmade items from their patterns as long as you credit the designer. Always read the license page at the start of the PDF before listing items for sale.
What is a magic ring and do I really need to use one?
A magic ring (also called a magic circle) is an adjustable loop that lets you start crocheting in the round with zero visible hole at the center. It is the standard starting method for amigurumi heads and bodies. If you struggle with it at first, a two-chain alternative works as a substitute — just pull the tail snug after the first round to close the gap.
What stuffing should I use for amigurumi?
Polyester fiberfill is the standard choice. It is inexpensive, washable, holds its shape over time, and is available at every craft store. Avoid cotton batting or loose wool, which can compact and shift inside the piece. For very small parts like ears or tiny limbs, use the eraser end of a pencil to push a small amount of stuffing into the tip before closing.