How to make a slip knot for crochet — step by step
Every single crochet project starts with one small loop. Master the slip knot in under two minutes and you are ready to cast on anything.

Before you chain a single stitch, before you pick up a pattern, before you even choose a project — there is one tiny knot standing between you and everything crochet has to offer. The slip knot. It takes about thirty seconds to learn, and once it clicks you will never forget it.
What is a slip knot and why does it matter?
The slip knot is the very foundation of every crochet project — get it right once and you are good forever.
A slip knot is simply a self-tightening loop. When you place it on your hook and pull the working yarn (the yarn coming from your ball), the loop snugs down around the hook's shaft without falling off. It is the anchor point from which every chain stitch, every single crochet, and every amigurumi body part grows. If your slip knot is too tight, your first few stitches will feel stiff and cramped. If it is too loose, the knot may slip right off the hook before you start. Getting it just right — snug but still free to slide — is the whole game, and it is easier than you think.
The slip knot also matters for a less obvious reason: it does not count as a stitch. When a pattern says "make a magic ring" or "chain 15," your slip knot is already on the hook and is not included in that count. Knowing this early saves beginners a lot of confusion when they try to count their stitches and rows later on.
What you need before you start
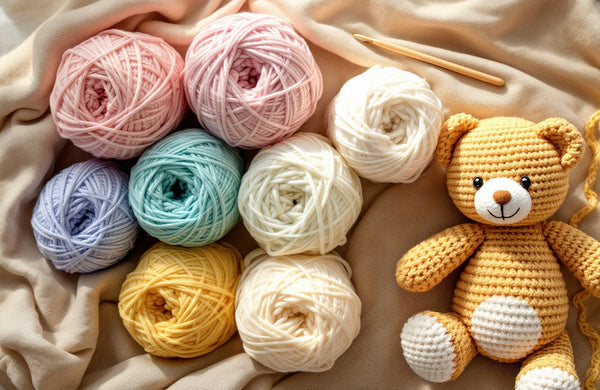
You need just two things: a ball of yarn and a crochet hook. For learning, a worsted-weight yarn (labeled "4 – Medium" on the ball band) paired with a 5 mm hook is the easiest combination — the stitches are big enough to see clearly and the yarn is smooth enough to slide without catching. If you are not sure which hook to pick up first, our guide to the best crochet hooks for beginners walks you through every option. For yarn, anything smooth and light-colored works — you want to see what your fingers are doing.
How to make a slip knot: the two-finger method
This is the clearest, most beginner-friendly method — no wrapping around a hook required.
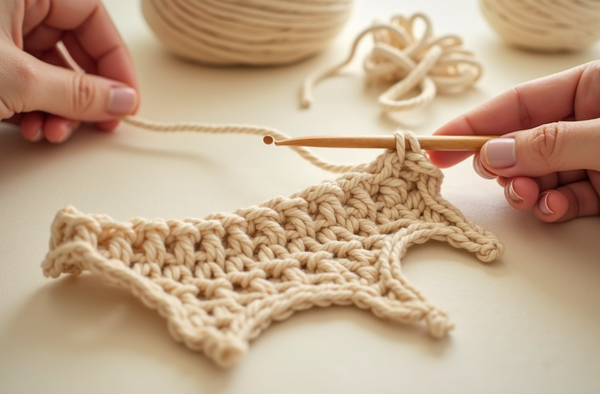
Step 1 — Pull out a tail. Unwind about 6 inches (15 cm) of yarn from the ball. This is your "tail end." The yarn still attached to the ball is your "working yarn."
Step 2 — Make a loop. Hold the tail end between your thumb and index finger. With your other hand, bring the working yarn over the top of the tail, forming a loop that looks like the letter O. The working yarn should cross over the tail, not under it.
Step 3 — Pull a bight through. Pinch the place where the two strands cross. Reach through the loop with two fingers and grab the working yarn (not the tail). Pull that grabbed strand part-way through the loop to create a new, smaller loop — this is called a "bight."
Step 4 — Place on your hook. Slide your hook through the new bight you just pulled through. Hold the tail end and gently pull it downward while holding the bight on the hook. The loop will snug around the hook's shaft.
Step 5 — Adjust the size. Pull the working yarn gently to tighten the bight around the hook until the loop slides along the shaft without resistance but does not fall off. It should feel like a comfortable ring — not a vice grip, not a hula hoop.
That is it. You now have a slip knot on your hook and you are one step away from your first chain stitch.
Common slip knot mistakes and how to fix them
Even seasoned crocheters occasionally tie an accidental overhand knot instead of a slip knot. Here is what to watch for:
- The loop will not slide. You have tied a regular knot. Pull it out completely and start fresh — you cannot rescue an overhand knot.
- The loop falls off the hook. The bight is too large. Tug the working yarn gently while holding the knot to snug it down.
- The knot is so tight you can barely move it. You pulled the tail end too hard. Loosen it by pushing the loop open with your hook's head or your fingernail.
- There are two loops on the hook. You accidentally grabbed both strands when making the bight. Slide everything off, take a breath, and repeat from Step 2.
Struggling with tension across your whole project? Our deep-dive on how to get even crochet tension will help you from the very first stitch.
"Every great crochet project starts with exactly one small loop. Do not rush past it — take a moment to get that slip knot just right and everything that follows will feel so much easier."— Ava, MrsCrochetWorld
Your first projects after the slip knot
Once your slip knot is on the hook, these beginner-friendly patterns give you a satisfying first finish — no complex techniques required.

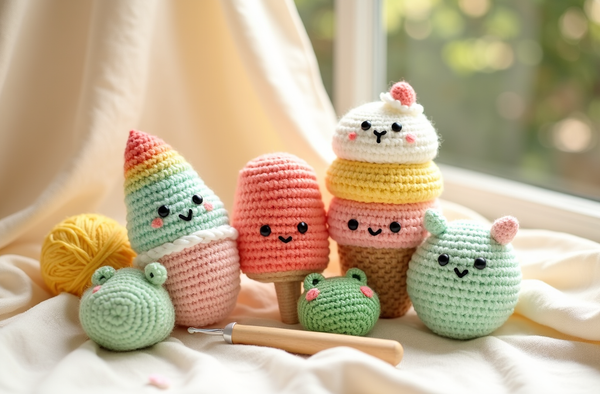
50 No-Sew Amigurumi Pattern Bundle
Best for new startersFifty adorable plushie patterns, all designed so you never need to sew parts together — perfect for anyone who just learned their slip knot. Every design starts with a magic ring, and once you have read our guide on how to make a magic ring, you will fly right through them. The bundle covers animals, food, and fantasy characters in one download.

Care Bears Amigurumi Pattern — 4-in-1 PDF
Fan favoriteFour classic Care Bears in one PDF, written in clear US crochet terms with step-by-step photos. These bears use only single crochet and basic increases and decreases — exactly the stitches you will practice right after mastering your slip knot. They make beautiful gifts and are surprisingly quick to finish on a weekend.

Dinosaur Amigurumi Bundle — 4-in-1 PDF
Kids love theseT-Rex, Stegosaurus, and friends — four prehistoric pals in one bundle that kids (and adults) go absolutely wild for. Each dinosaur is worked in the round from a slip knot and magic ring, making them ideal second or third projects once you have your tension dialed in. Check out the top 10 easy amigurumi patterns for beginners for more ideas at this level.
What comes right after the slip knot
Six essential first steps that build naturally from your very first loop.
Chain stitch
Yarn over and pull through the slip knot loop — your first real stitch and the building block of almost every foundation row. Our chain stitch guide shows exactly how.
Magic ring
The magic ring is the amigurumi alternative to chaining a foundation. Once your slip knot is second nature, the magic ring is your very next move if you want to crochet in the round.
Single crochet
The most used stitch in amigurumi and beginner projects. Insert hook, yarn over, pull up a loop, yarn over, pull through both loops — simple, satisfying, and endlessly versatile.
Tension basics
Consistent tension starts at the slip knot. If your loop is too tight or too loose from the start, every stitch that follows inherits that problem. Aim for a loop that slides freely but does not wobble.
Reading a pattern
Patterns assume your slip knot is already on the hook when they say "chain 1" or "make a magic ring." Understanding this context early saves a lot of head-scratching — see our beginner pattern reading guide.
Ready to dive in?
If you want a guided, reassuring walkthrough of every foundational skill — from slip knot to your first finished piece — our complete beginner guide to crochet has you covered step by step.
Ava's slip knot tips for absolute beginners
- Use smooth yarn first. Fuzzy, textured, or novelty yarns are beautiful but hide your stitches. Start with a plain, smooth worsted-weight yarn in a medium color so you can see every strand clearly while you learn.
- Leave a 6-inch tail, not a 2-inch one. A longer tail gives you something to hold onto while you form the knot and weave in later. Short tails tend to pull through accidentally.
- The loop should slide, not spin freely. After you place the slip knot on your hook, give the working yarn a gentle tug. If the loop shrinks smoothly toward the hook, you have done it right. If nothing moves, loosen the knot slightly with your fingernail.
- Practice on scrap yarn. Make ten slip knots in a row, then compare them. The difference between your first and tenth will surprise you — your hands learn faster than your brain thinks they do.
- The slip knot does not count as a stitch. Every beginner pattern is written this way. When you chain 15 for a foundation, those 15 chains start after the slip knot — not including it.
- If it goes wrong, just try again. A slip knot that does not work is just a small tangle. Pull it out, cut off any knots if needed, and start fresh. There is no wasted yarn here — only experience.
Now put that slip knot to work
You have learned the first move. Now it is time to build something wonderful. Browse our free crochet patterns to start your first project at no cost, or jump into our hand-picked easy beginner crochet patterns for a full range of confidence-building makes.
Get a free pattern Shop beginner patternsFrequently asked questions
What is a slip knot in crochet?
A slip knot is a self-tightening adjustable loop that you place on your crochet hook before starting any project. It anchors the yarn to the hook so you can make your first chain stitch. Pulling the working yarn tightens the loop, while pulling the tail loosens it.
Does the slip knot count as the first chain stitch?
No. The slip knot does not count as a stitch in crochet. When a pattern tells you to chain a certain number, you start counting from the first chain stitch you make after the slip knot, not from the slip knot itself.
How tight should a crochet slip knot be?
The slip knot should be snug enough to stay on the hook without falling off, but loose enough that the loop slides freely along the hook's shaft when you pull the working yarn. A good rule of thumb: if you can slide the loop up and down the shaft with light finger pressure, the tension is right.
Why does my slip knot keep falling off the hook?
If your slip knot falls off, the loop is too large. After placing it on the hook, gently pull the working yarn (the yarn coming from the ball) while holding the knot to snug the loop down around the shaft. Do not pull the tail end, or you may tighten it into an immovable knot.
Can I start crochet without a slip knot?
Yes, in some cases. When working in the round with a magic ring, you start with the ring itself rather than a slip knot on a foundation chain. However, for most projects that begin with a foundation chain, the slip knot is the standard and easiest starting point.
What yarn is best for practising a slip knot?
A smooth worsted-weight yarn (weight 4, medium) in a light or medium color is ideal for learning. The stitches are large enough to see clearly and the smooth surface lets the yarn slide easily. Avoid fuzzy or fluffy yarns until you are comfortable with the basic technique.
Is a slip knot the same as a slip stitch in crochet?
No, they are different. A slip knot is made before you even begin crocheting and sits on your hook as a starting anchor. A slip stitch is an actual crochet stitch worked into existing fabric — it is used to join rounds, move yarn invisibly, or finish off a piece.
How do I undo a slip knot if I make a mistake?
Simply slide the loop off the hook and pull the working yarn end. The slip knot will unravel immediately because it is designed to release. If the yarn formed an accidental overhand knot instead, carefully loosen it with your fingernail or a blunt tapestry needle — do not yank it, as that can tighten it further.