


The Complete Beginner's Guide to Crochet
Everything you need to go from zero to a finished project — the right supplies, every beginner crochet stitch in order, your first project ideas, and free tools to keep you on track. Start here and work down at your own pace.

If you have never held a crochet hook before, this is exactly where to start. Crochet is one of the most accessible handcrafts you can learn — you need only a hook, some yarn, and the handful of stitches taught below. Within a single afternoon you can work your first chain stitch. Within a week of daily practice you can finish a real project and feel that unmistakable "I made this" satisfaction. This guide walks you through every step in the correct order: from choosing your first supplies, through every foundational beginner crochet stitch, all the way to reading your first pattern and finishing your first project.
Why crochet is easier to learn than most people expect
Unlike knitting — which keeps many live stitches on two needles — crochet works with a single hook and one active stitch at a time.
That distinction matters enormously when you are just starting out. With only one loop on your hook at a time, dropping the hook or losing your place does not unravel your work. Recovery is simple. The core motion — insert hook, yarn over, pull through — repeats in every stitch, so once your hands know that rhythm, learning new stitches feels like adding variations to a theme you already know well.
Crochet is also wonderfully portable. A small project fits in a zip pouch; you can pick it up during a lunch break and set it down five minutes later without losing your progress. It rewards short, regular sessions just as much as long ones — which is ideal while you are building a new skill.
If you want to understand what to buy before your first session, start with our dedicated guides to the best crochet hooks for beginners and the best yarn for beginners. Both give honest, opinionated advice on the supplies that make learning easiest — and tell you exactly what to skip.
Crochet supplies for beginners — what you actually need
Skip the intimidating starter kits. This short list is everything you need to begin crocheting today, and nothing extra.

The four-item beginner supply list
Crochet supplies for beginnersYou need exactly four things to start crocheting: a 5.0 mm (US H-8) crochet hook in aluminum or ergonomic resin, one skein of smooth worsted-weight yarn in a light, solid color, a pair of small scissors, and a blunt-tipped tapestry needle for weaving in ends when you finish a project. That is the complete kit. A stitch marker — even a loop of scrap yarn — is worth adding once you start working in the round, but you do not need it on day one.
The single most important choice in this list is yarn. Use a smooth, light-colored, solid yarn: smooth so the hook slides easily; light-colored so you can see every stitch clearly; solid so there are no color distractions while you are counting. Avoid fuzzy (bouclé), textured, or dark yarn for your first several projects — they hide the stitch loops and make counting and correcting mistakes extremely difficult. For the full breakdown, our yarn and hook guide has a complete weight-to-hook cross-reference.

Choosing your first hook size
How to start crochetingFor most new crocheters, a 5.0 mm hook is the ideal starting point. It is large enough that the stitches are easy to see and insert into, yet small enough that the fabric has a pleasing density rather than looking open and loose. Hook materials range from basic aluminum — inexpensive, smooth, and widely available — to ergonomic resin handles that significantly reduce hand fatigue during longer sessions. If your hands tire quickly, the ergonomic option is worth the modest extra cost from your very first session.
As you progress and try different yarn weights, you will need different hook sizes. The yarn and hook guide has the full reference table, and the free tools and charts hub includes a printable hook conversion chart for every time you need to cross-reference metric, US, and UK sizing.
| Supply | Beginner recommendation | Why it matters |
|---|---|---|
| Hook | 5.0 mm aluminum or ergonomic | Large enough to see stitches clearly; easy to control |
| Yarn | Worsted weight (4), smooth, light solid color | Every stitch is visible and easy to count |
| Scissors | Small, sharp-tipped | Clean cuts close to the work without fraying |
| Tapestry needle | Blunt-tipped, large eye | Weaves in ends without splitting the yarn strands |
| Stitch marker | Split-ring plastic marker or scrap yarn loop | Marks the first stitch when working in the round |
How to start crocheting — the beginner stitch journey in order
Follow these seven steps in sequence. Each one builds directly on the last — skipping ahead tends to create confusion that is harder to undo than simply doing it in order.
The whole journey from slip knot to first finished project takes most people two to four hours of practice spread over a few days. Muscle memory — the kind of automatic hand motion that makes crochet feel effortless — develops through repetition, not through reading. Work each step for at least fifteen to twenty minutes before moving on, even if you feel ready sooner. Confidence built slowly is far more durable than confidence rushed.
- Make a slip knot Form a loop in the yarn, pass the working end through from behind, and place it on the hook so it slides freely but does not fall off. Every crochet project on earth starts with this motion. A slip knot that is too tight locks on the hook and makes your first chain stitch difficult — loosen it until it moves easily. This step takes about one minute to learn and never changes no matter what you make later.
- Chain stitch (ch) — your foundation With the slip knot on your hook, yarn over from back to front and pull through the loop. That is one chain stitch. Repeat to build a foundation chain of 20 stitches, aiming for even tension so every link looks approximately the same size. A too-tight chain makes the first row very hard to work into; a too-loose chain produces an uneven edge that is hard to count. Our full chain stitch tutorial walks you through every detail with close-up photos. The chain is the starting point for virtually every flat crochet project.
- Single crochet (sc) — the core stitch Insert your hook into the second chain from the hook, yarn over and pull up a loop (two loops now on the hook), yarn over again and pull through both loops. That is one single crochet stitch. Single crochet creates a dense, firm fabric and is used in everything from dishcloths and pot holders to amigurumi bodies and bags. Practice a swatch of about 15 stitches wide by 12 rows tall before moving to the next stitch — this alone builds the hand memory you need for every technique that follows. Read the complete step-by-step how to single crochet guide for detailed photos of each motion.
- Double crochet (dc) — the versatile workhorse Yarn over before inserting your hook into the stitch, pull up a loop (three loops on hook), yarn over and pull through the first two loops (two remain), yarn over and pull through the remaining two. That is one double crochet. This stitch is twice the height of single crochet, works up significantly faster, and is the foundation of most blankets, hats, and granny squares. The turning chain for double crochet rows is three chains rather than one. With single and double crochet mastered, you can follow the vast majority of patterns labeled "beginner" or "easy." See the complete how to double crochet guide for a photo walkthrough.
- Magic ring — start circular projects Once you can work flat rows, the magic ring opens up circular crochet — the foundation of amigurumi, hats, coasters, flowers, and bags. The magic ring creates a closed center loop with no visible hole in the middle, far neater than the chain-ring alternative. Wrap the yarn around two fingers, insert the hook through the ring, pull up a loop, chain, then work your first round of stitches into the ring. Pull the tail to close and proceed in a continuous spiral. Our full how to make a magic ring tutorial has every step illustrated.
- Read a pattern Crochet patterns use abbreviations like "sc," "ch," and "dc" and repeat notation like "(sc 2, inc) x 6" that look like code at first but follow a consistent, learnable grammar. Before starting any written pattern, read through it completely, note any unfamiliar abbreviations, and look them up in the crochet glossary. Always confirm whether the pattern uses US terms or UK terms — all MrsCrochetWorld patterns use US terms. Our complete guide to how to read a crochet pattern decodes every notation you will encounter as a beginner, with worked examples.
- Weave in ends and finish neatly Cut the yarn leaving a 6-inch tail, pull the tail through the last loop to fasten off, then thread it onto your tapestry needle and weave it diagonally through 5 or 6 stitches on the wrong side, reverse direction, and weave back through a different path to lock it. Trim close. A neatly finished piece looks professional; an unfinished tail turns out of place after one wash. This step takes under two minutes and transforms the overall appearance of your work.
"The chain stitch and the single crochet are the whole craft in miniature. Every advanced stitch is simply a variation of the same hook-yarn-over-pull-through rhythm. Get those two right and everything else clicks into place faster than you expect."— Ava, MrsCrochetWorld
Beginner crochet hook and yarn size reference
Matching hook size to yarn weight is the single most important technical decision you make at the start of any project. Get it right and your fabric lies flat, holds its shape, and matches the pattern's intended size.
The table below shows standard pairings across the most common yarn weights. Most beginner patterns specify worsted weight (size 4) with a 5.0 mm hook — that combination is forgiving enough to absorb minor tension differences while you are learning, and produces a fabric that is dense enough to be satisfying without being stiff. Once you have a few projects finished, use the free crochet gauge calculator to check whether your stitch count per inch matches the pattern's target, and visit the free tools and charts hub for a printable conversion chart you can keep at your workspace.
| Yarn weight | US label | Standard hook range | Good for beginners? |
|---|---|---|---|
| Fingering / Sock | Size 1 | 1.6 – 2.5 mm | No — very fine, hard to see stitches |
| Sport / Baby | Size 2 | 2.25 – 3.5 mm | Not ideal for learning |
| DK / Light | Size 3 | 3.5 – 4.5 mm | OK for small flat projects |
| Worsted / Medium | Size 4 | 4.5 – 5.5 mm | Yes — ideal starting weight |
| Bulky | Size 5 | 5.5 – 6.5 mm | Yes — works up quickly, easy to see |
| Super Bulky | Size 6 | 6.5 – 9.0 mm | Good for scarves and quick blankets |
For a full cross-reference of metric, US, and UK hook sizes alongside yarn weight equivalents, visit the yarn and hook guide. If you are ever unsure how much yarn to buy for a project, the crochet yarn calculator estimates yardage and skeins needed based on stitch type, hook size, and finished dimensions.
Your first crochet project — three proven options for brand-new makers
The best first project finishes quickly, teaches you something concrete, and gives you an early win to build on.

Option A — a free no-sew amigurumi
Easy crochet for beginnersA small, no-sew amigurumi (a stuffed crocheted toy) is one of the best possible first crochet projects for beginners. It uses single crochet worked in a continuous spiral — the exact stitch you just practiced — and because it is three-dimensional, each round of increase stitches gives you visible, satisfying progress. No-sew designs eliminate the needle-and-thread assembly entirely, so you finish by simply stuffing the piece and drawing the closing tail tight.
Our free hedgehog pattern is a perennial favorite for first-timers: it takes roughly two to three hours for someone brand new to crochet, requires only one color of worsted yarn, and produces a palm-sized creature that looks genuinely charming. Download it free from the free patterns collection and start as soon as you feel comfortable with the magic ring.

Option B — a flat project (dishcloth or coaster)
Your first crochet projectIf a three-dimensional toy feels too ambitious for session one, a flat project is the ideal starting point. A dishcloth worked entirely in rows of single crochet requires no shaping, no pattern reading beyond counting rows, and finishes in under two hours. A crocheted coaster is even smaller — most finish in 45 to 90 minutes — and working a set of four gives you enough repetition to feel your tension genuinely evening out by the final piece.
Our free giraffe pattern works beautifully as a second project: it is still simple single crochet in the round, but it introduces a basic color change that teaches you a new technique in a low-stakes context. Browse the full easy beginner crochet patterns collection for more options at exactly the right level.

Option C — a set of animal coasters
Beginner crochet stitches in practiceCrocheted coasters occupy the sweet spot between a practice swatch and a real project: they use only single and double crochet in the round, they finish in under 90 minutes each, and they produce something genuinely useful that you can gift or keep. Making four or six in a set is one of the most reliable ways to build even tension naturally — each coaster you make is faster and neater than the last.
Our 20-in-1 Animal Coasters bundle contains twenty animal designs written at beginner level, each one a self-contained project with its own stitch count and color notes. Download one, make it, then pick another — they also make an excellent handmade gift. See the full pattern collection for the complete range of options.
Six skills to unlock in your first month of crochet
Each skill below opens up a new category of patterns. Add them one at a time and your project options expand dramatically.
Even tension
Consistent stitch size is the skill that most visibly distinguishes a beginner's work from an experienced maker's. Practice long chains and flat swatches with no project goal — focus only on making each stitch match the last. Once your tension is even, your finished pieces will look far more polished. Check your work with the gauge calculator to confirm your stitches per inch.
Increases and decreases
Working two stitches into one (an increase) or joining two stitches together (a decrease) is what creates three-dimensional shape. Every amigurumi body, hat crown, and rounded pocket uses these two moves. They require exactly the same hook motions as single crochet — just applied slightly differently. Once you can increase and decrease confidently, you can follow any amigurumi pattern in the beginner collection.
Color changes
Joining a new color looks dramatic but is mechanically simple: on the final yarn-over of the stitch before the change, drop the old yarn, pick up the new color, and complete the stitch. Cut the old yarn leaving a 6-inch tail to weave in. A single stripe or color-block accent transforms a simple project into something that looks deliberately designed rather than practice work.
Neat finishing
Every project ends with yarn tails that must be secured so they do not pull out with washing. Thread each tail on a tapestry needle and weave it diagonally through 5 to 6 stitches on the wrong side, then reverse direction and weave back through a different path. A properly woven end is invisible from the right side and will not loosen over time. This two-minute step is what makes handmade items look professional.
Stitch counting
Every pattern row or round ends with a stitch count in brackets — "(18 sc)" or "[24]." Counting your stitches at the end of each round catches errors before they compound over multiple rows. A locking stitch marker at the start of each round gives you a clear reference point. Visit the skill level guide to understand how these techniques map to beginner, easy, intermediate, and advanced difficulty ratings.
Following a written pattern
Written crochet patterns use a compact abbreviation language that becomes second nature with practice. US terms ("sc," "dc," "hdc") differ from UK terms ("dc," "tr," "htr") — always confirm which system a pattern uses before starting. Our how to read a crochet pattern guide and the crochet glossary together decode every abbreviation you will encounter as a beginner.
Nine practical tips to learn to crochet faster and with less frustration
- Practice the chain for five minutes before every session. A brief chain warm-up loosens your hands and reestablishes your tension memory before you attempt anything more complex. It takes almost no time and prevents the tight, uneven first rows that plague beginners who pick up cold.
- Always use a smooth, light-colored yarn while learning. Textured, fuzzy, or dark yarn hides your stitch loops and makes counting and correcting almost impossible. Reserve specialty yarn for when your tension is already consistent.
- Count every stitch, every row. Beginners who skip this step consistently find their piece widening or narrowing over time and cannot trace back to where the error occurred. Ten seconds of counting at the end of each row prevents hours of having to unravel and restart.
- Understand the turning chain rule before your first row. In flat crochet, the turning chain at the end of each row either counts as the first stitch of the next row or it does not — depending on the pattern. A chain-1 turn for single crochet typically does not count; a chain-3 turn for double crochet typically does. Check your pattern's specific instructions on this point; getting it wrong shifts your stitch count by one in every single row.
- Guide the yarn, do not grip it. Tension comes from guiding the working yarn over and between your non-dominant hand's fingers, not from squeezing. A relaxed hand feeds yarn at an even pace and produces more consistent stitches with far less fatigue during longer sessions.
- Check gauge before any sized project. For amigurumi and small toys, a slightly different gauge rarely matters — the finished size difference is minor. For hats, garments, bags, or anything with a specified finished measurement, checking that your stitch count per 4 inches matches the pattern's target is the difference between a piece that fits and one that does not. Use the gauge calculator to make this check fast and objective.
- Unravel without guilt. "Frogging" — pulling out your hook and undoing stitches — is how every skilled crocheter responds to a mistake. A project you unraveled twice and restarted correctly is stronger than one you pushed through with a visible error growing larger by the row.
- Use the yarn calculator before large purchases. Before buying multiple skeins for a blanket or large toy, use the crochet yarn calculator to estimate how many yards you actually need. Running out of a dye lot mid-project is one of the most preventable frustrations in crochet.
- Read the full pattern before starting your first stitch. Scan the entire pattern from start to finish before you pick up your hook. Note any techniques you have not tried, any special stitches, and the finishing instructions. Surprises halfway through a project cause mistakes at exactly the point where your stitch count matters most.
Free crochet tools and charts for beginners
These free resources live permanently on MrsCrochetWorld and are built to answer the questions every new crocheter hits within their first ten projects.
The most common source of early frustration is not the stitches themselves but the surrounding reference information — "What does 'hdc' mean?", "What hook size do I use with this yarn?", "Why is my finished piece the wrong size?" — These tools give you fast, accurate answers without having to search through pattern booklets or buy a reference book.
- Free Tools and Charts Hub The central hub for all free MrsCrochetWorld resources. One bookmark covers crochet abbreviations, US-UK term conversion, hook size charts, blanket size references, hat sizing charts, and more. If you are not sure which tool you need, start here and browse the full list.
- Crochet Gauge Calculator Enter the gauge specified in your pattern and the gauge from your own practice swatch, and the calculator tells you whether your hook size is correct — or exactly how much you need to adjust. Essential for hats, garments, and any project where finished size matters.
- Crochet Yarn Calculator Estimate how many yards or skeins you need for a project based on stitch type, hook size, and finished dimensions. Prevents both running out mid-project and over-buying yarn you will not use.
- Yarn and Hook Guide A comprehensive cross-reference of yarn weights, metric hook sizes, US hook sizes, and UK hook sizes, alongside the fabric qualities each combination produces. Use it to decode any yarn label or pattern specification.
- Skill Level Guide Understand what "beginner," "easy," "intermediate," and "advanced" actually mean in practical crochet terms, with concrete examples of the techniques each level requires. Use it to choose patterns that challenge you without overwhelming you.
- Crochet Glossary Every crochet term, abbreviation, and symbol defined in plain English, with US and UK equivalents listed side by side. Bookmark this page and open it alongside any new pattern you try.
Your beginner learning path — what to do next
Each card below is the right next step depending on where you are in your journey. Work through them in order or jump to whichever gap you want to fill right now.
Master the chain stitch
The foundation of almost every crochet project. Practice until your chains are even and consistent before moving to single crochet rows.
Full chain stitch tutorial
Learn single crochet
The most fundamental stitch. Work a 15-stitch, 12-row swatch before anything else — this single exercise builds the core technique that every other stitch uses.
How to single crochet
Add double crochet
Taller and faster than single crochet, used in most blankets, hats, and granny squares. The natural next skill once single crochet is comfortable.
How to double crochet
Make a magic ring
The starting point for every circular project — amigurumi, coasters, flowers, hats. Takes about ten minutes to learn and unlocks an enormous range of patterns.
How to make a magic ring
Read your first pattern
Decode every US-term abbreviation and repeat notation in plain English — then follow a real beginner pattern from start to finish.
How to read a crochet pattern
Get a free pattern
Put your new skills to work immediately with a free, beginner-level pattern. No purchase or sign-up needed — just download and start making.
Browse free patterns
Frequently asked questions about learning to crochet
How do I start crocheting as a complete beginner?
Gather a 5.0 mm (US H-8) hook and one skein of smooth worsted-weight yarn in a light, solid color. Learn the slip knot, chain stitch, and single crochet in that order — these three techniques are all you need to make your first project. Work through the step-by-step stitch journey on this page in sequence, spending at least fifteen to twenty minutes on each skill before moving on. Our yarn and hook guide helps you identify exactly the right supplies if you are unsure what to buy.
What are the basic crochet stitches a beginner must know?
The essential beginner crochet stitches are the chain stitch (ch), single crochet (sc), half double crochet (hdc), double crochet (dc), and slip stitch (sl st). With these five stitches you can follow the vast majority of beginner and intermediate patterns. The magic ring is also a critical technique for anyone who wants to make circular projects like amigurumi or hats. Start with the single crochet and double crochet tutorials and work in order from there.
What crochet supplies do I need to get started?
You need four things: a 5.0 mm aluminum or ergonomic crochet hook, one skein of smooth worsted-weight (size 4) yarn in a light solid color, a small pair of scissors, and a blunt-tipped tapestry needle for weaving in ends. A stitch marker is worth adding once you start working in the round. That is the complete beginner kit — you do not need a full starter set or multiple hook sizes until you are comfortable with the basics. See the yarn and hook guide for a full size reference.
How long does it take to learn to crochet?
Most people produce a recognizable chain stitch within their first fifteen minutes of practice. The single crochet becomes comfortable within one to two hours of focused work. By the end of a week of daily twenty-to-thirty-minute sessions, most beginners can complete a small flat or circular project. Even, consistent tension — where every stitch looks the same — typically develops over your first two or three finished projects. The learning curve is genuinely gentle compared to most handcrafts.
What is the easiest first crochet project for a complete beginner?
A small no-sew amigurumi or a crocheted dishcloth are the most reliable first projects for beginners. Both use single crochet as the core stitch, finish in two to four hours for a first-timer, and produce something genuinely useful or charming. A simple flat square or rectangle worked in straight rows of single crochet is also excellent because it removes all variables except stitch consistency. Browse our free patterns collection for no-cost options written specifically for beginners.
What is the difference between US and UK crochet terms?
US and UK crochet use the same stitches but give them different names, and the names shift by one stitch up the scale. What the US calls a single crochet (sc), the UK calls a double crochet (dc). What the US calls a double crochet (dc), the UK calls a treble crochet (tr). Always check which term system a pattern uses before starting. All MrsCrochetWorld patterns are written in US terms. The crochet glossary lists both US and UK names for every stitch side by side.
Why does my stitch count keep changing as I crochet?
A changing stitch count almost always means you are accidentally working into the turning chain at the start of a row, or skipping the last stitch at the end of a row. Both are extremely common beginner errors. Place a stitch marker in the first and last stitch of every row and count your stitches at each end before you turn. The count should stay exactly the same from row to row. Once you can hold a consistent count for ten rows in a row, you have solved the problem.
How do I keep my crochet tension even?
Consistent tension comes from a relaxed grip and a consistent yarn feed from your non-dominant hand. Guide the working yarn over one or two fingers rather than pinching it — this creates a natural, adjustable brake. Practice on long chains with no project goal; focus only on making each link the same size as the last. If stitches are too tight, loosen your grip; if too loose, add a finger wrap for more friction. The gauge calculator gives you an objective measurement of whether your tension matches a pattern's specification.
Do I need to check gauge as a beginner?
For simple practice projects like dishcloths, scarves, or small amigurumi, gauge is rarely critical — a minor size difference does not matter. For hats, garments, bags, or any project with a specified finished measurement, checking that your stitches and rows per 4 inches match the pattern's stated gauge determines whether the finished piece comes out the right size. The free gauge calculator makes this check quick and straightforward even if math is not your strength.
Ready to start your crochet journey?
Download a free beginner pattern and put your new skills to work today — no purchase or sign-up required. When you are ready to go further, our beginner pattern collection has dozens of options written at exactly the right level.
Get a free pattern Browse beginner patternsReady for more stitches? Browse the complete Crochet Stitches Library — basics, amigurumi essentials and texture stitches, all step by step.
Ready to try? Beginner-loved patterns
Everything you just learned, put into practice — clear US terms, step-by-step photos, instant download.
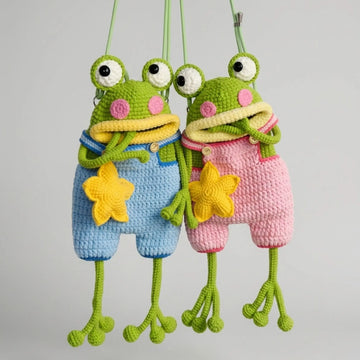
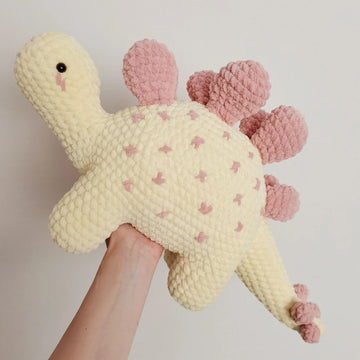

Put your new skills to use
Ready for your next crochet project?
Choose a beginner-friendly pattern with clear US terms, helpful photos and an instant PDF download.
Browse beginner-friendly patternsKeep learning — explore the hub 🧶
Pick your next topic. Every free guide, chart and calculator is one tap away.
From the Crochet Blog 📖
View all articles →
Crochet Turtle Pattern: Easy No-Sew Amigurumi Turtle Guide for Beginners (2026)
Make a squishy no-sew crochet turtle in one afternoon. Full beginner guide: shell shaping, the no-sew join, stuffing, sizing and the four mistakes every beginner hits.
Read full article
How to Crochet a Magic Ring — Step by Step (Never Have a Hole Again)
Amigurumi Basics How to Crochet a Magic Ring — Step by Step (Never Have a Hole Again) The magic ring is the single technique that separates...
Read full article
How to Crochet a Ghost: Easy No-Sew Amigurumi Pattern for Beginners
Make a squishy crochet ghost in about 90 minutes. One piece, no seaming, no safety eyes needed — full written pattern in US terms, face placement...
Read full article
Crochet for Emotional Wellbeing: A Cozy Ritual for Steadier, Softer Days
Crochet Wellness Crochet for Emotional Wellbeing: A Cozy Ritual for Steadier, Softer Days How a simple hook, soft yarn, and a gentle rhythm can become one...
Read full article