No-sew amigurumi techniques — the MrsCrochetWorld method
Discover how to join crochet parts without a single sewing needle — clean joins, invisible seams, and adorable results every time.

You've finished crocheting all the pieces — a chubby little body, two round ears, a tiny snout — and now comes the moment that stops a lot of beginners cold: sewing everything together. But here's the thing: you don't have to sew a single stitch. No-sew amigurumi techniques let you join parts while you're still holding your hook, giving you cleaner joins and way less anxiety.
What "no-sew" actually means in amigurumi
It's not magic — it's a smarter build order.
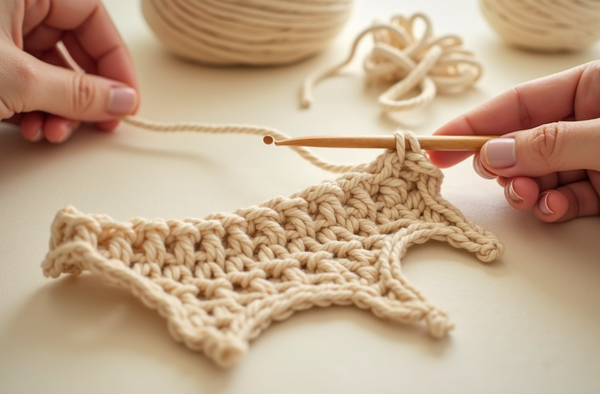
Traditional amigurumi construction finishes every part separately, then uses a yarn needle to whipstitch or mattress-stitch them together. No-sew construction flips that order: you leave the last round of a limb open, hold it against the body, and crochet through both layers at the same time. The hook does what the needle would have done — and the join ends up tighter, more even, and invisible from the outside.
This approach works especially well for classic amigurumi shapes like spheres and cylinders, because those flat open edges line up perfectly for a slip-stitch join. Once you try it on a simple project, you'll wonder why you ever reached for the tapestry needle.
The core no-sew join: slip-stitch attachment
This is the technique at the heart of our 50 no-sew patterns. Here's how it works step by step:
- Finish the limb but don't fasten off. Stop after your final decrease round — the opening should be small enough to match the spot on the body where it'll attach.
- Flatten the opening. Pinch the last row together so the stitches line up in pairs. For legs you'll usually get a tidy oval; for arms a smaller oval.
- Pin or hold in position. Place the flattened limb on the body and use a stitch marker or spare yarn to mark the location.
- Slip-stitch through both layers. Insert your hook through the front stitch of the limb AND the corresponding stitch on the body, yarn over, pull through all loops. Repeat across. This locks the limb directly onto the body with no needle required.
- Fasten off inside the body. Draw the tail to the inside and trim — no weaving-in mess on the outside.
If you're new to working into existing fabric, our guide on how to attach amigurumi parts walks through both sewing and no-sew approaches side by side so you can see the difference visually.
"The moment I stopped reaching for the sewing needle, my amigurumi got neater — and I actually started enjoying the finishing stage."— Ava, MrsCrochetWorld
No-sew patterns to practice these techniques on
Each of these patterns is designed from the ground up using the no-sew method — great for building your skills one step at a time.

50 No-Sew Amigurumi Patterns Bundle
Best sellerFifty designs, zero sewing. This mega bundle covers animals, characters, and seasonal figures — all using the slip-stitch attachment method. Perfect for anyone who wants to build speed and confidence. Check our beginner amigurumi roundup for which ones to start with.

Easy No-Sew Amigurumi Book for Beginners
Book formatIf you prefer a physical book or a beautifully formatted PDF, this is the one to grab. Fifty super simple plushies written in clear US terms with step-by-step photos at every tricky join. Great for older kids learning to crochet too.

Stegosaurus No-Sew Amigurumi Pattern
Beginner friendlyThis little dinosaur is a brilliant way to practice no-sew plate and limb attachments in one project. The spines along the back are crocheted directly into the body ridge — a satisfying challenge that builds your confidence for more complex shapes like those in the amigurumi collection.
Six no-sew techniques every amigurumi crocheter should know
Master these and you'll handle any pattern with confidence.
Slip-stitch join
The most versatile no-sew method. Flatten the limb opening, hold against the body, and slip-stitch through both layers. Works for arms, legs, ears, and tails.
Worked-in attachment
Instead of making a piece separately, you crochet it directly from a stitch on the body — like amigurumi ears that emerge right from the head round.
Strategic stuffing order
Stuff the body about 80% full before attaching the last limb. This keeps the shape firm while giving you room to maneuver the hook for the join. See our tips on how to stuff amigurumi properly.
Join-as-you-go panels
For flat panels like tails or fins, crochet the last row through both the panel edge and the body surface simultaneously. No seam — just a neat integrated edge.
Safety eyes before closing
Insert safety eyes before you pull that magic ring tight or close the head — once the opening is gone, there's no going back. This is the most common no-sew mistake.
Ready to go deeper?
Our complete beginner crochet guide covers magic rings, basic decreases, and everything you need before your first no-sew amigurumi.
Pro tips for clean no-sew joins every time
- Match stitch counts before joining. Count the stitches on the open limb edge and mark the same number on the body attachment zone with stitch markers — mismatched counts create puckering.
- Use the same yarn for joining. Switching to a contrast color for your joining round is fine if it's decorative, but for invisible joins always use the same yarn as the limb.
- Don't overstuff limbs. A firmly but not tightly stuffed arm lies naturally against the body. Over-stuffing causes stiff, splayed limbs that are hard to position before the join.
- Tighten the magic ring all the way. A properly closed magic ring prevents holes at the tip of round parts like paws and snouts — no extra sewing needed to close gaps.
- Work in tight gauge. No-sew joins are cleaner when your overall tension is firm. If you're seeing holes in your amigurumi, try going down one hook size.
- Practice on a swatch first. Before joining a finished limb to a finished body, practice the slip-stitch-through-two-layers technique on two flat swatches — it's much less stressful than committing to the real piece.
Ready to try your first no-sew amigurumi?
Grab one of our free patterns and put these techniques into practice today. No needle required — just your hook, some yarn, and a little patience.
Get a free patternShop amigurumi patternsFrequently asked questions
What is the no-sew amigurumi technique?
No-sew amigurumi means joining crocheted parts together using your crochet hook instead of a sewing needle. The most common method is a slip-stitch join: you flatten the open edge of a limb, hold it against the body, and crochet through both layers at once to lock the pieces together.
Is no-sew amigurumi easier than traditional amigurumi?
Many crocheters find it easier because it removes the awkward needle-sewing step, especially for small pieces. The joins also tend to be more even and invisible than hand-sewn seams, which makes the finished piece look more polished.
Can I use no-sew techniques with any amigurumi pattern?
You can adapt most patterns to use no-sew joins, but it works most naturally when the pattern is specifically written for it. No-sew patterns leave the final round of each limb open so there is a clean edge to join against the body. Patterns written for sewn assembly may need adjustment.
What hook size works best for no-sew amigurumi?
The same hook you would use for the pattern overall. For most worsted-weight amigurumi that is a 3.5 mm to 4.0 mm hook, which creates a tight enough fabric that the no-sew join stays secure. Going one size down from the yarn label recommendation is common for amigurumi in general.
How do I keep a no-sew join from coming apart?
Work your slip-stitch join snugly and fasten off with a firm knot, then draw the tail inside the body. The join is actually reinforced by the stuffing pressing outward, which holds the stitches in tension. If a join ever loosens, a few extra slip stitches at each end of the seam will secure it.
Do I need safety eyes for no-sew amigurumi?
Safety eyes are still the most common choice and they are not sewn — they snap into place through the fabric. The key no-sew rule is to insert them before you close the head, because you cannot push the post through a fully closed opening. You can also embroider eyes if the toy is for a very young child.
Can children learn no-sew amigurumi?
Yes — the no-sew approach is actually great for young learners precisely because it eliminates the fiddly needle-and-thread step. Once a child can crochet a basic sphere and understands the slip-stitch, they have everything they need to assemble their first no-sew plushie.
Where can I find no-sew amigurumi patterns for beginners?
MrsCrochetWorld has a full collection of no-sew amigurumi patterns designed specifically for beginners, including a free giraffe and hedgehog pattern you can download right away. The 50 No-Sew Amigurumi Patterns Bundle is also a popular choice for building a wide range of skills in one purchase.