How to get even crochet tension (hold your yarn and hook right)
Lumpy stitches and wavy edges driving you crazy? Here's exactly how to hold your yarn and hook so every stitch comes out smooth and consistent.

If you've ever finished a row and noticed the stitches look tight in some spots and loose in others, you're not alone. Uneven tension is the single most common frustration for beginners — and the good news is it almost always comes down to two things: how you hold your hook and how you tension your yarn. Fix those two habits and your crochet transforms.
Why tension matters so much
Tension affects the size, drape, and structure of everything you make.
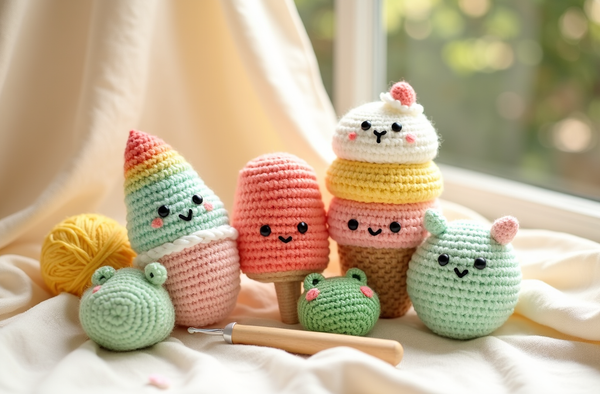
When your tension is uneven, your finished piece may end up the wrong size, curl at the edges, or have visible gaps and tight puckers that no amount of blocking can fully fix. For amigurumi specifically, too-loose tension means the stuffing shows through the stitches — which ruins that clean, plush look. For bags and accessories, uneven tension makes the fabric ripple instead of lying flat.
The pattern's gauge swatch exists precisely because of tension. When a pattern says "14 sc × 16 rows = 4 inches," it's telling you the tension the designer used. If yours is tighter, your piece comes out smaller; if it's looser, it comes out larger. Reading your pattern carefully includes paying attention to that gauge note before you cast on.
The two ways to hold your crochet hook
Neither grip is wrong — pick whichever feels comfortable and stick with it.
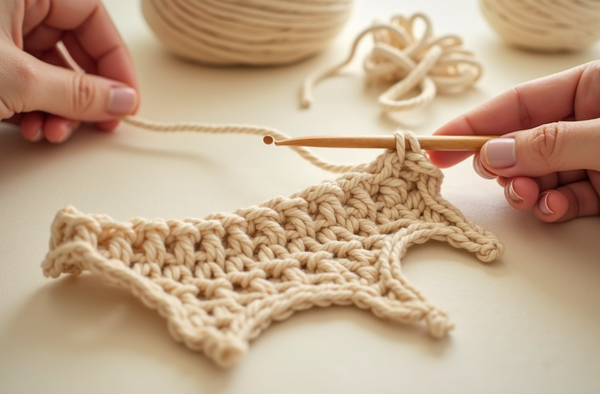
Pencil grip: Hold the hook between your thumb and index finger the same way you'd hold a pencil, with the hook facing slightly downward. This gives you precise control and is popular for fine-weight yarns and detailed stitch work.
Knife grip: Wrap your hand over the hook so it rests in your palm, with your thumb and index finger on the flat grip section. Many crocheters find this grip less tiring for long sessions because it uses larger arm muscles rather than fine finger movements.
The most important thing isn't which grip you choose — it's that you use the same grip every single stitch. Switching between grips mid-row is one of the sneakiest causes of uneven, curling fabric.
How to tension your yarn with your non-dominant hand
Your non-hook hand is doing more work than you might think.
The working yarn needs a small amount of resistance as you pull it through each stitch. Too much resistance and your stitches will be tight and hard to work into on the next row. Too little and they'll be floppy and uneven. Here's a reliable starting method:
- Let the yarn drape over the back of your index finger.
- Weave it under your middle finger and over your ring finger.
- Pinch the base of your current stitch between your thumb and middle finger — this "pinch point" is what controls the tension as the stitch forms.
- Keep moving that pinch point up as you complete each stitch; don't let it drop down to the slipknot.
That last step — keeping the pinch close to the active stitch — is the one most beginners skip. Without it, the yarn has too much slack between your hook and your hand, and the stitches start to vary in size. Learning how to hold your hook and yarn together as one coordinated system is the real skill here.
Common tension problems and quick fixes
Diagnose the issue before you reach for a different hook size.
Stitches too tight / hard to insert the hook: Your yarn hand is gripping too firmly. Consciously relax your index finger and let a little more yarn feed through. You can also try going up half a hook size — for example, from a 4.0 mm to a 4.5 mm — and see if your gauge improves. This is one of the top beginner mistakes and is easy to correct.
Stitches too loose / fabric feels floppy: Try wrapping the yarn an extra time around your index finger for more resistance, or go down half a hook size. Also check whether you're pulling the yarn too far back on the hook shaft before drawing through — keep the loop snug near the throat of the hook.
Tension fine in the middle but tight at row ends: You're probably pulling the last stitch of each row before you turn. Take a breath, make your turning chain calmly, and resist the urge to "tighten up" as you near the end of a row.
For a deeper dive into correcting lopsided fabric, see the guide on why crochet gets wider or narrower.
"Tension isn't about holding the yarn perfectly — it's about holding it the same way every single time."— Ava, MrsCrochetWorld
Patterns that reward good tension
Once your tension clicks into place, these projects show off every even stitch beautifully.

50 No-Sew Amigurumi Bundle
Best for tension practiceAmigurumi worked in the round is the ultimate tension trainer — every stitch is visible and you'll feel the difference immediately when your gauge is consistent. This bundle of 50 no-sew designs gives you dozens of projects to practice on, from tiny animals to chubby plushies. Learn more about no-sew amigurumi techniques before you dive in.

Granny Square Tote Bag
Flat-fabric tension testA granny square lies completely flat only when your tension is even — making it the perfect diagnostic tool. Crochet one square, block it, and measure: you'll know exactly where you stand. This tote bag pattern is also a wonderful first crochet bag project once your squares are consistent. Check the full tutorial on how to crochet a granny square if you need a refresher.

Easy No-Sew Amigurumi for Beginners (Book)
Step-by-step guidanceThis printed book walks you through 50 beginner-friendly plushie patterns with clear photography at every step — including close-ups that let you compare your stitch size to the sample. It's ideal if you learn best by seeing exactly what "correct tension" looks like in a finished stitch. Explore the full crochet books collection for more guided learning resources.
Six habits that keep tension consistent
Build these into your routine and you'll notice the difference within a single session.
Yarn from the center
Pull yarn from the center of the ball, not the outside. Center-pull keeps consistent resistance and stops the ball from rolling and creating slack.
Move the pinch point
Pinch the base of the working stitch between thumb and middle finger and keep moving that pinch up as you go — don't let it slip back toward the tail.
Count your stitches
Counting at the end of every row catches tension drift early. If your stitch count is off, recount before continuing — an extra stitch usually means a loose join that got worked twice.
Take breaks
Hands tire and tighten over long sessions. A five-minute break every 30–40 minutes keeps your grip relaxed and your tension from gradually creeping tighter.
Swatch in the right yarn
Tension varies with fiber and weight. Always choose yarn that matches the pattern weight and swatch in that exact yarn — switching from wool to acrylic changes everything.
Learn the full beginner foundation
Tension is one piece of a bigger picture. The complete beginner guide to crochet walks you through every fundamental skill in one place.
Quick troubleshooting tips
- Do a gauge swatch every time. Even if you've used the same yarn before, different dye lots and ambient temperatures affect tension. A 4-inch swatch takes five minutes and saves the whole project.
- Check your hook size against the yarn label. The yarn band recommends a hook range for a reason. Using a 3.5 mm hook with worsted-weight yarn forces you to grip tighter than necessary. See the crochet hook sizes chart for guidance.
- Don't look away mid-stitch. The moment you glance at your phone while mid-pull, your hands relax or tighten unpredictably. Keep your eyes on the hook until the stitch is complete.
- Block your swatch. Wet blocking reveals the true post-wash tension of your fabric. A swatch that looks fine dry can open up dramatically after washing — or tighten if it's wool. Learn how to block crochet properly for accurate results.
- If you're a tight crocheter, try ergonomic hooks. A hook with a soft grip handle reduces the urge to white-knuckle it. It won't fix technique, but it removes fatigue that causes tension to creep.
Ready to put perfect tension to work?
Now that you know how to keep your stitches consistent, grab a pattern and practice. A small, quick project is the best teacher — grab a free pattern to try it today, or browse our beginner collection for something you'll love making.
Get a free pattern Shop beginner patternsFrequently asked questions
Why is my crochet tension so tight?
Tight tension usually means your yarn hand is gripping too hard, or you're wrapping the yarn too many times around your fingers. Try relaxing your index finger deliberately and letting a little more yarn feed through freely. Going up half a hook size can also help — for example, switching from a 4.0 mm to a 4.5 mm hook gives each stitch a bit more room to form without requiring you to loosen your grip.
How do I know if my tension matches the pattern gauge?
Crochet a gauge swatch using the same hook and yarn the pattern specifies. Work at least a 6-inch square, block it the same way you plan to block the finished piece, then measure the center 4 inches. Count the stitches and rows in that 4-inch area and compare to the gauge listed in the pattern. If you have more stitches than stated, your tension is tight; if you have fewer, it's loose. Adjust your hook size until the numbers match.
Does it matter which way I hold my crochet hook?
No — both the pencil grip and the knife grip are perfectly valid. What matters is consistency. Switching between the two mid-project changes the angle at which the hook enters each stitch, which creates slight variations in stitch size. Pick the grip that feels most comfortable and use it exclusively until it becomes automatic.
Why is my tension fine at the start of a row but tight at the end?
Many crocheters unconsciously tighten up as they approach the last few stitches of a row, especially when they're counting down and concentrating harder. Take a deliberate breath before the final three or four stitches, relax your yarn hand, and remind yourself the turning chain is just another stitch. Practicing this mindfully for a few rows usually breaks the habit.
Can I fix uneven tension after I've finished crocheting?
Blocking helps significantly. Wet blocking especially can even out minor variation in stitch size by relaxing the fibers. Lay the piece flat, pin it to the correct dimensions, and allow it to dry completely. For severe unevenness, however, blocking won't fully rescue the fabric — it's better to frog the problem section and rework it with corrected technique.
Does yarn type affect tension?
Absolutely. Smooth, tightly spun acrylic yarn tends to slide easily, which can make your tension looser than usual. Wool has more grab and can make stitches feel tighter. Cotton is inelastic and shows every tension irregularity clearly. When you switch yarn types, even within the same weight category, always swatch again to check whether your tension has shifted before starting the main project.
How long does it take to develop even tension?
Most beginners notice a real improvement within two to four hours of focused practice once they're using the correct yarn-holding technique. Full consistency usually comes after completing two or three small projects from start to finish. The key is repetition with awareness — if you practice incorrect habits for hours, the improvement won't come. Short, focused sessions where you pay attention to each stitch are more effective than long, distracted ones.
Should I use a tension ring or yarn guide for more consistent results?
A tension ring or yarn guide slips onto your finger and keeps the working yarn at a fixed angle, which many crocheters find helpful when they're learning. It's a useful training tool, but it's not a substitute for building good yarn-hand habits. Start with the hand-wrapping method described above, and add a ring if you still find your tension wandering after several practice sessions. Over time, most crocheters find they no longer need the ring as muscle memory takes over.