Beginner Crochet Guide: Stitches, Tools & Your First Project in 7 Days
Everything you need to pick up a hook, learn the essential stitches, and finish your very first crochet project — one day at a time.

Crochet can feel a little overwhelming when you are just starting out — there are hooks, yarns, abbreviations, and more stitches than you can count. The good news? You only need three basic stitches and one inexpensive hook to make something genuinely beautiful. This seven-day plan breaks everything down into small, manageable wins so that by the end of the week you will have finished a real project and built the confidence to tackle anything in our shop.
What You Need Before Day 1
A short shopping list that won't break the bank.
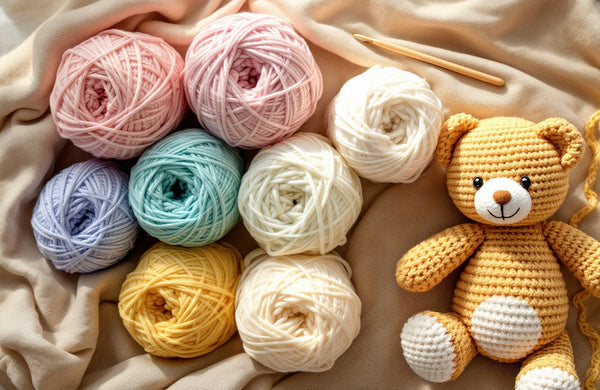
You do not need a big starter kit. Grab a size H-8 (5 mm) crochet hook — it is the friendliest size for beginners — and one skein of smooth worsted-weight (category 4) yarn in a light, solid color so you can see every stitch clearly. Avoid fluffy or textured yarn for now; it hides your work and makes counting hard. A pair of scissors and a blunt tapestry needle round out everything you need. Check out our full guide to the best crochet hooks for beginners if you want to compare materials before buying.
How to Hold Your Hook
There are two classic grips: the pencil hold (hook resting between thumb and index finger like a pencil) and the knife hold (hand wrapped around the hook from above). Neither is wrong — choose whichever feels less tense after five minutes of practice. Tension in your shoulders or wrist is the biggest beginner hurdle, so shake out your hands often and take breaks. Read our deeper breakdown in how to hold a crochet hook.
The 7-Day Learning Plan
One small skill per day, one finished project at the end.
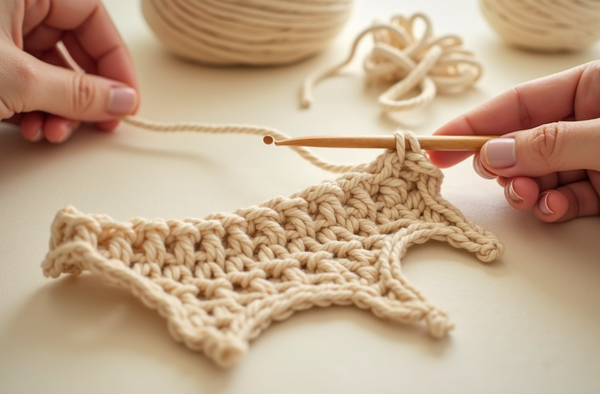
Day 1 — Slip Knot & Chain Stitch. Make a slip knot, attach it to your hook, and practice chaining until you can produce a neat, even chain of 20 stitches without looking. See the full tutorial at how to make a slip knot and how to chain stitch.
Day 2 — Single Crochet. Chain 11 and work single crochet (sc) back and forth for 10 rows. This creates a small swatch — your very first fabric. Focus on keeping the same number of stitches in each row. Visit how to single crochet for a photo walkthrough.
Day 3 — Counting & Tension. Unravel your swatch and redo it, this time counting stitches out loud at the end of each row. Consistent tension is the secret to professional-looking crochet. Our article on how to get even crochet tension covers every common tension mistake.
Day 4 — Double Crochet. Chain 13 and practice double crochet (dc) for 8 rows. The double crochet is taller and faster — it will become your go-to stitch for bags, blankets, and garments. See how to double crochet.
Day 5 — Reading a Pattern. Open a free beginner pattern and read through it completely before picking up your hook. Learn what ch, sc, dc, st, rep, and sl st mean. Our crochet abbreviations glossary and how to read a crochet pattern will answer nearly every question.
Day 6 — Start Your Project. Choose a simple dishcloth or small coaster pattern that uses only chains and single or double crochet. Cast on and complete at least half of it today while the skills are fresh.
Day 7 — Finish & Weave Ends. Complete your project, fasten off, and weave in the yarn tails with your tapestry needle. Read how to weave in ends so they stay hidden wash after wash. Hold it up and be proud — you are a crocheter.
"The first chain stitch you ever make is the most important one — every beautiful project starts there."— Ava, MrsCrochetWorld
Beginner-Friendly Patterns to Try After Day 7
Once you have the basics down, these patterns will take you from first stitches to adorable finished pieces.

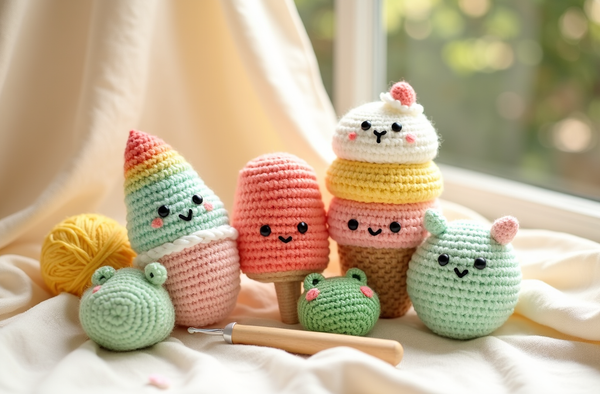
Free No-Sew Giraffe Pattern
Free DownloadA perfect first amigurumi — the no-sew construction means no assembly headaches, so you focus entirely on your stitches. Once you are comfortable with single crochet in the round, this is your ideal next step. Learn more in our no-sew amigurumi techniques guide.

Free No-Sew Hedgehog Pattern
Free DownloadAnother great confidence-builder — the rounded shape teaches you how to crochet in the round and how to work increases and decreases, skills you will use in every amigurumi you ever make.

50 No-Sew Amigurumi Bundle
Best SellerWhen you are ready to go further, this bundle gives you 50 no-sew patterns in one download — animals, characters, and seasonal designs — all written in clear US terms at a beginner-friendly pace. Browse our full amigurumi crochet patterns collection for even more ideas.
6 Things Every New Crocheter Should Know
Keep these tips in mind and you will avoid the most common beginner frustrations.
Choose the Right Yarn
Smooth, light-colored worsted yarn lets you see every stitch clearly. Check our guide on the best yarn for beginners before you shop.
Always Check Hook Size
The hook size printed on your yarn label is a starting suggestion, not a rule. Make a small swatch and see how the fabric feels before committing to a full project.
Count Every Row
Most beginner mistakes happen when stitch counts drift. Count out loud or use a stitch marker at the start of each row until counting becomes automatic.
Mistakes Are Easy to Fix
Crochet unravels cleanly — just pull the yarn and your stitches disappear. Embrace the undo button and read how to fix crochet mistakes for the trickier scenarios.
Weave Ends as You Go
Do not save all your yarn tails until the end. Weave in every tail as soon as you finish a color or fasten off — it keeps your work tidy and less overwhelming.
Ready for More?
Once you finish your first project, visit our complete beginner guide to crochet to discover what to learn next and browse our easy beginner patterns.
Quick-Start Tips for Your First Week
- Practice chains daily. Even five minutes of chaining before you start a new session warms up your hands and builds muscle memory for consistent tension.
- Work in good light. Stitches that are hard to see are hard to count. Natural daylight or a daylight bulb makes a real difference, especially with darker yarns.
- Don't crochet too tightly. A tight grip is the number one reason beginners struggle to insert the hook. Relax your yarn hand — the fabric should flow, not fight you.
- Use stitch markers freely. A safety pin or a commercial stitch marker slipped into the first stitch of a round tells you exactly where each row starts and ends.
- Watch a video alongside the pattern. Reading and watching at the same time locks in new techniques much faster than either method alone.
- Finish one project before starting another. "Project ADD" (starting multiple things at once) is real — a single completed dishcloth or coaster will teach you more than three half-finished ones.
Grab a Free Pattern and Start Today
The best day to start crocheting is today. Download one of our free patterns, pick up your hook, and work through Day 1 right now. Every expert you admire was once exactly where you are.
Get a free pattern Shop beginner patternsFrequently asked questions
What crochet hook size should a complete beginner use?
A size H-8 (5 mm) crochet hook paired with worsted-weight (category 4) yarn is the most beginner-friendly combination. The hook is large enough to work with comfortably but small enough to produce neat, even stitches. Once you are comfortable with the basics you can experiment with other hook sizes.
How long does it take to learn the basic crochet stitches?
Most beginners can form a recognizable chain stitch in their very first session and feel comfortable with the single crochet after two or three hours of focused practice spread over a couple of days. The double crochet usually clicks within the first week. Consistent short practice sessions are more effective than one long marathon.
What are the three most important stitches for a beginner to learn first?
The chain stitch, single crochet, and slip stitch cover the majority of beginner patterns. The chain forms your foundation, single crochet builds the fabric, and the slip stitch joins rounds and creates neat edges. Once those three feel natural, add the double crochet and you will be able to tackle a huge range of projects.
What yarn should a beginner use for their first crochet project?
Choose a smooth, light-colored, worsted-weight (category 4) yarn in an acrylic or acrylic-blend fiber. It is machine washable, widely available, affordable, and forgiving. Avoid fuzzy, textured, or dark yarn while you are still learning — they make it very difficult to see individual stitches and count accurately.
Why does my crochet fabric keep getting wider or narrower?
The most common cause is accidentally adding or skipping stitches at the beginning or end of rows. This usually happens when the turning chain is mistakenly counted as the first stitch (or not counted when it should be). Count your stitches at the end of every row until you build consistent habits. Our article on why crochet gets wider or narrower explains every scenario in detail.
Is crochet hard to learn as a complete beginner?
Crochet has a short learning curve compared to many other crafts. The basic stitches are repetitive, which means your hands learn the movements quickly. Most people can make a recognizable piece of fabric within their first hour. The challenge is patience in the early stages — once the movements feel natural everything speeds up considerably.
How do I know what crochet abbreviations mean?
US crochet patterns use standard abbreviations such as ch (chain), sc (single crochet), dc (double crochet), sl st (slip stitch), and st (stitch). Bookmark our crochet abbreviations glossary — it covers every abbreviation you will encounter as a beginner and intermediate crocheter.
What is the easiest first crochet project for an absolute beginner?
A simple rectangular dishcloth or a set of small coasters made entirely in single crochet is the ideal first project. They are small enough to finish quickly, use only one stitch, and produce something genuinely useful. Once you have one under your belt, no-sew amigurumi free patterns are a wonderfully rewarding next step.