How to weave in ends in crochet (so they stay hidden)
Say goodbye to poking tails and unraveling seams — learn the exact weaving technique that keeps your finished crochet looking polished for years to come.

You've just finished your last stitch, and the project looks amazing — until you spot those floppy yarn tails dangling everywhere. Weaving in ends is one of those tasks that feels tedious, but done correctly it's the difference between a project that holds together beautifully and one that unravels after the first wash.
What you need before you start
A few simple tools make weaving in ends much faster and more secure.
All you need is a tapestry needle (also called a yarn needle or darning needle) with a blunt tip and a large eye. A needle with a bent tip is especially handy — it lets you scoop under stitches without flipping your work. For very fine cotton yarn, use a thinner steel tapestry needle so you don't split the plies. Keep a small pair of sharp scissors nearby to snip the tails close to the fabric once you're done.
The classic zigzag method, step by step
This is the most reliable technique for almost every yarn weight and project type.
Start by threading your tail onto the tapestry needle. Working on the wrong side of your fabric, insert the needle under the back bars of four to five stitches going diagonally in one direction — say, upper-left to lower-right. Pull the yarn through gently, keeping tension even. Now turn your needle and weave back in the opposite diagonal direction through a different set of stitches, crossing the first path. This creates a subtle X pattern that locks the yarn from two directions. Finally, give the tail a light tug, snip it close to the work, and the short remaining end disappears into the fabric.
For amigurumi and no-sew plushies — like the projects in our no-sew amigurumi guide — weave the tail inside the stuffed piece so it is completely invisible. Pass the needle through the body, squeeze the toy lightly, snip the tail, and let it retract inside.
Weaving in ends for stripes and color changes
Color-change tails are the trickiest because you have two ends per join. The cleanest approach is to carry each tail along the edge as you weave. Thread the old color tail and work it over three stitches going right, then back under those same stitches going left — this effectively buries it inside the crocheted loops. Repeat with the new color tail going in the opposite direction. When done neatly, no color ghost shows through on the right side.
If you are working on a project where the wrong side will be visible (like a scarf or a granny square flat piece), take extra care to weave along only the very back bump of each stitch so nothing peeks through to the front.
"A beautifully woven-in end is invisible proof that you care about your craft." — Ava, MrsCrochetWorld
Projects where weaving in ends really matters
These patterns have lots of color joins or sewn parts — master the technique on them and you'll be set for anything.

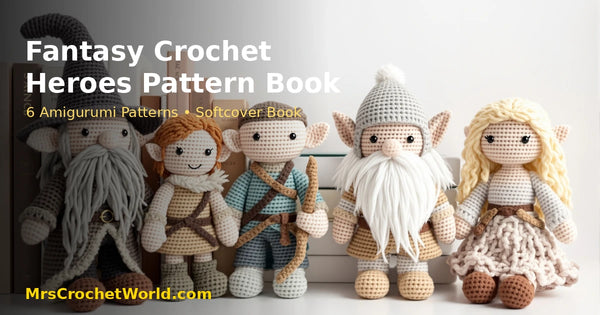
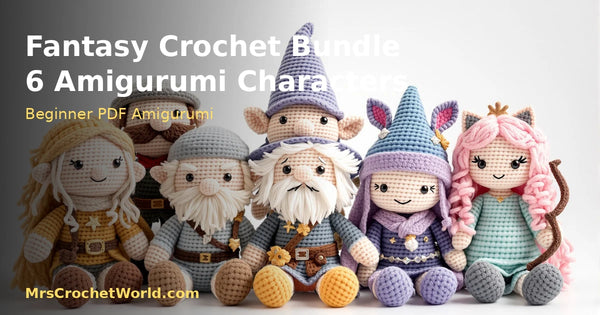
Care Bears Amigurumi Bundle
4 patterns · multi-colorEach bear uses multiple yarn colors for the tummy symbol and body, giving you plenty of practice at color-change tails. Once you know how to change yarn colors cleanly, the finishing goes very fast. Explore the full amigurumi collection for more multi-color plushies.

50 No-Sew Amigurumi Bundle
50 patterns · beginner-friendlyBecause these designs avoid seaming, weaving in the starting and ending tails inside the stuffed body is the primary finishing step. It's a brilliant bundle to build your no-sew skills while practicing neat tail work. See all mega bundles for great value pattern sets.

9 Modern Crochet Bag Bundle
9 patterns · granny squaresGranny square bags have a tail at the start and end of every motif, so good weaving technique is essential before joining squares together. Read our granny square tutorial alongside this bundle for a complete finishing workflow. Browse the whole bags and accessories collection for more ideas.
Six ways to make the job easier
Smart habits that save time and keep your work secure.
Leave longer tails
Always leave at least 6 inches (15 cm) when starting or ending yarn. Longer tails are far easier to thread and weave without the needle slipping off.
Always weave in two directions
A single straight line of weaving can pull loose over time. The crossing X pattern doubles the friction so the tail stays put through washing and handling.
Snip close but not flush
Leave about 2–3 mm of tail after snipping. Cutting right at the surface can cause the end to work its way out. A tiny stub disappears into the fabric naturally.
Match needle size to yarn
A needle that's too thick splits the plies and creates visible bumps. A needle that's too thin is hard to thread. Test on a yarn scrap before starting your project.
Block before weaving (for some projects)
For flat items like granny squares or shawls, blocking first opens up the stitches and makes it much easier to slide the needle cleanly under the back loops.
Learn the full finishing toolkit
Weaving in ends is just one finishing skill. Discover seaming, blocking, and more in our complete beginner guide to crochet — all the techniques in one place.
Avoid these common weaving-in mistakes
- Knotting before weaving — knots add bulk and can work loose over time. Trust the zigzag weave alone to hold the tail securely.
- Weaving on the right side — always work on the wrong side (or inside a stuffed piece) so the tail path stays completely hidden.
- Weaving in a straight line — a single direction of weaving has much less grip than the crossing zigzag technique described above.
- Rushing amigurumi tails — for stuffed toys, push the tail needle all the way through the body, gently squeeze the stuffing, snip, and release so the end retracts. Skipping any of these steps risks a visible nub.
- Using the wrong needle — a sharp sewing needle splits yarn and makes the weaving look messy. Always use a blunt tapestry needle for crochet finishing.
- Cutting too short on superwash wool — superwash-treated yarns are slippery. Leave a slightly longer tail (3–4 mm after snipping) and weave through extra stitches for more security.
Ready to put your skills into practice?
The best way to get confident at weaving in ends is to finish a real project. Grab one of our beginner-friendly patterns — many include photo guides for every finishing step — and give it a try today.
Get a free pattern Shop beginner patternsFrequently asked questions
How many stitches should I weave through to secure a yarn end?
Aim for at least four to five stitches in each direction. Weaving through fewer stitches reduces friction and the tail can work loose with use or washing. For slippery yarn like superwash wool or silk blends, go through six or seven stitches per direction for extra security.
Can I just tie a knot instead of weaving in the ends?
It is better to avoid knots. Knots add bulk that can show through to the right side of your work, and they can also work loose over time, especially with stretchy or slippery yarns. The zigzag weave method holds yarn just as securely without any of those drawbacks.
What is the best needle to use for weaving in crochet ends?
A blunt-tipped tapestry needle (also called a yarn needle or darning needle) is ideal. Blunt tips glide under stitch loops without splitting the yarn plies. For bulky yarn use a larger plastic needle; for fine cotton or lace weight use a thinner steel tapestry needle. A bent-tip needle is especially convenient because it scoops under stitches easily.
How do I weave in ends in amigurumi so they don't show?
Thread the tail onto a tapestry needle and pass it through the stuffed body to exit on the opposite side. Gently squeeze the toy to create a little slack, snip the tail close to the exit point, then release. The end retracts into the stuffing and becomes invisible. Never pull the tail tight before snipping or it will leave a dimple on the surface.
How should I handle ends when changing yarn colors?
Leave a tail of at least 6 inches on both the old and new color when you make the join. After finishing your project, thread each tail separately and weave it diagonally through stitches of the matching color on the wrong side, crossing back in the opposite direction. Weaving each color into its own matching yarn area prevents color ghosting on the right side.
Do I need to weave in ends before or after blocking?
For flat projects like granny squares, shawls, or dishcloths, blocking first is helpful because the wet fibers open up and make it easier to slide the needle cleanly under back loops. For amigurumi or structured bags that are not blocked, weave in ends after the piece is otherwise complete but before adding any final assembly steps like seaming panels together.
What if my yarn end is too short to thread onto a needle?
If the tail is less than 3 inches, a latch-hook or crochet hook can help. Insert a small crochet hook under several stitches on the wrong side, catch the yarn tail with the hook, and pull it through to the other side. Repeat in the opposite direction. Alternatively, use a self-threading needle that has a flexible eye that opens when you press on the shaft.
Will woven-in ends survive machine washing?
Yes, if woven correctly with the zigzag X method through at least four to five stitches per direction. Place finished crochet items in a mesh laundry bag and use a gentle cold-water cycle to reduce agitation. Superwash yarns are slippery, so weave through extra stitches and leave a slightly longer snipped tail for those. Always check the yarn label care instructions before machine washing any finished piece.