How to increase and decrease in amigurumi crochet
Master the two moves that give every amigurumi its shape — from round heads to tapered tails — and never lose count again.
If you have ever stared at the words "inc" and "dec" in an amigurumi pattern and felt a small wave of panic, you are in good company. These two techniques are the engine behind every plump amigurumi belly, every pointy ear, and every perfectly round head. Once you understand what they actually do — add a stitch or remove a stitch — the shapes that seem like magic start to make complete sense.
What an increase actually does
One stitch in, two stitches out
An increase is simply two single crochets worked into the same stitch. In most amigurumi patterns you will see it written as "inc" or "2 sc in next st." When you place two stitches where one used to be, your stitch count grows by one per increase. Working a round where you increase in every stitch doubles your count — which is exactly how a flat magic ring grows into a circle, and how that circle eventually curves into a sphere.
The process is straightforward: insert your hook into the next stitch, yarn over, pull up a loop, yarn over, pull through both loops (that is your first sc). Without moving to the next stitch, insert your hook into the same stitch again and work a second sc. You have just increased.
Increases almost never cause problems because they are additive — you are always working into a stitch you can see. If you are struggling to count your stitches and rows after a round of increases, a stitch marker in the first stitch of each round is your best friend.
What a decrease actually does — and why "invisible" matters
One stitch fewer, with no visible gap
A standard single-crochet decrease (sc2tog) pulls through both loops of two consecutive stitches to merge them into one. It works, but it leaves a small horizontal bar on the fabric that shows through even when stuffed. The invisible decrease — also called the slip-stitch decrease — is the go-to method for amigurumi because it hides almost completely on the right side.
Here is how to work it: insert your hook through the front loop only of the next stitch, then through the front loop only of the stitch after that. You now have three loops on your hook. Yarn over and pull through the first two loops (the two front loops), then yarn over again and pull through the remaining two loops. Done — two stitches have become one, with almost no visible bump on the outside.
You will find invisible decreases written as "dec," "invdec," or "sc2tog (FLO)" depending on the pattern designer. If a pattern just says "dec," it is nearly always expecting the invisible method for amigurumi work. If you are curious about how this interacts with no-sew shaping techniques, the same principle applies — fewer seams means your shaping needs to be even more precise.
Reading the stitch counts in a pattern
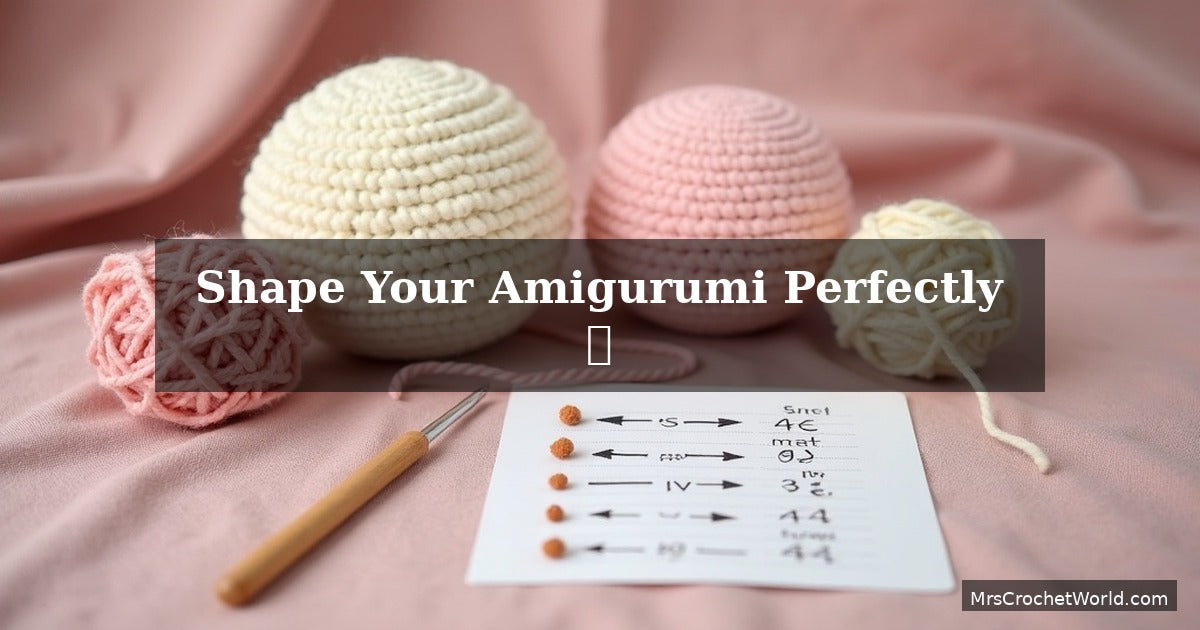
Most amigurumi patterns list the running stitch count at the end of each round in parentheses, for example: Round 5: inc in each st around. (12) That "(12)" tells you exactly how many stitches you should have when the round is finished. If your count does not match, something happened in that round — not several rounds later. Stop, recount, and fix it before continuing.
A typical sphere starts with a magic ring, grows through several increase rounds, works a few even rounds, then closes with matching decrease rounds. For a 6-stitch start the sequence often looks like this:
- R1: 6 sc in magic ring (6)
- R2: inc in each st (12)
- R3: [sc, inc] × 6 (18)
- R4: [2 sc, inc] × 6 (24)
- R5–9: sc in each st (24)
- R10: [2 sc, dec] × 6 (18)
- R11: [sc, dec] × 6 (12)
- R12: dec × 6 (6)
Notice the decrease rounds are the mirror image of the increase rounds. This symmetry is what makes the shape close so neatly. If you want to understand the underlying technique of crocheting in the round, that foundation article covers spirals vs. joined rounds in detail.
Common shaping mistakes and how to fix them
Why your amigurumi looks lumpy — and how to smooth it out
The most common mistake beginners make is inserting the hook through both loops for a decrease instead of the front loops only. The result is a ridge on the outside of the piece. If you notice this after a few rounds, it is worth unraveling back and fixing it — the ridges become very visible once the piece is stuffed and the fabric is stretched tight.
Another frequent problem is accidentally skipping the increase. When you work two sc into one stitch, the first sc sits in the stitch and the second tends to slide toward the gap between stitches. If you are not watching closely, that second sc can slip into the next stitch instead. Use your thumb to hold both stitches in place after the first sc before inserting for the second.
Tension also matters enormously in decreases. If your yarn is pulled too tightly, the front loops of the target stitches will be hard to access. Slightly looser tension helps keep the fabric pliable. This is also worth keeping in mind if you are working on getting even tension overall — amigurumi benefits from slightly tighter tension than, say, a blanket, but not so tight you cannot get your hook through.
Shaping beyond spheres: tapered limbs and flat pieces
Once you are confident with increases and decreases in a round piece, the same logic applies to shaped limbs. A tapered arm might increase for a few rounds, stay even, then decrease to a tip. An ear might start with a small number of stitches, increase outward, and never close — leaving an open flat disc.
Flat amigurumi pieces (like a flower or a leaf) use increases along certain edges and not others to create asymmetry. If you have tried the guide on crocheting amigurumi ears, you have already worked with partial shaping — one side increases while the other stays even, resulting in a curved rather than circular edge.
Body shaping for characters follows the same principle at a larger scale. A pear-shaped body might increase rapidly through the lower rounds, plateau, then begin decreasing around the middle to create a waist. The animal body construction guide shows exactly how these sequences translate into recognizable animal forms.
"Every increase is a promise — you are telling your amigurumi it is going to grow. Every decrease is a hug — you are gently closing it in. Together, they make the magic."— Ava, MrsCrochetWorld
Patterns that put your shaping skills to work
Each of these projects is a fantastic practice run for increases and decreases — from simple spheres to complex multi-piece characters.

50 No-Sew Amigurumi Patterns Bundle
Best for beginnersFifty projects, zero sewing — which means your increases and decreases are doing all the structural work. Perfect for practicing consistent shaping across a huge variety of animals and characters. Each pattern lists round-by-round stitch counts so you can double-check your work as you go. Pair with the full bundle guide for tips on which projects to tackle first.

Dinosaur Amigurumi Bundle (4-in-1)
Intermediate shaping challengeDinosaurs are a wonderful next step because they have tapered tails, rounded bodies, and small protruding limbs — each requiring a slightly different increase/decrease rhythm. Working through all four designs in the bundle will give you exposure to multiple shaping sequences in one download. Check the beginner amigurumi roundup to see where dino patterns fit on the skill ladder.

Care Bears Amigurumi Pattern (4-Pack)
Classic bear constructionBears are the gold-standard exercise for shaping: their heads are near-perfect spheres, their bodies are gentle ovals, and their small ears demand precise flat shaping. Four characters in one pattern means four opportunities to refine your technique. Once you can shape a bear consistently, you can shape almost anything. Read up on attaching amigurumi parts so your finished pieces look as polished as they feel.
Six things every amigurumi shaper should know
Keep these principles close while you crochet and your pieces will come out right every time.
Always use a stitch marker
Place a locking marker in the first stitch of every round. When you reach it again you know one round is complete — critical for accurate stitch counts around increases and decreases.
Count after every round
Do not wait until the end of the head to discover you have the wrong count. A quick count after each round catches errors while they are still easy to fix. Check your count against the number in the pattern's parentheses.
Mirror your decreases to your increases
If your increase rounds go 6 → 12 → 18 → 24, your decrease rounds should go 24 → 18 → 12 → 6 in the same pattern. Symmetric shaping closes neatly and gives a pleasing round form.
Front loops only for invisible dec
This is the single biggest quality upgrade for clean amigurumi. Inserting through front loops only hides the decrease on the inside of the fabric rather than leaving a ridge on the outside surface.
Stuffing affects your shaping
Amigurumi stuffing pushes the fabric outward and makes any uneven shaping more visible. Stuff as you go — filling the piece every few rounds rather than all at once — to keep a consistent shape.
Ready for a full step-by-step start?
Visit the complete beginner guide to crochet for a structured path from your very first slip knot all the way to your first finished amigurumi.
Quick tips for cleaner increases and decreases
- Mark the second sc of every increase. After you work both sc into one stitch, place a small split-ring marker on the second stitch. This helps you confirm your increases are in the right place when you count at the end of the round.
- Use ergonomic hooks for tight decreases. If you struggle to insert your hook through two front loops at once, an inline hook with a narrow throat slides through more easily than a tapered one. Pair this with a good hook for beginners overview to find the right fit.
- Work decreases at a slightly looser tension. Tighten after pulling through the loops, not before. This keeps the front loops accessible and prevents the finished decrease from puckering the fabric inward.
- Do a test swatch for new yarn. Different yarns behave differently under tension. Cotton grips the hook, acrylic slides. A small swatch of 12 stitches with a few inc and dec will tell you if your gauge is on target before you commit to a full project. See the cotton vs acrylic yarn guide for more on how fiber affects shaping.
- Close the last round cleanly. After your final dec round leaves 6 stitches, cut the yarn leaving a long tail, thread it through a tapestry needle, and pass it through the front loop of each remaining stitch before pulling tight. This is tidier than a slip stitch close and leaves no visible hole.
- Safety eyes go in before the last decrease rounds. Place your safety eyes while you can still reach inside the piece comfortably — usually after the even rounds and before you start closing with decreases.
Ready to put your shaping skills to the test?
Grab a free pattern and try your first round of increases today, or browse our beginner-friendly amigurumi patterns designed with clear stitch counts and step-by-step shaping guides.
Get a free pattern Shop amigurumi patternsFrequently asked questions
What is the difference between an increase and a decrease in amigurumi?
An increase (inc) adds one stitch by working two single crochets into the same stitch, making your piece wider or rounder. A decrease (dec) removes one stitch by merging two stitches into one, making your piece narrower or closing a shape. Together they are how every amigurumi gets its three-dimensional form.
How do I do the invisible decrease in amigurumi?
Insert your hook through the front loop only of the next stitch, then through the front loop only of the stitch after it. You will have three loops on your hook. Yarn over and pull through the first two loops, then yarn over again and pull through the remaining two loops. This method hides the decrease on the inside of the fabric so the outside looks smooth.
Why does my amigurumi look uneven after decreasing?
The most common cause is inserting through both loops of a stitch rather than the front loop only, which creates a visible horizontal bar. Another cause is uneven tension — if some decreases are tighter than others the fabric will pucker in spots. Try slowing down and making sure each decrease is worked at the same tension before pulling snug.
When should I increase vs when should I keep stitches even?
Increase rounds make a flat circle grow outward. Even rounds (no increases or decreases) let the piece grow in height without expanding the circumference, which is what turns a flat disc into a three-dimensional sphere or cylinder. Most amigurumi heads follow a pattern of increase rounds to reach the widest point, then even rounds to build height, then decrease rounds to close.
How do I keep track of increases and decreases without losing count?
Use a stitch marker in the first stitch of every round and count your stitches at the end of each round. Compare your count to the number shown in parentheses in the pattern. If they do not match, go back and recount that round rather than continuing, because errors compound quickly over the next several rounds.
Can I substitute sc2tog for the invisible decrease?
Yes, sc2tog (the standard single crochet decrease) works structurally but leaves a small ridge on the outside of the fabric. For most amigurumi this is noticeable once the piece is stuffed and the fabric stretches. If you are making a piece that will not be stretched tightly or if you are using fuzzy yarn that hides texture, sc2tog can work fine. For smooth cotton or acrylic yarn, the invisible decrease gives a cleaner result.
How many increases do I need to make a perfectly round head?
A standard amigurumi sphere starts with 6 stitches in a magic ring and increases by 6 stitches per round until it reaches the widest point — usually 24 or 30 stitches depending on the finished size you want. The key is that each increase round adds exactly one stitch per existing stitch in the previous increase round, keeping the increases evenly spaced around the circle.
Do increases and decreases work the same way in no-sew amigurumi patterns?
Yes, the technique itself is identical. In no-sew amigurumi the shaping just has to do more of the structural work because parts are crocheted directly onto the body rather than assembled. This means the placement of your increase and decrease rounds must be especially precise so that the limbs emerge at exactly the right position and angle. Practicing your shaping on standalone pieces first is a great way to build confidence before tackling no-sew construction.