Why does my amigurumi have holes or gaps?
Gaps and holes in your crochet plushies are one of the most common beginner frustrations — and every single cause has a simple fix.

You finish stuffing your first amigurumi, hold it up with a proud smile — and notice light peeking through the stitches. Filling poking out between gaps. That sinking feeling is temporary, because the good news is this: amigurumi holes are almost always caused by one of just four fixable things.
The most common cause: your hook is too big for your yarn
Hook size is the number one culprit behind holey amigurumi — and it is the easiest to fix.
Amigurumi is worked at a much tighter gauge than regular crochet projects. Where a pattern might call for a 4 mm hook to match yarn weight, amigurumi makers typically go one or two sizes smaller — often a 2.5 mm or 3 mm hook with worsted weight yarn. That tighter fabric closes the gaps between stitches so the stuffing cannot show through.
If you are using the hook size listed on your yarn label and noticing gaps, simply switch down. Try a 2.5 mm hook for sport and DK yarn, or a 3–3.5 mm hook for worsted. Work a small swatch in the round and hold it up to the light. If you cannot see through it, you are good to go. You can also check our crochet hook sizes chart for a quick reference on hook-to-yarn pairings.
Loose tension: the invisible culprit
Even with the right hook size, tension that is too loose will leave gaps. Tension is simply how tightly or loosely you pull the yarn as you work. It varies from crocheter to crocheter — and it can even vary from day to day for the same person depending on mood, fatigue, or how you are holding the hook.
The fix is to practice getting even crochet tension by paying attention to how much yarn you draw through each stitch. Try to keep your yarn hand (the one feeding the yarn) consistently firm. If you know you crochet loosely, go down another hook size. Your stitches should feel snug when you try to pull them apart — if they give easily, tighten up.
Inserting your hook in the wrong place
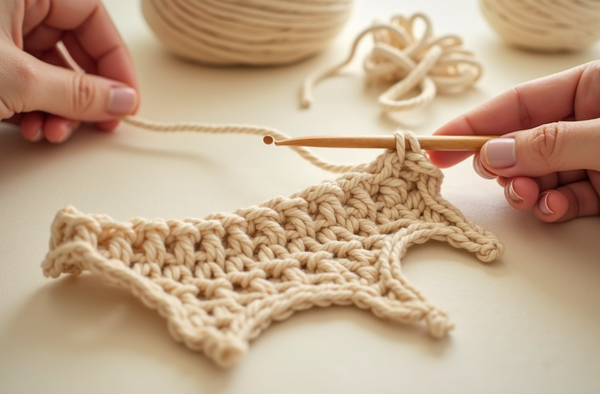
In amigurumi worked in the round, you almost always insert your hook under both loops of the stitch unless the pattern specifically says otherwise. A common mistake is accidentally working into only the front loop or only the back loop, which creates a gap on the opposite side of the fabric and also distorts the shape of your piece.
Before you insert your hook, take a moment to find both the V-shaped loops sitting on top of the stitch. Push your hook under both of them. This small habit keeps the fabric dense and even. If you want to learn more about the anatomy of a stitch, our how to single crochet guide covers exactly this.
Missed increases and decreases
Amigurumi shapes are created entirely through invisible increases (working two stitches into one) and invisible decreases (working two stitches together). If you accidentally skip a decrease or add an extra stitch, the stitch count grows or shrinks unexpectedly — creating a pocket of loose fabric or a visible hole in the finished piece.
Count your stitches at the end of every round. Most amigurumi patterns note the stitch count in parentheses at the end of each row — for example (12) or (18). If your count does not match, stop and find where you went wrong before moving on. Learning how to count crochet stitches and rows properly is one of the most valuable skills for clean amigurumi.
"Go down a hook size, count every round, and your amigurumi will look just as tight and adorable as you imagined."— Ava, MrsCrochetWorld
Patterns designed with tight, gapless stitches in mind
Every MrsCrochetWorld pattern is written with beginner-friendly stitch counts and clear round-by-round instructions so you always know exactly where you are.

Stegosaurus Crochet Pattern
Beginner-friendlyThis easy dinosaur pattern uses single crochet in the round throughout, making it perfect for practicing tight, even tension. The stitch counts are listed at the end of every round so you can catch mistakes instantly. A great project for putting your in-the-round skills to the test.

50 No-Sew Amigurumi Patterns Bundle
Mega bundleFifty amigurumi designs, all using the no-sew technique that builds parts in continuous rounds — which naturally tightens the fabric. Working seamlessly means fewer joins, fewer holes, and less finishing frustration for beginners.

Dinosaur Crochet Pattern Bundle — 4 in 1
Best valueFour adorable dinosaur amigurumi patterns in one download. Each design builds on the same core construction so you can practice maintaining even tension across multiple projects. Perfect for beginners building confidence with amigurumi basics.
Six quick checks before you start your next amigurumi
Run through this checklist at the start of any project to prevent gaps before they happen.
Go down a hook size
Use a hook 1–2 sizes smaller than recommended on the yarn label for dense, stuffing-hiding fabric.
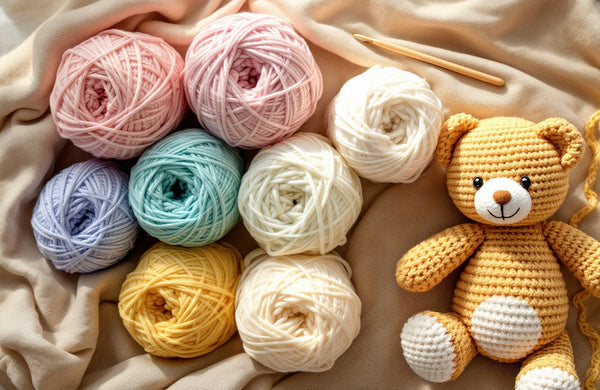
Choose the right yarn
Smooth acrylic or cotton yarn shows stitch definition clearly, making it easier to spot — and fix — any gaps. See our best yarn for amigurumi guide.
Start with a magic ring
A tight magic ring closes the center hole that a chain-4 start often leaves. Pull it snug before joining.
Always use both loops
Insert your hook under both the front and back loop on every stitch unless the pattern explicitly says otherwise.
Count every round
Match your stitch count to the number in parentheses at the end of each round. One extra or missing stitch snowballs quickly.
Follow a beginner guide
New to amigurumi? Our complete beginner guide to crochet walks you through every foundational skill before your first project.
Pro tips for perfectly tight amigurumi every time
- Test with a swatch first. Work 12–18 sc in the round and hold it to the light. No light peeking through means your hook-yarn combo is ready.
- Use stitch markers. Place a removable marker at the first stitch of each round so you never lose your place and accidentally add or skip stitches at the join.
- Don't overstuff. Heavy stuffing stretches the fabric and forces gaps open. Fill firmly but stop before you see the stuffing pushing against the stitches.
- Use an invisible decrease. The standard sc2tog creates a small hole; the invisible decrease (working through only the front loops before pulling through both) leaves a nearly seamless result.
- Check your magic ring after joining. Give the tail a gentle tug after completing round 1 to confirm the center is fully closed before you continue.
- Weave in ends carefully. A tail left at the magic ring or a color join that is not woven properly can work loose and open a hole over time. Weave at least 2–3 inches in different directions.
Ready to crochet your first gap-free amigurumi?
Grab a free pattern to practice your tension and stitch placement — no risk, just fun. When you are ready for more, browse our full collection of beginner amigurumi designs.
Get a free pattern Shop amigurumi patternsFrequently asked questions
Why does my amigurumi have holes even when I follow the pattern exactly?
The pattern may be written for a tighter gauge than you naturally crochet. Try going down one hook size — even a 0.5 mm difference can close gaps significantly. Also double-check that you are inserting your hook under both loops of each stitch.
What hook size should I use for amigurumi?
Most amigurumi makers use a hook 1–2 sizes smaller than the yarn label recommends. For worsted weight yarn, a 3–3.5 mm hook is common. For DK or sport weight, try 2.5–3 mm. The goal is fabric dense enough that you cannot see through it when held to the light.
How do I fix a hole in the center of my amigurumi (where I started)?
If you started with a chain ring instead of a magic ring, the center hole can be hard to fully close. Switch to a magic ring for future projects — it pulls completely shut. If you already have a finished piece with a center hole, thread your yarn tail on a tapestry needle and weave it around the inner edge of the opening, then pull tight to cinch it closed.
Is it normal for amigurumi to show the stuffing through the stitches?
No — if stuffing is visible it means the fabric is too loose. The most common fixes are: use a smaller hook, tighten your tension, or switch to a yarn with better stitch definition (smooth cotton or acrylic rather than fuzzy or chunky yarn).
What is an invisible decrease and does it really reduce holes?
Yes, significantly. A standard sc2tog inserts the hook under both loops of two stitches, which can leave a small visible gap. The invisible decrease inserts the hook under only the front loop of each of those two stitches before pulling through — this keeps the back loops in place and creates a much tighter, neater decrease with almost no visible hole.
Why does my amigurumi have a gap where I joined the round?
If you are working in joined rounds (slip stitch to join, chain 1 to start), the join creates a visible seam. Many amigurumi patterns use a continuous spiral instead — no join, no chain, just keep going. Check your pattern instructions. If gaps appear at the start of each round in a spiral, you may have moved your stitch marker too late and are losing track of the first stitch.
Can the type of stuffing I use cause gaps to look worse?
Yes. Polyfill stuffing that is packed in large clumps can push unevenly against the fabric and make small gaps stand out more. Tease the stuffing apart into light, fluffy layers before inserting it, and add it gradually so you can distribute it evenly throughout the piece.
How do I prevent holes when attaching amigurumi parts like arms and legs?
When sewing parts onto the body, the hole at the open end of the arm or leg can be visible if not closed properly before attachment. Before sewing, weave your yarn tail around the outer edge of the open stitches and pull to gather them shut, then use the same tail to sew the part to the body. This creates a clean, gap-free join.