How to sew amigurumi parts together — the complete guide
Learn exactly how to attach arms, legs, ears, and tails to your amigurumi so every seam is invisible, secure, and straight every time.

You've finished crocheting all the pieces — a round little body, two stubby arms, a pair of floppy ears — and now comes the part that makes many crafters hold their breath: sewing it all together. Getting the assembly right is what transforms a pile of crocheted shapes into a character with personality. The good news? With the right needle, a bit of patience, and a clear method, sewing amigurumi parts is 100% learnable.
What you need before you start
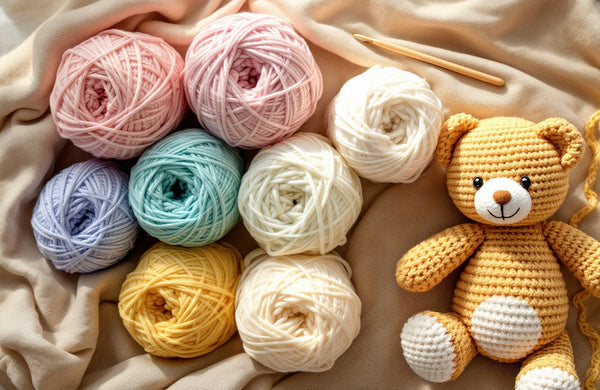
Gather these items and assembly becomes much less stressful.
You only need a few basics: a blunt-tipped yarn needle (also called a tapestry needle), the yarn tail left when you finished off each piece — aim for at least 12 inches — and a handful of straight pins or locking stitch markers to hold parts in position. Having a ruler nearby helps you double-check symmetry before you make a single stitch.
If your yarn tail is too short, simply thread a new length of the same yarn onto your needle. Knot it securely around one stitch on the inside of the part so the knot is hidden, then proceed as normal. Learning how to weave in ends cleanly is closely linked to assembly and will make your finished pieces look professional.
How to position and pin parts correctly
Before you sew a single stitch, spend time on placement. Lay the body on a flat surface and hold the part against it. Step back and look — is the arm level? Are both ears the same height and distance from center? Symmetry is everything in amigurumi, and fixing a wonky placement before sewing saves you from pulling everything out later.
Push a straight pin through the center of the part and into the body to anchor it. Add two or three more pins around the edge. Then put the project down, look at it from arm's length, and adjust if needed. This is especially important for amigurumi ears and limbs that need to match on both sides. Pin both arms or both legs at the same time so you can compare them before committing.
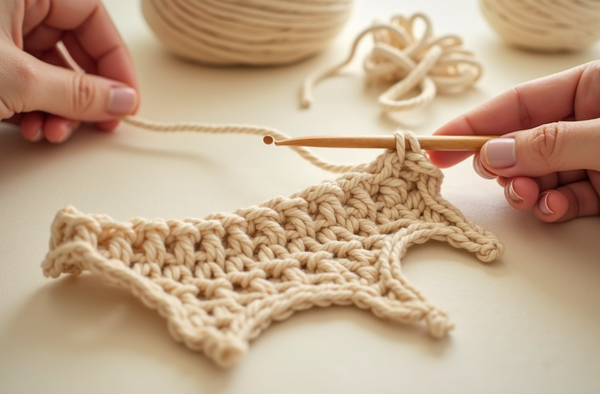
The sewing technique step by step
Thread your yarn needle with the tail from the finished-off part. Push the needle into the body at the spot where you want the edge of the part to sit. Bring the needle up through a stitch on the edge of the part, then back down into the body one stitch along. Continue working around the entire opening of the part, stitching through every stitch or every other stitch depending on yarn weight.
The goal is to catch the front loops or both loops of the edge stitches and pull the yarn snug but not so tight that the fabric puckers. After you complete one full round, go around once more in the opposite direction to close any visible gaps. This whipstitch-style method creates a flat, secure join that holds up to play and handling. For a deeper look at joining techniques, check out mattress stitch vs. whipstitch for crochet.
"The moment you sew on that last little ear and it sits exactly where you imagined it — that's when a crocheted shape becomes a character. Assembly is the magic step."— Ava, MrsCrochetWorld
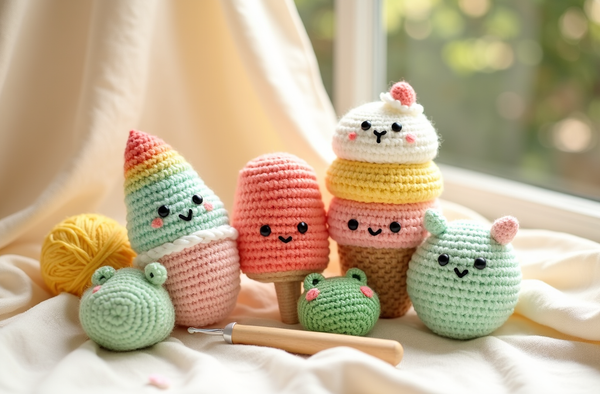
Patterns that are great for practising assembly
These beginner-friendly designs have clear part counts and generous yarn tails, making them ideal for learning to sew amigurumi together.

50 No-Sew Amigurumi Bundle
Bundle · PDFWant to skip the needle entirely for your first few projects? This massive bundle of 50 designs is built around no-sew amigurumi techniques, so you can build confidence in shaping and stuffing before you tackle assembly. Perfect as a stepping stone — and you'll still get gorgeous results.

Care Bears Amigurumi Pattern (4-in-1)
Character · PDFFour adorable bear bodies, each with separate ears, muzzles, and belly badges that need sewing on — a fun way to practise assembly on a consistent shape. The pattern includes clear part-by-part finishing notes. Great for anyone levelling up from easy beginner amigurumi patterns.

Dinosaur Amigurumi Bundle (4-in-1)
Bundle · PDFSpikes, tails, tiny arms, and legs — dinosaurs are an excellent assembly workout. Each pattern in this bundle breaks the sewing order down clearly, so you'll never wonder which part to attach first. Browse more in our amigurumi patterns collection.
Six assembly rules every amigurumi maker should know
Keep these in mind and your finished pieces will look polished every time.
Always pin before sewing
Spend two minutes pinning and checking symmetry. It takes far less time than ripping out a badly placed arm.
Leave long tails
Finish off every piece with at least 12 inches of tail. A short tail is the fastest way to make assembly frustrating.
Match your yarn
Use the same yarn (or a matching colour) as the part being attached. This makes the seam essentially invisible against the fabric.
Go around twice
One pass secures the part; a second pass in the opposite direction closes gaps and makes the join much sturdier.
Bury your ends
After knotting off, thread the tail deep inside the body and bring it out an inch away, then trim. The yarn retracts inside so no end pokes out.
Start with a complete guide
New to amigurumi altogether? Our complete beginner guide to crochet walks you through every foundational skill before your first project.
Quick troubleshooting tips for common assembly problems
- Gap around the attached part: Go around a second time with small stitches, catching any stitches you missed on the first pass.
- Part feels loose after finishing: Tie a second knot on the inside of the body and bury both tails separately so neither can work free.
- Seam looks bumpy: You may be pulling the yarn too tight. Aim for firm but not puckered — the two surfaces should sit flush against each other.
- Can't find matching yarn: Use a strand of sewing thread in a close colour. It's thin enough to be invisible and strong enough to hold.
- Part is at the wrong angle: Remove the pins, reposition, and re-pin. It is always worth resetting before you sew rather than hoping it will look fine in the end.
- Unsure of sewing order: Attach the largest parts first (body to head), then mid-sized parts (arms, legs), and finally the smallest details (ears, tails, muzzles). This gives you a stable base to work from. For more guidance on the full assembly workflow, re-read the step-by-step section above.
Ready to put your new skills to work?
Grab a free pattern and practise your assembly technique on a simple project — or dive into one of our beginner-friendly bundles and stitch something you'll be proud to display or give as a gift.
Get a free patternShop amigurumi patternsFrequently asked questions
What needle should I use to sew amigurumi parts together?
Use a blunt-tipped tapestry needle, also called a yarn needle. The blunt tip slides between yarn strands rather than splitting them, giving you a cleaner seam. Choose a size that fits your yarn weight comfortably without fraying the yarn as you pull it through.
How long should I leave my yarn tail when finishing off an amigurumi piece?
Aim for at least 12 inches, or about 30 cm. This gives you enough length to thread the needle, sew all the way around the part, go around a second time if needed, tie off securely, and bury the end deep inside the body — all without running out of yarn mid-seam.
Should I stuff an amigurumi part before or after sewing it on?
For 3D parts like arms, legs, and tails, stuff them before sewing them onto the body. For very small or flat parts like ears or fins, they often look better left unstuffed. The pattern will usually tell you whether to stuff a part, but when in doubt, a small amount of stuffing gives parts a rounder, more finished look.
How do I make sure both arms or legs are at the same height?
Use a ruler or tape measure to measure from a fixed reference point — usually the base of the neck or the bottom of the body — to where you plan to pin each arm. Mark the spot with a pin on both sides before sewing either one. Step back and look at the piece from a distance to confirm symmetry before you commit to sewing.
What stitch is best for sewing amigurumi parts together?
Most makers use a whipstitch, working through corresponding stitches on the edge of the part and the surface of the body. Some prefer a mattress stitch for very flat joins. Either works well — the important thing is to keep your tension even and to go around the full edge at least twice for a secure hold.
How do I hide the knot after sewing an amigurumi part on?
After your final stitch, make two small knots right against the fabric surface. Then thread the tail back onto the needle, push it deep into the body, bring it out about an inch away, tug gently, and trim close to the surface. The yarn retracts back inside the stuffing, burying the end completely so nothing pokes through.
Can I use hot glue instead of sewing to attach amigurumi parts?
It is possible on display-only pieces, but it is not recommended for toys or items that will be handled frequently. Hot glue can come loose over time, especially with repeated squeezing, and it can leave a stiff patch on the fabric. Sewing with a yarn tail creates a much more flexible and durable join, and it looks cleaner from the outside.
In what order should I sew amigurumi parts together?
Start with the largest join first — usually attaching the head to the body. Then add the larger limbs such as arms and legs. Finish with the smallest details like ears, tails, muzzles, and any surface embellishments. Working from large to small gives you a stable base at each step and makes it easier to check placement as you go.