How to crochet amigurumi ears — round, pointed & floppy
Master every ear shape your amigurumi needs: from tidy round bunny ears to sleek cat points and adorable floppy dog flaps — all with clear row-by-row guidance.

Ears make or break an amigurumi. Get them right and your little critter instantly looks like the character you imagined. Get them slightly off and the whole face can feel lopsided or cartoonish in the wrong way. The good news? Once you learn the three core ear shapes — round, pointed, and floppy — you can mix, scale, and adapt them for almost every animal pattern you'll ever encounter.
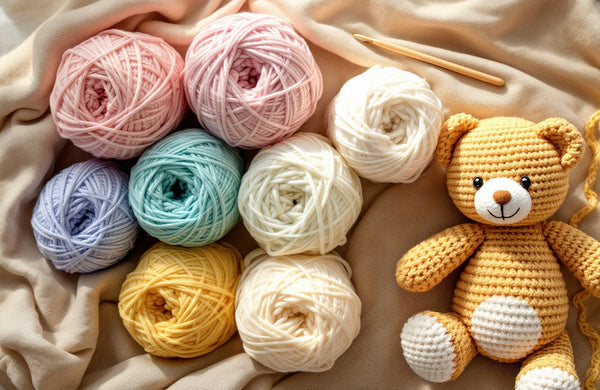
The tools and yarn you need
Nothing special required — just your usual amigurumi kit.
For ears you'll use the same hook and yarn you used for the head, which keeps color and gauge consistent. Most amigurumi use a hook 0.5–1 mm smaller than the yarn label suggests — that tight gauge prevents stuffing from showing through gaps. A size C/2 (2.75 mm) or D/3 (3.25 mm) hook paired with DK or worsted cotton or acrylic works beautifully. If you're unsure which yarn to reach for, our guide to the best yarn for amigurumi covers cotton vs. acrylic in detail. You'll also need a yarn needle, stitch markers, and locking pins for placement before sewing.
Round ears: the versatile workhorse
Perfect for bears, owls, cats with a chubby look, and most small animals.
Round ears are worked in the round from a magic ring, just like your amigurumi body parts. Start with a magic ring, then single crochet (sc) 6 into the ring and pull snug. Round 2: 2 sc in each stitch (12 sc). For a small ear, fasten off here — that flat circle is your ear. For a medium ear, add Round 3: (sc 1, 2 sc in next st) around (18 sc) before fastening off. Leave a long tail for sewing. Flatten the circle slightly — don't stuff it — and the natural curve will face outward when attached to the head.
For a two-toned ear (pink inner, beige outer), make two circles in different colors and whipstitch them together around the edge before attaching to the head. This technique is used in bear patterns, bunny patterns, and many animal designs in our amigurumi collection.
Pointed ears: cats, foxes, and fantasy creatures
A few decreases turn a flat square into a sharp, satisfying point.
Pointed ears are worked flat in rows. Chain 4. Row 1: sc in 2nd ch from hook, sc 2 (3 sc). Row 2: ch 1, turn, sc2tog, sc 1 (2 sc). Row 3: ch 1, turn, sc2tog (1 sc). Fasten off. That tiny triangle becomes a crisp cat ear. Scale it up by starting with a longer foundation chain — ch 6 for a medium ear, ch 8 for a large one — and adding extra rows before you begin decreasing. For a fox or demon character, skip the color change and work the entire ear in one color for a sleek silhouette. Our amigurumi beginner guide explains how to read the decrease notation if sc2tog is new to you.
"The secret to perfect amigurumi ears is placement — pin them in three or four different positions before you sew a single stitch."— Ava, MrsCrochetWorld
Floppy ears: dogs, bunnies, and elephants
Long, soft, and draped — these ears add instant personality.
Floppy ears are worked flat and left unstuffed so they hang naturally. Chain 5. Row 1: sc in 2nd ch from hook, sc to end (4 sc). Rows 2–8: ch 1, turn, sc across. You now have a small rectangle. To taper the tip: Row 9: ch 1, turn, sc2tog, sc2tog (2 sc). Row 10: ch 1, turn, sc2tog (1 sc). Fasten off. This gives a droopy ear with a rounded bottom and a narrow top. Pin the narrow end to the side of the head so the wide portion hangs down. For a larger dog ear, extend the rectangle to 12–14 rows before tapering. If you've mastered the basics of amigurumi increases and decreases, you can also add a gentle curve by working one fewer stitch on the right edge every other row.
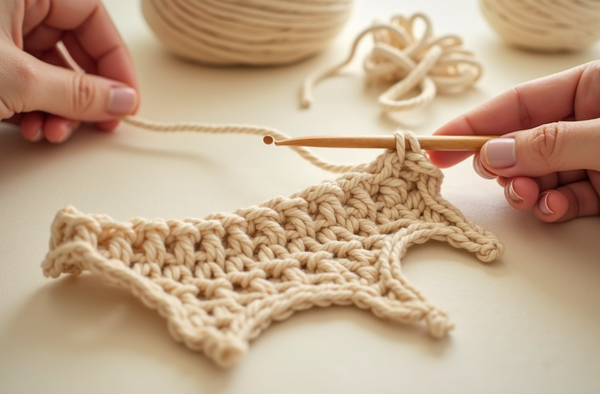
How to attach ears without gaps or lopsided placement
This step matters as much as the crochet itself.
After fastening off, thread the long tail onto a yarn needle. Hold the ear against the head and use locking stitch markers or T-pins to fix its position. Step back and look at the face from the front — check symmetry. Sew through every stitch along the base of the ear, going into the head stitches in a matching row. Come up inside the head and pull snug. Reinforce by going around the base a second time. Weave in the end securely. If you're new to sewing pieces together, our article on how to sew amigurumi parts walks through every knot and needle angle.
For no-sew enthusiasts: work the last row of the ear in slip stitches directly onto the head stitches. This technique is covered extensively in our no-sew amigurumi techniques guide and is the approach used throughout our no-sew pattern range.
Patterns that put these ear techniques to work
Each PDF shows you exactly how the ears are built — great practice alongside this tutorial.

50 No-Sew Amigurumi Patterns Bundle
No-sew techniqueFifty animals — bears, cats, dogs, bunnies, and more — each with ears worked directly onto the head. Brilliant for practicing attachment before moving to sewn-on ears. Works beautifully with the no-sew method described above.

Care Bears Crochet Pattern — 4 Amigurumi Bears
Round earsClassic round bear ears in four pastel colorways. The pattern gives row-by-row instructions for the two-toned inner-ear technique — the perfect companion to the round-ear section above. Great for practising safety-eye placement too, since the face assembly comes right after the ears.

Zootopia Amigurumi 7-in-1 Bundle
Floppy & pointed earsSeven characters, seven different ear styles — from Judy Hopps's tall floppy bunny ears to Nick Wilde's pointed fox ears. Working through this bundle gives you hands-on practice with every shape in this guide. Check out our beginner amigurumi roundup if you'd like to warm up with simpler projects first.
Six ear-shaping tricks every amigurumi crafter should know
Small adjustments that make a big difference to the finished look.
Scale by chain count
Add or subtract stitches from your foundation chain to resize any ear pattern without changing hook or yarn weight.
Inner ear contrast
Work a smaller piece in pink or pale yarn and whipstitch it to the front of the ear before attaching to the head for a realistic two-tone look.
Pin before sewing
Always pin ears in place and photograph the face from the front before sewing a single stitch — tiny shifts in position change the character's personality completely.
Match the gauge
Use the same hook and yarn tension as the head so the ear fabric looks identical and doesn't pucker when attached.
Leave a long tail
Leave at least 30 cm (12 in) of yarn when fastening off — you'll use it to sew the ear on, going around the base twice for a secure hold.
Ready for the full picture?
Our complete beginner guide to crochet covers stitches, tools, and your first project in one place — the perfect next step.
Quick tips for flawless amigurumi ears
- Work tight. A smaller gauge means no gaps and a firmer ear that holds its shape — especially important for pointed and round ears that don't rely on stuffing.
- Block flat pieces. Before attaching, lightly mist floppy and flat ears with water, pin to the correct shape, and let dry for a crisp, professional result. More on this in our blocking guide.
- Count your stitches. Ears are small but asymmetry shows instantly. Use a stitch marker in the first stitch of every round and count every row as you finish it. Our stitch-counting article has a handy checklist.
- Use matching yarn for sewing. Thread a tail of the same color onto your needle. If you switch to a contrasting sewing thread, it can show through the stitches on the head.
- Check the pattern's gauge swatch. If the pattern specifies ear dimensions (e.g., 2 cm wide) and yours are bigger, try going down a hook size for those pieces only.
Ready to put your new skills to the test?
Grab a free pattern and start crocheting ears right now — or browse our beginner amigurumi collection for a full project that practices everything in this guide.
Get a free pattern Shop amigurumi patternsFrequently asked questions
How do I make amigurumi ears that lie flat?
Work the ears without stuffing and use a hook size slightly smaller than the yarn label recommends. The tighter gauge creates a stiff, flat fabric that stays flat once attached. If the ear still curls, lightly block it by misting with water, pinning to a foam board in the correct shape, and allowing to dry fully before sewing it onto the head.
What is the easiest ear shape for beginners?
Round ears are the easiest starting point. You work in the round from a magic ring using simple single crochet increases — no shaping rows, no turning chains. Just two or three rounds and you have a small flat circle that becomes a perfectly proportioned bear or cat ear.
How do I make ears the same size?
Count your stitches at the end of every round or row and record the count. Use the same hook, the same yarn, and work from the same written pattern for both ears. Tension varies slightly between pieces, so blocking both ears flat and pinning them to identical measurements before they dry helps even out small differences.
Do amigurumi ears need to be stuffed?
Usually no. Round ears are left flat (they are just small discs), pointed ears are too narrow to stuff, and floppy ears are intentionally left unstuffed so they drape naturally. Stuffing ears tends to make them too stiff and round, which looks unnatural. The exception is very large statement ears where a tiny pinch of stuffing adds volume at the base.
How do I attach amigurumi ears so they do not fall off?
Leave a tail of at least 30 cm when you fasten off. Thread it onto a yarn needle and sew through every stitch along the base of the ear, passing the needle into the head stitches on the same row. Then go around the base a second time and weave the end back and forth through several head stitches before cutting. This double-pass technique creates a very secure join.
Can I add a no-sew ear directly onto the head?
Yes. Work the last round of the ear using slip stitches placed directly into the stitches on the head rather than into the ear itself. This joins the ear as you finish it, leaving no sewing required. It works best for round and flat ears and is the preferred method in no-sew amigurumi patterns.
How do I make pointed cat ears in crochet?
Start with a foundation chain of 4. Row 1: single crochet in the 2nd chain from the hook and in each chain across (3 sc). Row 2: chain 1, turn, sc2tog, sc in last stitch (2 sc). Row 3: chain 1, turn, sc2tog (1 sc). Fasten off. The resulting triangle is your ear. Scale up by starting with a longer chain and adding more rows before you begin decreasing.
Why do my amigurumi ears look lopsided when attached?
Lopsided ears almost always come down to placement, not the ears themselves. Pin both ears to the head at the same time and check symmetry from the front and top before sewing. Count the stitches from the center of the head to each ear position to confirm they match. Photograph the face before committing — the camera reveals asymmetry the eye can miss.