How to Crochet a Granny Square: A Complete Step-by-Step Tutorial
The most famous motif in crochet — and one of the easiest. Learn the granny square once and you can make blankets, bags, cardigans and more from a single, satisfying pattern.

If crochet had a greatest hit, it would be the granny square. This humble little motif — clusters of double crochet worked around and around a center ring — has been turning leftover yarn into blankets, bags and cardigans for generations. The magic is that it teaches you the rhythm of crochet in miniature: you make one small square, then another, then suddenly you understand how nearly every motif-based project works. Best of all, a granny square uses just three stitches you can learn in an afternoon.
What you'll need
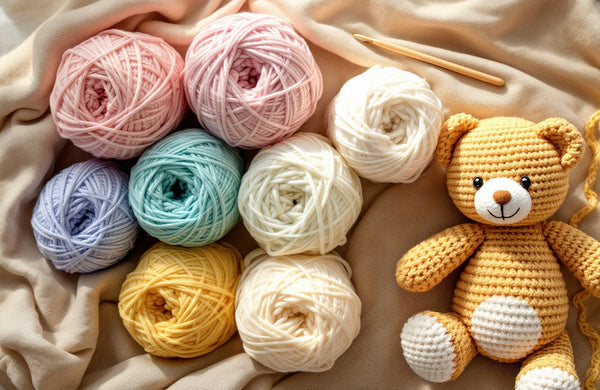
Granny squares are famously forgiving — they're the classic "use up your scraps" project — but here's the simple kit.
A worsted/aran (medium, #4) yarn is the easiest to see and handle while you learn; cotton gives crisp squares, acrylic is soft and cheap for practice. Pair it with a 5.0–5.5 mm (H/I) hook, a pair of scissors and a yarn needle for weaving in ends. That's genuinely all. If you're still choosing supplies, our guides to the best beginner yarn and best beginner hooks will set you up.
The three stitches you need
A traditional granny square uses only the chain stitch (ch), the double crochet (dc), and the slip stitch (sl st) to join. If you can make those three, you can make a granny square. Don't worry if your tension is uneven at first — squares are wonderfully forgiving, and even tension comes naturally with practice.
"Your first granny square will be a little wonky. Your tenth will be beautiful. That's not a warning — it's a promise. Keep going."— Ava, MrsCrochetWorld
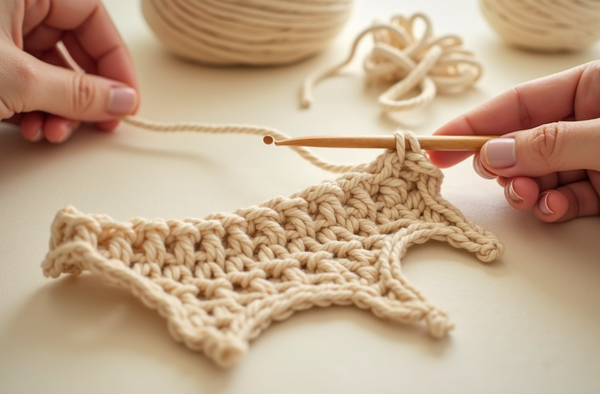
How to crochet a granny square, round by round
Here's the classic version in US terms. Read each line, make it, then check the corners before moving on.
Start: Make a magic ring (or chain 4 and join with a slip stitch to form a ring).
Round 1: Ch 3 (counts as your first dc). Work 2 dc into the ring, then ch 2 — that's your first corner. *3 dc into the ring, ch 2; repeat from * twice more. You now have four clusters of 3 dc with a ch-2 space at each corner. Join with a sl st to the top of the beginning ch-3.
Round 2: Sl st into the nearest corner space. Ch 3, then work (2 dc, ch 2, 3 dc) all into that same corner space — this makes the corner. *Ch 1, then in the next corner space work (3 dc, ch 2, 3 dc); repeat from * around. Ch 1 and join with a sl st. You now have two clusters per side with a neat corner at each turn.
Round 3 and beyond: Keep the rule simple — 3 dc into every chain-1 space along the sides, and (3 dc, ch 2, 3 dc) into every chain-2 corner space. Each round adds one extra cluster to each side and the square grows. Repeat until your square is the size you want, then fasten off and weave in your ends.
That's the entire secret: sides get clusters, corners get a cluster-chain-cluster. Once it clicks, you'll never need to look at the pattern again.
Changing colours like a pro
The rainbow look that makes granny squares so iconic comes from changing yarn each round. Fasten off at the end of a round, then join the new colour into any corner space with a slip stitch and carry on. Doing the colour change neatly — pulling the final loop through with the new colour — keeps your edges tidy; our guide to changing colours in crochet shows exactly how.
From one square to a finished project
A single square is satisfying — but join a few and you've made something real. These beginner-friendly patterns turn the granny square into bags you'll actually carry.

The granny square bag
Beginner · with videoThe natural next step: join a handful of squares into a roomy tote bag. It comes with a video tutorial, so you can watch every join.

The Humble Bag
Modern granny toteA modern take on the classic — the Humble Bag uses the same square you just learned, scaled up into a chic everyday tote in US terms.

9 modern granny bags
Bundle · best valueHooked already? Our 9-in-1 bag bundle gives you a whole summer of granny-square projects in one download.
What can you make with granny squares?
This one little motif is the foundation of an astonishing range of projects.
Blankets
The classic — join dozens of squares for a heirloom afghan, one cozy round at a time.
Bags & totes
A few squares become a market bag, a tote or a cute little purse.
Cardigans
The "granny square cardigan" trend is built from exactly this motif — squares sewn into a garment.
Home decor
Cushion covers, coasters, pot holders and table runners all start as squares.
Scrap busters
The perfect way to use up odd balls of yarn — every square can be a different colour.
Granny square tips for a flat, even square
- Keep corners consistent — always (3 dc, ch 2, 3 dc) in the corner space. Skipping the ch-2 makes corners pull in.
- Work into spaces, not stitches. Granny clusters go into the chain spaces between clusters, not into the tops of individual dc.
- If your square ruffles, you're adding too many stitches — recheck that sides get exactly 3 dc per space.
- If it cups or curls, your tension is too tight; try the next hook size up. See why crochet curls.
- Block your finished squares so they're perfectly square before joining — it makes assembly far neater. Here's how to block crochet.
- Make all your squares the same number of rounds so they're identical in size for joining.
Turn your squares into something beautiful 🧶
Start free, then grab a step-by-step granny project with photos and video. Instant download — make a start today.
Browse free patterns Shop granny bag patternsFrequently asked questions
How do you crochet a granny square for beginners?
Start with a ring (a magic ring or 4 chains joined). Round 1: work four clusters of 3 double crochet separated by chain-2 corners. From round 2 on, work 3 dc into each side space and (3 dc, ch 2, 3 dc) into each corner. Repeat rounds until the square is the size you want.
What stitches are used in a granny square?
Just three: the chain stitch, the double crochet, and the slip stitch used to join rounds. That's what makes the granny square such a great beginner project.
Why is my granny square not flat — it ruffles?
Ruffling means you're adding too many stitches per side. Make sure each side space gets exactly 3 double crochet, and only the corners get the extra cluster-chain-cluster.
Why is my granny square cupping or curling?
That's usually tension being too tight, or too few stitches. Try going up a hook size and double-check your corners include the ch-2 space so they can lie flat.
How do I change colours in a granny square?
Fasten off at the end of a round, then join the new colour with a slip stitch into any corner space and continue. Pulling the final loop through with the new colour keeps the change tidy.
How many granny squares do I need for a blanket?
It depends on square and blanket size, but a baby blanket might use 25–36 squares and a throw 48–80. Make all squares the same number of rounds so they match.
What can I make with granny squares?
Blankets, bags, cardigans, cushion covers, coasters and more. The granny square is the building block for a huge range of crochet projects.
Do I work into the stitches or the spaces?
Into the spaces. Traditional granny clusters are worked into the chain spaces between clusters, not into the tops of individual double crochet stitches.
How do I join granny squares together?
Common methods include whip-stitching or slip-stitching squares together through the back loops, or joining as you go on the final round. Block the squares first so they're even.