Why is my crochet curling? 7 causes and fixes
Curling edges and cupped fabric can be so discouraging — but every single cause has a straightforward fix you can apply right now.

You cast on your foundation chain, work a few rows, and then notice the whole piece is rolling inward like a taco shell. Sound familiar? Curling is one of the most common frustrations beginners and even experienced crocheters run into — but the good news is that it is almost always caused by something very specific that you can diagnose and fix quickly.
1. Your tension is too tight
The most common culprit by far
When you grip your yarn or hook too firmly, each stitch contracts as you draw it through. Over dozens of rows that contraction adds up, pulling the edges inward and giving the whole piece a cupped, rigid feel. The fix is to consciously relax your grip and let the yarn flow more freely through your fingers. It can feel awkward at first, so try a swatch: work 10 rows loosely, then compare the drape to your curling piece. You'll see the difference immediately. If you struggle to maintain even tension consistently, try a tension ring or simply slow down until the habit clicks.
2. Your hook is too small for the yarn
Every yarn weight has a recommended hook size printed on the label for a reason — using a hook that is too small compresses the stitches and forces the fabric to cup. If your work is curling, try sizing up one or two hook sizes even if a pattern specifies a certain size. The fabric should feel soft and drapey, not stiff. Check our complete hook size chart if you're unsure which size matches your yarn weight, and remember that hook recommendations are always a starting point — your personal tension may need a slight adjustment.
3. The stitch pattern itself creates curl
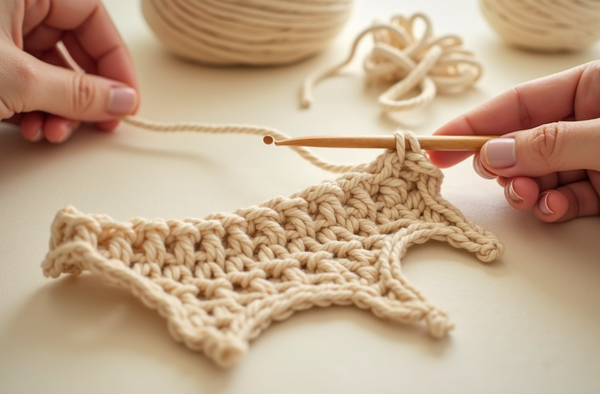
Some stitches are naturally more prone to curling than others. Single crochet, worked flat in rows, is infamous for curling sideways along the length of the fabric because the short stitches create a strong tension pull at the turning chain. Taller stitches like double crochet curl much less. If you are working a single-crochet flat piece, consider adding a border of slip stitches or single crochet around the edges, or switch to a ribbing stitch that naturally lies flat. You can also try working in the round instead of rows, which eliminates turning-chain tension entirely and produces beautifully flat fabric.
4. Your foundation chain is too tight
A tight foundation chain pulls the bottom edge inward, causing the entire piece to curl toward that edge from row one. The classic fix is to use a hook one size larger just for your foundation chain, then switch back to your regular hook for the body. Alternatively, learn the foundation single crochet or foundation double crochet technique — these chainless foundations are stretchier by design and virtually eliminate base-edge curl.
5. Skipping or miscounting turning chains
Turning chains set the height of each row and keep the edges vertical. If you skip them, work an extra one, or count them wrong, the side edges slowly tighten or loosen row by row — producing a curve or a slant. Get in the habit of counting your turning chain before you begin the next row, and always learn whether a pattern counts the turning chain as the first stitch or not. Inconsistency here is also why so many beginners find their work gets wider or narrower over time.
6. You need to block it
Blocking is the gentle process of wetting or steaming your finished piece into shape and letting it dry flat. It relaxes the fibers, opens up the stitches, and can completely eliminate curl in natural fibers like cotton, wool, and bamboo. Lay your work on a foam mat, pin the edges out to the correct measurements, mist it with water or hold a steam iron a few centimeters above the surface, and leave it until fully dry. Acrylic yarn responds better to steam blocking than wet blocking — but always check the yarn label first. If you want the full method, our guide to blocking crochet walks you through every step.
7. The wrong yarn for the pattern
Stiff, tightly plied yarn — especially certain cotton blends — has less natural drape, which exaggerates curl in flat stitch patterns. Choosing a softer, more flexible yarn for the same pattern can solve curling without changing anything else. If your pattern calls for a specific yarn and you want to substitute, learn how to match yarn weight and fiber so the substitution doesn't introduce new problems. For amigurumi, a tighter cotton is actually ideal — but for shawls, bags, or flat swatches, go for something with some give.
"Every crochet problem has a solution hiding inside the stitch. Curling just means your fabric is asking for a little more breathing room."— Ava, MrsCrochetWorld
Patterns that stay flat from row one
Once you've solved your curl problem, reward yourself with a project designed to lie beautifully flat — these are some of our most satisfying picks.

Granny Square Tote Bag
Crochet Bag PatternGranny squares are worked in the round, which means zero curl by nature. This cheerful tote is perfect once you have your granny square technique dialed in and your tension consistent.

9 Modern Crochet Bag Patterns Bundle
Bundle · Best SellerNine beginner-friendly bag patterns in one download. Each design is structured to lie flat and hold its shape — ideal for practicing even tension on a project you'll actually use every day.

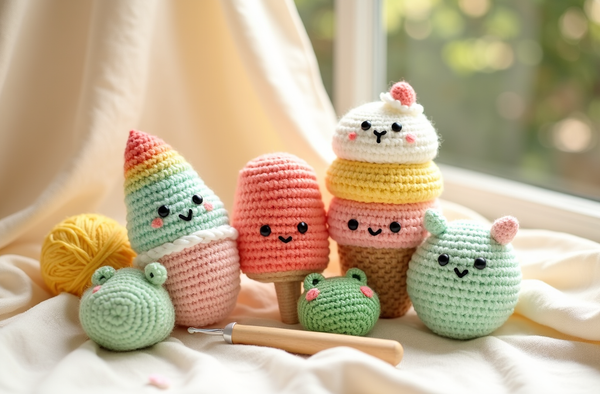
50 No-Sew Amigurumi Bundle
Bundle · AmigurumiAmigurumi worked in the round never curls — the continuous spiral locks your stitches into a perfectly round shape. This bundle covers 50 adorable creatures so you can build tension confidence while making gifts. Browse all amigurumi patterns if you want to start with just one.
Quick checks before you frog it
Run through this list and you'll pinpoint the problem in under two minutes.
Hook size
Compare your hook to the yarn label recommendation. If your hook is smaller than suggested, size up and swatch again.
Tension test
Pull a finished row gently sideways — if the stitches barely budge, your tension is too tight. Relax your grip and try a few rows.
Stitch type
Single crochet rows curl; double crochet rows are flatter. Adding a taller stitch border can anchor curling edges immediately.
Foundation chain
Chain loosely or use a larger hook for the starting chain only. A tight foundation is the fastest route to a curled bottom edge.
Block it
Natural fibers respond dramatically to wet or steam blocking. Pin the piece flat while damp, let it dry completely, and the curl often vanishes.
Learn the fundamentals
Curling usually signals a gap in foundational technique. Our complete beginner guide to crochet covers tension, hook hold, and flat fabric from the very start.
Pro tips to prevent curling before it starts
- Always swatch. Work a 4×4 inch test square in your chosen stitch before starting any project — if it curls in the swatch, you know to adjust before investing hours in the real piece.
- Use a foundation row alternative. Foundation single crochet and foundation double crochet are stretchier than a chained foundation, which prevents base-edge curl from the very first row. Try them on your next project.
- Add a slip-stitch border. Working one round of slip stitches around a finished flat piece acts like a frame that holds the edges in place — quick and highly effective on single-crochet dishcloths and washcloths.
- Choose the right stitch for flat fabric. The waffle stitch, moss stitch, and V-stitch all have natural texture that resists curling far better than plain single crochet rows.
- Check your pattern's gauge. If the pattern specifies a gauge swatch and yours is too dense, your whole finished piece will curl and measure smaller than intended. Gauge is not optional — it's the secret to flat, correctly sized crochet.
- Go easy on yarn substitutions. Swapping a drapey fiber for a stiff one can introduce curl even when your tension is perfect. Always read about choosing the right yarn for your pattern before you sub.
Your next project is waiting
Now that your fabric lies flat, treat yourself to a pattern designed for success. Grab a free pattern to practice, or explore our beginner-friendly collection — every design comes with clear, step-by-step instructions so your next make goes smoothly from cast-on to finish.
Get a free patternShop beginner patternsFrequently asked questions
Why does my single crochet always curl sideways?
Single crochet produces short, tight stitches that create strong lateral tension in flat rows. This pulls the edges inward along the length of the piece. The most reliable fixes are relaxing your tension, sizing up your hook, working in the round instead of rows, or adding a border of slip stitches along the long edges to anchor them flat.
Will blocking fix crochet curling?
Yes, blocking can dramatically reduce or eliminate curling, especially in natural fibers like cotton, wool, linen, and bamboo. Wet or steam the piece, pin it flat to the correct dimensions on a foam mat, and leave it to dry completely. Acrylic yarn responds better to steam blocking with an iron held a few centimeters above the surface rather than wet blocking.
Does hook size affect curling?
Absolutely. A hook that is too small for your yarn compresses the stitches, which causes the fabric to cup and curl. Try sizing up one or two hook sizes. The finished fabric should feel soft and have natural drape rather than feeling stiff or papery. Always compare your hook to the recommended size on your yarn label as a starting point.
Why is my crochet curling at the bottom edge only?
A tight foundation chain is almost always the cause. The chain contracts more than the rest of the fabric, pulling the bottom edge inward. Fix it by chaining loosely, using a hook one size larger just for the foundation chain, or switching to a foundation single crochet or foundation double crochet which are stretchier by design.
Can the type of yarn cause curling?
Yes. Stiff, tightly plied yarns — certain cotton blends in particular — have little natural drape, which amplifies any tension or stitch-pattern issues and can produce curl even with correct technique. Choosing a softer, more flexible yarn for flat stitch patterns makes a noticeable difference. Save tighter cottons for amigurumi, where firm fabric is actually desirable.
Why does my crochet curl even when I follow the pattern exactly?
Patterns are written at a specific gauge using the designer's personal tension. If your tension is tighter than theirs, your piece will be stiffer and more prone to curling even with the correct hook size and stitch count. Always work a gauge swatch before starting, and adjust your hook size until your swatch matches the pattern's stated gauge.
How do I stop my amigurumi from curling?
Amigurumi worked in continuous spiral rounds very rarely curls because the round structure distributes tension evenly in all directions. If you notice the opening edge of an amigurumi piece curling outward, your tension may be loosening toward the end of the piece. Work the final rows more firmly, or use a slightly smaller hook for the last few rounds to keep the edge tidy.
Is curling a sign I need to start over?
Not usually. First try the fixes in this article — relax your tension, size up your hook, block the piece, or add a stabilizing border. Only frog and restart if the curl is so severe that no amount of blocking can flatten it, or if your gauge is so far off that the finished size will be wrong. Most curling issues can be solved without losing your progress.