How to change colors in crochet — a complete tutorial
Master every color-swap technique — from simple yarn joins to seamless mid-stitch changes — so your finished piece looks clean, professional, and exactly the way you imagined it.

Color changes are one of those crochet skills that look intimidating until the moment they click — and then you wonder why you ever worried. Whether you want bold stripes on a blanket, subtle color shifts in an amigurumi, or intricate colorwork on a bag, this tutorial walks you through every method step by step.
Why the "last yarn-over" rule changes everything
The single most important concept in color changing — and the one that makes every technique make sense.
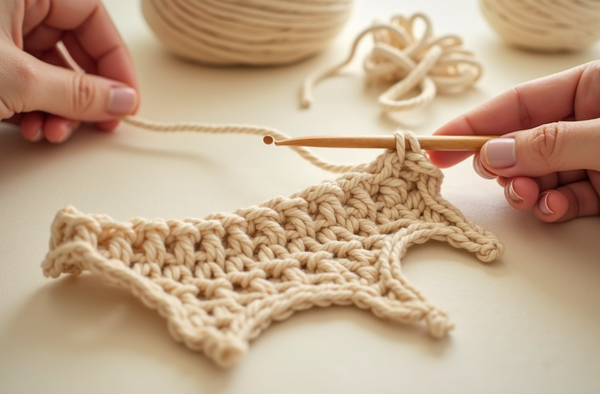
Every crochet stitch ends with a final yarn-over-and-pull-through that closes the stitch. That last pull is your color-change moment. If you pull through with the new color, the top of the stitch — the two loops that form the V you work into on the next row — will be the new color. Do it a stitch too late and you get a messy half-and-half top loop. Do it at exactly the right moment and the transition is invisible.
For a single crochet: insert hook, pull up a loop (two loops on hook), then on the final yarn-over pull through both loops with the new color. For a double crochet: work until two loops remain on the hook after the second yarn-over pull-through, then complete with the new color. The same principle applies to half double crochet, treble, and beyond.
Changing colors at the end of a row
Row-end color changes are the most beginner-friendly because you have plenty of yarn-tail to work with. Follow these steps:
- Work across the row until one stitch remains.
- Begin that last stitch but stop at the final yarn-over.
- Drop the current color to the back of your work.
- Pick up the new color, leaving a 6-inch tail, and complete the stitch.
- Chain the turning chain in the new color.
- Weave in both tails as you go, or save them for the end.
If you plan to use a color only for one or two rows and then return to it, do not cut — simply carry it loosely up the side of your work. This saves you from weaving in dozens of ends on a striped blanket.
Changing colors mid-row (intarsia and tapestry crochet)
Mid-row color changes open the door to colorwork patterns, geometric designs, and character-themed pieces. There are two main approaches:
Intarsia: Each color block uses its own separate yarn supply (a small bobbin or butterfly). When you reach the color boundary, drop the old color and pick up the new one, twisting the two strands once around each other at the back to prevent a gap. This method keeps the back of your work clean and works well for large color blocks.
Tapestry crochet: Here you carry all non-working colors along inside your stitches by crocheting over them. The carried yarn is hidden inside each stitch. This technique is popular for granny square bags and geometric designs because the fabric stays tidy on both sides — ideal for projects where the wrong side shows.
Learning to count your stitches and rows accurately becomes especially important once you start colorwork, since every color change depends on hitting the right stitch position.
Joining a new ball of the same color
Running out of yarn mid-project isn't quite a color change, but the technique is identical. Use the last-yarn-over rule to introduce the new ball exactly where the old one ends. Leave tails of at least 6 inches on both ends, and weave them in the same direction as your stitches for an invisible join. Avoid tying knots — they can work loose over time and create bumps in the fabric.
"Color is where your project stops being practice and starts being yours. Once you know how to swap yarns, the whole color wheel becomes your palette."— Ava, MrsCrochetWorld
Patterns perfect for practicing color changes
These beginner-friendly designs give you a real-world canvas for every technique in this tutorial.

9 Modern Crochet Bag Patterns Bundle
Color-change practiceNine granny-square bag designs in one download — each one uses color changes to create its signature look. Start with the two-color tote and work your way up to the more complex grid designs. A fantastic way to build confidence with granny square techniques while making something genuinely useful.

50 No-Sew Amigurumi Patterns Bundle
Color joins in the roundColor changes in amigurumi happen in the round rather than in rows — a slightly different rhythm that this bundle helps you master. Fifty adorable characters, each built with clean color joins at belly patches, facial features, and body stripes. Pair it with our guide on crocheting in the round for the smoothest results.

9-in-1 Flower Crochet Pattern Bundle
Short color segmentsFlower patterns are brilliant for practicing short color segments — a few rounds in green for the stem, a pop of yellow for the center, then petals in any shade you like. This bundle covers roses, tulips, irises, and more. Each project is small enough to finish quickly, so you get lots of color-change repetitions in a single evening.
Six things to know before your first color change
Small habits that save big headaches when you're working with multiple yarns.
Match your yarn weight
Always use the same weight for both colors in one project. Mixing a bulky with a worsted creates uneven stitches and unpredictable tension at the join line.
Leave 6-inch tails
Shorter tails slip out when you weave in ends. Six inches gives you enough length to secure the yarn with a tapestry needle without the tail escaping.
Carry colors up the side
For stripe patterns, don't cut a color every time you pause it. Carry it loosely up the edge — it hides in the seam and eliminates half your ends to weave in.
Check tension after joining
Many crocheters tighten up when introducing a new yarn. Work the first few stitches in the new color slightly looser than usual, then check your tension against a gauge swatch.
Use stitch markers at color boundaries
Place a locking stitch marker at the first and last stitch of each color section before you begin. This way you never lose your place when juggling bobbins mid-row.
Ready for more colorwork skills?
Our complete beginner guide covers every foundational skill — from your first slip knot to reading a pattern with color symbols — all in one place.
Quick tips for invisible color-change joins
- Weave in the same direction as your stitches. Running a tail horizontally through vertical stitch legs creates a bump; weaving diagonally with the stitch grain makes it disappear.
- Avoid the slip-knot join. Tying old and new yarns together before starting looks neat on the spool but creates a knot that can show on the right side — use the last-yarn-over method instead.
- Test your color on a swatch first. Some dye lots bleed when blocked; a quick soak of the swatch tells you whether you need to pre-wash your yarn before crocheting.
- Go up a hook size for stranded colorwork. Carrying a second strand inside stitches tightens the fabric; a slightly larger hook compensates and keeps your project the right size.
- Use a yarn guide or bobbin for multiple colors. Bobbins prevent tangles when you're working intarsia with four or more color sections. Small binder clips work just as well in a pinch.
- Block your finished piece. Blocking evens out color-join tension differences that are visible in the unblocked fabric but invisible once the piece dries flat.
Try a color-change pattern today
The best way to learn color changes is to pick a pattern you love and dive in. Browse our free patterns for a zero-risk starting point, or explore our beginner collection for step-by-step projects that walk you through every color swap.
Get a free pattern Shop beginner patternsFrequently asked questions
When exactly do I switch to the new color?
Switch on the very last yarn-over of your current stitch. For a single crochet, that means you insert the hook, pull up a loop (two loops on hook), then complete the stitch by pulling through both loops with the new color. For a double crochet, complete all yarn-overs until two loops remain, then finish with the new yarn. The top of the finished stitch will be the new color, creating a clean transition.
Do I cut the old yarn every time I change colors?
Not necessarily. If you are working stripes and will return to the old color within a few rows, simply drop it and carry it loosely up the side of your work. Only cut the yarn if you are done with that color entirely or if carrying it would create too much bulk or tension across a long stretch.
How do I prevent a gap or hole at the color-change point?
The most common cause of gaps is loosening your tension when you pick up the new yarn. Keep a firm (but not tight) grip on the new color as you complete the first stitch. For intarsia color changes mid-row, twist the two yarn strands once around each other at the back of the work before continuing — this locks the yarns together and closes any potential gap.
What is the difference between intarsia and tapestry crochet?
In intarsia each color section uses its own separate yarn supply, and unused colors hang at the back without being carried inside stitches. This creates a lighter, neater back but requires managing multiple bobbins. In tapestry crochet you crochet over non-working strands, encasing them inside each stitch. The back looks tidier in thin strips but adds bulk to the fabric. Intarsia suits large color blocks; tapestry suits detailed, small-repeat colorwork.
How do I keep the back of my colorwork looking neat?
For tapestry crochet, make sure you are consistently crocheting over the carried yarn with even tension so the floats do not show through to the right side. For intarsia, weave in your ends as you go using a tapestry needle and work them in the same diagonal direction as the stitch grain so they are completely invisible. Blocking the finished piece also helps even out any texture differences on the back.
Can I change colors in amigurumi worked in the round?
Yes, and it works the same way — switch on the last yarn-over of the stitch before your intended color change. The only difference is that you are working in a continuous spiral rather than in rows, so your color join may sit slightly offset compared to a flat project. Plan your color changes one stitch before the position you want so the visible transition lands in the right spot.
How do I weave in the ends from a color change so they do not come loose?
Thread the tail onto a tapestry needle and weave it diagonally through the back bumps of stitches for at least 1.5 to 2 inches, changing direction once or twice to lock it in. Avoid weaving in a straight horizontal or vertical line — diagonal weaving with the stitch grain grips the fibers better. For slippery yarns like cotton, add one small loop around a stitch leg before finishing the weave.
Why does my color-change row look uneven or bumpy?
This usually comes down to tension — most people either tighten up when introducing new yarn or leave the first stitch in the new color too loose. Work the first two or three stitches after the color change slightly more deliberately, focusing on consistent hook insertion depth and yarn-over size. Blocking the finished swatch or project evens out most minor tension differences at color joins.