Easy Stegosaurus Crochet Pattern: Your First Dinosaur Amigurumi
Grab your hook and some yarn — this beginner-friendly stegosaurus pattern walks you through every step so you can finish your very first dinosaur plushie with confidence.


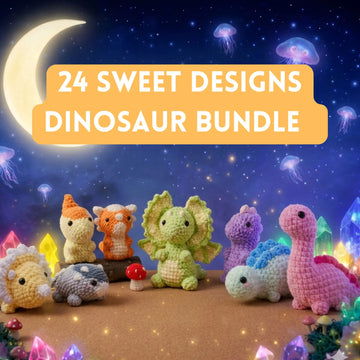
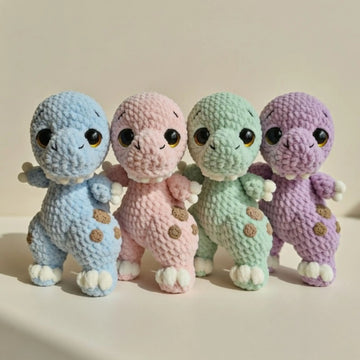
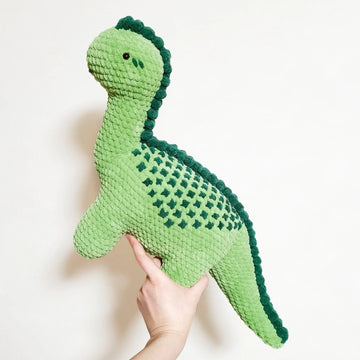
A peek at what you can make
There is something wonderfully satisfying about crocheting a creature that has been extinct for 150 million years and making it look incredibly huggable. The stegosaurus — with its trademark back plates and friendly rounded body — translates beautifully into amigurumi, and this pattern is designed from the ground up so that beginners can finish it in a single weekend session.
Why the stegosaurus is perfect for beginner amigurumi
Simple shapes, big results — here is why this dino is the ideal first project.
Most amigurumi animals involve a lot of fiddly tiny parts — tails, ears, paws — that need sewing. The stegosaurus keeps that complexity manageable. The body is one large oval worked in continuous rounds, the legs are four identical short cylinders, and the iconic back plates are flat triangles that lie naturally along the spine once stuffed. You end up with a recognisable, characterful toy without tackling any advanced techniques.
If you have already read through the complete beginner's guide to amigurumi and feel comfortable with magic rings, you are more than ready for this project. And if you are still nervous, the pattern PDF includes step-by-step photos for every major stage.
Materials you will need
You do not need anything fancy. Here is what the pattern calls for:
- Yarn: worsted weight (category 4) in your main colour (we love sage green or mint), a contrasting colour for the back plates, and a tiny amount of cream or white for the belly.
- Hook: 3.5 mm (US E/4). A slightly smaller hook than the yarn label suggests keeps your fabric tight so the stuffing does not show through. See our full crochet hook sizes chart if you are unsure which hook you own.
- Safety eyes: 9 mm or 12 mm black safety eyes, 2 pieces. Our guide on adding safety eyes to amigurumi covers placement and locking washers.
- Polyfill stuffing: a small bag is enough for this size.
- Yarn needle and scissors.
Not sure which yarn brand to reach for? Our article on the best yarn for amigurumi compares cotton vs acrylic so you can make a confident choice.
Key techniques used in this pattern
The stegosaurus pattern uses only a handful of skills. If any of these are new to you, click through to the linked tutorials before you cast on:
- Magic ring — every piece starts with one.
- Single crochet (sc) — the only stitch used throughout the body.
- Increase (2 sc in same stitch) and decrease (sc2tog) — for shaping. See our increases and decreases guide for amigurumi.
- Crocheting in continuous rounds with a stitch marker.
- Stuffing amigurumi — knowing how much fill to use makes a huge difference in the final shape.
- Sewing parts together — attaching legs and plates cleanly.
"Every crocheter I know has a soft spot for their first amigurumi — make yours a stegosaurus and you will never look at a yarn stash the same way again." — Ava, MrsCrochetWorld
Patterns to pair with your stegosaurus
Once you finish your stego, these patterns make a perfect prehistoric (and not-so-prehistoric) family.
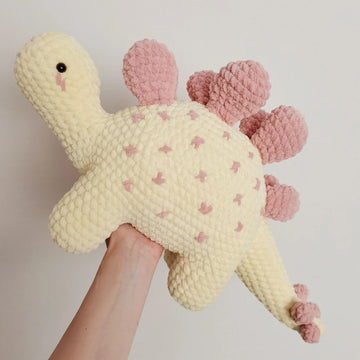
Stegosaurus Crochet Pattern PDF
Beginner · Low-SewThis is the exact pattern this article is built around — a low-sew, photo-guided PDF that takes you from magic ring to finished dinosaur. It is a great first amigurumi and doubles as a gift for any kid who loves dinosaurs. Pair it with the T-Rex for a full beginner amigurumi collection.
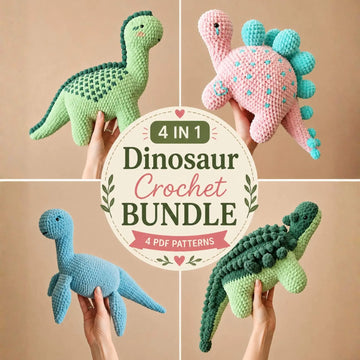
Dinosaur Crochet Pattern Bundle — 4 in 1
Bundle · Best ValueWhy stop at one dinosaur? This bundle adds three more prehistoric friends to your collection at a single bundle price. All four patterns share the same skill level and technique set, so finishing one makes the next feel even faster. A wonderful gift idea — check our crochet gift ideas roundup for more inspiration.

50 No-Sew Amigurumi Patterns Bundle
Mega Bundle · No-SewOnce you have mastered the stegosaurus and want to keep going, this 50-pattern bundle keeps your hook busy for months. Every design uses no-sew techniques, so there is no needle-and-thread finishing — just crochet, stuff, and done. Perfect if you enjoy building a whole plushie menagerie.
Six tips for a great-looking stegosaurus
Small habits that make a big difference in your finished toy.
Go one hook size down
A tighter gauge means cleaner fabric with no gaps for stuffing to peek through. If your yarn label says 5 mm, try 3.5 mm for amigurumi work.
Use a stitch marker always
Working in continuous rounds is easy to lose track of. Move your marker to the first stitch of every new round and you will never miscount again.
Place safety eyes before closing
Insert and lock your safety eyes while you can still reach inside the head. Once the opening is closed, there is no going back without frogging.
Stuff firmly but not tightly
Under-stuffed amigurumi go limp; over-stuffed ones distort. Aim for a firm pillow feel — the body should hold its oval shape without bulging at the seams.
Pin parts before sewing
Use sewing pins to position all four legs and each back plate symmetrically before you sew a single stitch. Step back and check from multiple angles.
New to crochet altogether?
Our complete beginner's guide to crochet covers the very first stitches in plain English — start there, then come back to this pattern.
Common mistakes (and how to avoid them)
- Skipping the magic ring: A chain-4 start leaves a hole at the tip of the head. Use a magic ring and pull it snug before you begin round 1.
- Uneven back plates: Crochet all plates in the same session so your tension stays consistent across them. Blocking each plate flat before sewing also helps them stand up neatly.
- Legs that flop sideways: Pin legs directly beneath the widest part of the belly — not too far forward or back — and sew through several rounds on each side for a secure anchor.
- Gaps in the body fabric: If light shows through your single crochet fabric, your hook may be too large. Check your tension or drop a hook size.
- Yarn tails coming loose: Weave ends in at least 3–4 directions for amigurumi — they get handled a lot more than a blanket. Our guide to weaving in ends shows the best method.
Ready to start your stegosaurus?
Grab the PDF pattern — it includes every stitch count, full-colour step photos, and tips for customising the colour to match any yarn you already own.
Get a free pattern Shop amigurumi patternsFrequently asked questions
Is this stegosaurus crochet pattern really suitable for beginners?
Yes. The pattern uses only single crochet, magic rings, and basic increases and decreases — no special stitches. As long as you can work in continuous rounds and are comfortable with a stitch marker, you can complete this project.
How long does it take to crochet a stegosaurus amigurumi?
Most crocheters finish the stegosaurus in 4 to 8 hours depending on their speed and experience. Spreading it across two evenings is a very comfortable pace for a first amigurumi.
What yarn weight works best for this pattern?
Worsted weight (category 4) gives the most forgiving gauge for beginners and produces a finished stegosaurus about 6 inches long. You can use DK weight with a smaller hook for a miniature version, or bulky yarn for a larger, squishier toy.
Do I need to sew many pieces together?
The stegosaurus is designed as a low-sew pattern. The main body and head are worked as one continuous piece; you only need to sew on the four legs and the back plates. Clear placement guides in the PDF make this straightforward.
Can I use cotton yarn instead of acrylic?
Yes, cotton works well for amigurumi because it creates a firm, tight fabric with very little stretch. It does not have the same springiness as acrylic, so stuff slightly more firmly. Amigurumi cotton and mercerised cotton are both good choices.
What size safety eyes should I use for the stegosaurus?
The pattern recommends 9 mm or 12 mm black safety eyes. Larger eyes give a rounder, more cartoonish expression; smaller eyes look more realistic. Always lock safety eyes in place before closing any opening in the body.
Is the finished stegosaurus safe for young children?
For children under three years old, embroider the eyes in black yarn rather than using safety eyes, as small parts pose a choking risk even when locked. For older children, properly secured safety eyes with locking washers are durable for regular play.
Can I sell finished stegosaurus toys made from this pattern?
Yes. MrsCrochetWorld patterns include a small-batch maker's license that allows you to sell finished handmade toys. Please credit MrsCrochetWorld as the pattern designer. Our article on selling items made from a crochet pattern explains the details.