Sloth Crochet Pattern: The Cuddly Amigurumi Sloth That Stole My Heart
Long arms, a sleepy smile and a soft plush body: here is everything you need to know to crochet an amigurumi sloth you will want to hug every day.

There is something irresistibly charming about a sloth. Maybe it is the sleepy eyes, the long arms, or the calm little smile that seems to say "I am exactly where I want to be." Whatever it is, the moment I finished my first plush sloth amigurumi, I knew it deserved its own spotlight.
Why a Sloth Makes a Wonderful Amigurumi
Simple shapes, big personality: sloths are made for crochet.
In nature, sloths are famous for doing everything slowly. They spend much of their lives hanging from branches, holding on with long arms and curved claws, and they always seem to wear a relaxed half-smile. Those same features translate beautifully into yarn. The body is a soft oval, the arms and legs are simple tubes, and the face comes alive with a pair of eyes, a contrast patch and a few well-placed shaping stitches.
If you have already worked through an easy amigurumi pattern for beginners, a sloth is a lovely next step. The long limbs give it instant character, and the slouchy posture is forgiving: a slightly uneven arm just looks like your sloth is reaching for the next branch.
What You Need Before You Start
Gather your supplies before you make your first magic ring and you will breeze through the project without interruptions.
- Yarn: A soft plush (chenille-style) yarn gives the cuddliest, fur-like result, plus a little regular yarn for the face details. Plush yarn hides stitches; smooth acrylic or cotton is easier to count. Unsure which fiber to pick? Read our guide to the best yarn for amigurumi.
- Hook: Choose a hook that gives a dense fabric with your yarn, often a size or two smaller than the yarn label suggests, so the stuffing stays hidden.
- Safety eyes or embroidery yarn: Safety eyes give a bright, expressive look; embroidered eyes are the safer choice for babies and toddlers. Learn how to place them in our safety eyes tutorial.
- Polyester fiberfill: Enough to make the head and body firm but still squeezable. See how to stuff amigurumi for smooth, even results.
- Strong thread, a sewing needle, scissors and a stitch marker. The thread is for facial shaping, the needle for assembly, and the marker keeps your rounds honest.
Key Stitches You Will Use
A sloth relies on the core amigurumi toolkit: single crochet, increases and decreases, worked in continuous rounds. If you need a refresher on shaping, our guide on how to increase and decrease in amigurumi covers it all.
The trickiest part, especially with plush yarn, is keeping an accurate stitch count. Place a stitch marker in the first stitch of every round and count before you move on. If counting is a struggle, our article on how to count crochet stitches and rows will help.
How a Sloth Amigurumi Comes Together
Most sloth designs follow the same order, and knowing it makes any pattern easier to read:
- Head: worked from a magic ring outward, increased to its widest point and then decreased. The eyes go in before the head is closed.
- Body: a soft oval, often a little wider at the bottom so your sloth sits well.
- Arms and legs: long, narrow tubes, stuffed lightly so they can bend and wrap around a shoulder or a bedpost.
- Face: a contrast patch or eye areas, plus a little sculpting with strong thread to give the face depth.
- Assembly and finishing: pin every piece first, check the pose from all sides, then sew the parts on and weave in the ends.
"A sloth never rushes, and neither should you. Every slow stitch is a stitch made with intention."— Ava, MrsCrochetWorld
Patterns to Crochet Alongside Your Sloth
Once you catch the amigurumi bug, these patterns and bundles are the perfect next adventure.

Sloth Crochet Pattern — Cute Amigurumi Plush Toy PDF
Intermediate PDFThe star of this article. This step-by-step PDF covers the body, head, arms, legs, facial shaping, assembly and finishing touches, with clear stitch counts for every round. Worked in plush yarn with a 4.0 mm hook and 14 mm safety eyes, your sloth grows to about 22 cm (8.7 in). It is an intermediate project in US crochet terms, with long arms and legs made for hugging.
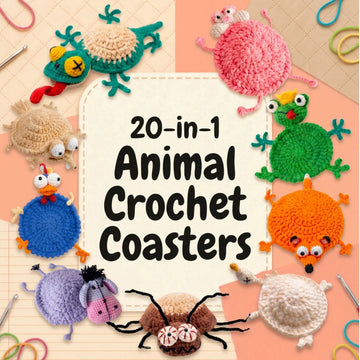
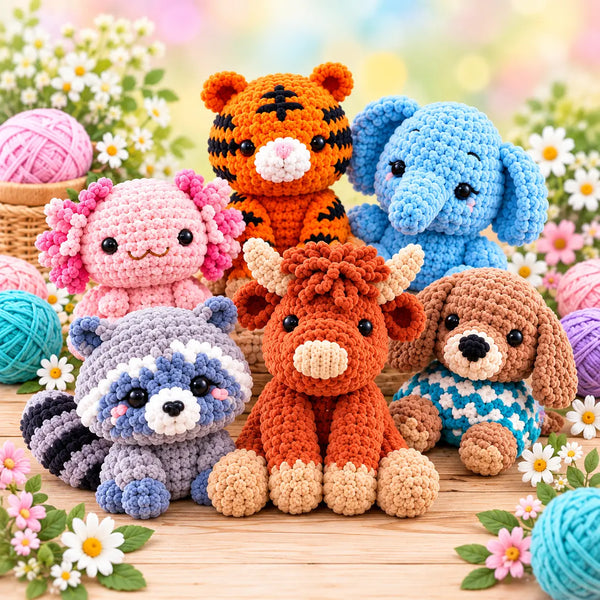
20-in-1 Cuddly Animals Crochet Pattern Bundle
20 Animal PatternsWant to give your sloth some friends? This bundle collects 20 amigurumi animal patterns in one digital PDF download, with step-by-step instructions in US crochet terms. The animals shown in the product photos include a highland cow, platypus, capybara, raccoon, tiger, unicorn, elephant and hippo. Browse more in our full amigurumi collection.

50-in-1 No-Sew Amigurumi Bundle — Crochet Pattern PDF
No-SewIf assembly is your least favorite part, this bundle skips the sewing: 50+ mini plushies and characters, Christmas accessories such as hats and scarves, and small plush keychains of about 8–10 cm (3–4 in) in one 240-page PDF eBook, worked in plush chenille yarn with a 3.75 mm hook and written in US crochet terms with clear photos and row-by-row guidance. Learn more in our deep-dive on no-sew amigurumi techniques.
Six Secrets of a Sloth That Looks Great
From the eyes to the stuffing, these details turn a good sloth into a great one.
Safety Eyes or Embroidered Eyes?
Safety eyes look crisp and are fixed with a washer on the inside, so they must go in before you close the head. For babies and toddlers, embroider the eyes with yarn instead: a satin stitch oval or a few French knots stay expressive and remove the small-parts risk.
Colors With Character
Classic sloth shades are warm browns and beige with a lighter face patch and darker eye areas. Pastels or a soft gray work just as well for a nursery. Crochet the details in a smooth contrast yarn so the face reads clearly against the plush.
Stuffing in Layers
Add small tufts of fiberfill as you go instead of one big wad at the end. Stuff the head firmly so it holds its shape, the body a little softer, and the long arms only lightly so they can bend and hug.
Shaping the Face
A strong thread pulled between two points on the head creates gentle indents around the eyes. This tiny step adds depth and brings the sleepy, contented expression of a sloth to life.
Gifting Ideas
A plush sloth makes a sweet baby shower or birthday gift, cozy nursery decor, or a "slow down" present for a friend who needs a break. Its long arms can hug a shelf edge or a bedpost.
Ready for Your Next Project?
Once your sloth is finished, keep the momentum going. Our complete beginner guide to crochet will help you level up your skills one stitch at a time.
Common Mistakes (and How to Avoid Them)
- Losing count in plush yarn. Plush stitches are hard to see, so mark the first stitch of every round and count by feeling for the loops.
- Working too loosely. If the white fiberfill peeks through, go down a hook size. Tighter fabric looks more polished and keeps plush loops from pulling out.
- Forgetting the eyes. Once the head is closed, adding or repositioning safety eyes is nearly impossible. Our safety eyes guide has exact placement tips.
- Overstuffing the limbs. Stiff arms stick straight out. Light stuffing keeps them floppy and huggable.
- Sewing before pinning. Pin the arms and legs in place, check that both sides match, then sew. Uneven limbs are the most common reason a finished sloth looks lopsided.
- Loose ends. Run each tail through several stitches in different directions so it stays hidden, even in plush yarn. Our guide to weaving in ends shows the neatest technique.
Ready to Meet Your New Favorite Plushie?
Grab the Sloth Crochet Pattern and start crocheting today, or warm up first with our beginner crochet patterns.
Get the sloth patternShop amigurumi patternsFrequently asked questions
Is a crochet sloth suitable for beginners?
A sloth uses only single crochet, increases and decreases in continuous rounds, so the stitches are beginner-level. Our Sloth Crochet Pattern is rated intermediate because of the plush yarn, facial shaping and assembly. If you are brand new, start with our beginner crochet guide and finish one or two small amigurumi first.
What yarn and hook do I need for the sloth pattern?
The Sloth Crochet Pattern is worked in plush yarn (approx. 100 g / 120 m) with a 4.0 mm hook and 14 mm safety eyes. You also need yarn for details, polyester fiberfill, a sewing needle, scissors and strong thread for shaping. A complete materials list is included in the PDF.
How big is the finished sloth?
Made as written, the sloth grows to about 22 cm (8.7 in). The exact size depends on your yarn, your hook size and your personal tension.
Can I make the sloth without safety eyes?
Yes. If the toy is meant for a baby or toddler, embroider the eyes with black yarn instead of using plastic safety eyes. A satin stitch oval or a few French knots look just as expressive, and there are no small parts that could come loose.
How do I keep plush yarn from showing gaps?
Work with a snug, even tension and keep your hook small enough for a dense fabric. Pull each loop fully closed and avoid tugging on finished stitches, which can make plush loops slip out. If the fiberfill still shows, try a hook one size smaller.
Is the sloth pattern written in US or UK crochet terms?
The pattern is written in English using US crochet terms. Remember that a US single crochet is called a double crochet in UK terms. Our guide on how to read amigurumi patterns explains the most common abbreviations.
Can I sell the sloths I make?
That depends on each pattern's terms, so check what the designer allows before you sell finished pieces. Reselling or sharing the PDF itself is a different matter. Our article on selling items made from crochet patterns explains what is typically permitted.
Where can I find more animal amigurumi patterns?
Our amigurumi patterns collection gathers our amigurumi designs in one place, and the 20-in-1 Cuddly Animals Crochet Pattern Bundle adds 20 animal patterns at once. New to the craft? Our complete beginner guide to amigurumi is a great place to start.