How to seam crochet: mattress stitch vs whipstitch
Learn the two most popular crochet seaming methods — mattress stitch and whipstitch — so every join you make is strong, tidy, and exactly right for your project.

You've finished all your crocheted pieces — the panels, the squares, the little animal parts — and now you're staring at them wondering how on earth to stitch them together neatly. Seaming is one of those skills that separates a project that looks homemade from one that looks handcrafted. The good news? Once you understand just two techniques, you'll be ready for almost any pattern you pick up.
What seaming actually does in crochet
Before you pick up a yarn needle, it helps to understand why the seam choice matters.
When you crochet flat pieces — granny squares, garment panels, bag sides — you need to join them firmly enough to hold the finished shape but flexibly enough that the fabric can still drape or stretch. A seam that's too tight puckers; one that's too loose gaps. The stitch you choose also affects how thick the join is, how it looks from the outside, and how reversible the item is. If you're still building core skills, the beginner crochet guide covers the foundation stitches you'll rely on before seaming.
The whipstitch seam: quick and characterful
The whipstitch is the go-to join for most beginners because it's fast, forgiving, and easy to unpick if something goes wrong.
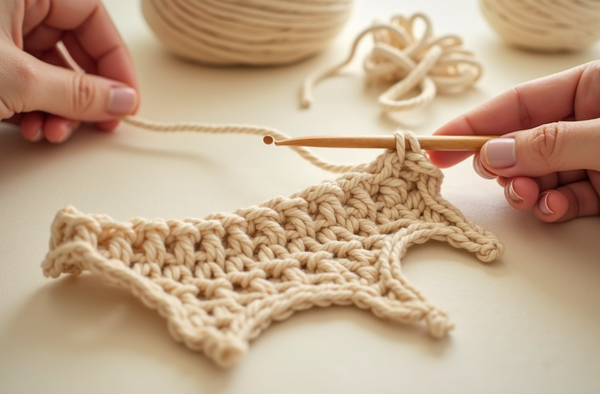
To work a whipstitch, hold your two pieces together with right sides facing (or wrong sides facing if you want the ridge to show on the outside as a design detail). Thread a yarn needle with a length of matching or contrasting yarn. Working from front to back, push the needle through the corresponding stitches or edge loops of both pieces, then loop the yarn over the edge and repeat — always entering from the same side. Space your stitches evenly, one per stitch or row end, and keep your tension consistent.
The whipstitch creates a visible ridge on the right side when pieces are joined wrong-sides-together, which many crocheters use deliberately on granny-square blankets and bags for a bold, boho look. When pieces are joined right-sides-together, the ridge sits on the inside. It works especially well on granny squares because the corner-to-corner alignment is easy to check as you go. The downside: the seam adds slight bulk, and if your tension is uneven it will show.
The mattress stitch seam: invisible from the right side
Mattress stitch (sometimes called ladder stitch or invisible seam) is the technique professionals reach for when the join must disappear.
Lay your pieces flat, right sides up, with the edges touching. Thread a yarn needle and anchor the yarn at the bottom of one piece. Working in a zigzag pattern, pick up one or two bars from the edge of one piece, then cross to the other piece and pick up one or two bars from its edge. Pull the yarn through gently and the two pieces draw together, hiding the seam between them. Every few stitches, pull the working yarn snug — the edges will roll inward and the seam becomes nearly invisible.
Mattress stitch takes a little more concentration than whipstitch, especially on single-crochet fabric where the bars can be hard to see. Good lighting and a blunt-tipped tapestry needle make a big difference. This technique is the standard choice for joining amigurumi parts, assembling sweater panels, and any project where you want the seam to genuinely vanish. It's also the preferred method when joining pieces with matching stitch counts on both sides.
"A beautifully seamed project is like a well-made gift — the care you put in doesn't shout, but it's felt the moment someone holds it." — Ava, MrsCrochetWorld
Patterns that put your seaming skills to work
These fan-favorite designs from MrsCrochetWorld are perfect for practising both seaming techniques on real projects.

50 No-Sew Amigurumi Bundle
No sewing requiredIf seaming makes you nervous, this bundle is designed for you — every character is constructed so the parts connect without a single needle join. It's a brilliant way to build confidence before tackling traditional seams. Browse more ideas in our amigurumi patterns collection.

9 Modern Crochet Bag Patterns Bundle
Whipstitch practiceBags are the ideal canvas for practising whipstitch joins — the seam often becomes a bold design detail on structured totes. This bundle includes nine bag designs that use panel-to-panel joining, giving you plenty of chances to perfect your tension. Check out more in our crochet bags collection.

Care Bears Amigurumi Pattern — 4 in 1
Mattress stitch focusAdorable stuffed bear bodies demand invisible joins — any visible seam breaks the illusion of a smooth, huggable toy. These four Care Bear-inspired patterns are ideal for practising mattress stitch on arms, legs, and ear attachments. Read our full guide on sewing amigurumi parts alongside this pattern for best results.
When to use which seam — at a glance
Six situations where one method clearly wins over the other.
Granny square blankets
Whipstitch is traditional here. Worked wrong-sides-together, it creates a proud ridge that frames each square beautifully and adds texture to the finished piece.
Amigurumi parts
Mattress stitch every time. Attaching ears, limbs, and tails invisibly keeps the character looking polished. Read more in the amigurumi parts guide.
Structured bags
Either method works, but whipstitch with contrasting yarn can be a deliberate style choice that echoes the bag's color palette and adds a handmade charm.
Garments and panels
Mattress stitch is the professional standard for joining garment pieces. The seam lies flat, the join is flexible, and the right side looks seamless. Perfect for sweaters, cardigans, and shawls.
Quick gift projects
When time matters, whipstitch wins — it's fast to work and easy to correct. Ideal for last-minute crochet gifts that still need to look thoughtful.
New to joining pieces?
Start with our complete beginner guide to crochet to understand the basic stitches and tools before attempting your first seam — it makes everything click faster.
Ava's top tips for neater seams every time
- Block first. Blocking your pieces before seaming makes edges straighter and stitch counts easier to match. This is especially helpful for granny squares and lace.
- Use the project yarn. Seaming with the same yarn you crocheted with helps the join blend in. If your project yarn is chunky or fuzzy, use a smooth strand of the same fiber weight instead — it's easier to pull through without snagging.
- Pin or clip first. Use locking stitch markers or small clips to hold the pieces in alignment before you start sewing. Checking that your stitch counts match at regular intervals prevents a twisted or uneven seam.
- Keep consistent tension. Pull your seaming yarn snug but not tight after every few stitches. A seam that's worked too tightly will pucker the fabric; too loosely and it will gap. Aim for a tension that mirrors the body of your crochet.
- Leave a long tail. Cut at least 18 inches (45 cm) of yarn for seaming — running out mid-join and having to add a new length creates a weak spot. Weave in both ends securely when you finish.
- Practice on swatches. If you're new to mattress stitch, seam two small practice squares before working on your actual project. Five minutes of practice removes most of the uncertainty. See how to fix crochet mistakes if a seam goes wrong.
Ready to stitch it all together?
Find the perfect pattern to put your new seaming skills into practice — from no-sew amigurumi to granny-square bags, there's a project waiting for every skill level.
Get a free pattern Shop beginner patternsFrequently asked questions
What is the difference between whipstitch and mattress stitch in crochet?
Whipstitch loops the yarn over the edge of both pieces in a spiral motion and creates a visible ridge on the right side when pieces are joined wrong-sides-together. Mattress stitch (or invisible seam) zigzags through the edge bars of each piece and pulls them together so the seam is nearly invisible from the right side. Whipstitch is faster; mattress stitch looks more polished on garments and stuffed animals.
Which seaming method is best for amigurumi?
Mattress stitch is the standard choice for attaching amigurumi parts such as ears, arms, and legs. Because the seam is invisible from the right side, the finished character looks smooth and professional. Whipstitch can be used but tends to leave a visible ridge that breaks the rounded, seamless look most amigurumi aim for.
Should I use whipstitch or mattress stitch to join granny squares?
Both work well, and the choice comes down to aesthetics. Whipstitch joined wrong-sides-together creates a raised ridge between squares that many crocheters love as a design feature on blankets and bags. Mattress stitch creates a flatter, less visible join if you prefer a seamless look. Try both on a couple of spare squares to see which you prefer before committing to a large project.
What type of needle do I use for seaming crochet?
Use a blunt-tipped tapestry needle (also called a yarn needle or darning needle). The blunt tip glides between stitches rather than splitting the yarn. For most yarn weights a size 13 to 18 tapestry needle works well. For very bulky yarn, look for a large-eye plastic needle. Avoid sharp embroidery needles — they tend to split the plies of your yarn.
How do I keep my seam from puckering?
Puckering usually comes from seaming tension that is too tight. After every three to five stitches, lay your work flat and gently ease the fabric smooth before pulling the yarn completely snug. Also make sure you are entering the same part of each stitch consistently — going through both loops on one piece and only one loop on the other will create an uneven join that puckers. Blocking your pieces flat before seaming also helps a lot.
Can I seam crochet pieces with a different color yarn?
Yes — seaming with a contrasting color is a popular design choice, especially on granny square blankets and tote bags where the whipstitch ridge becomes a decorative outline. If you want the seam to blend in, use a yarn that matches the dominant color of your project, or use a single strand of smooth yarn in a similar shade even if your project yarn is textured.
Do I need to weave in ends after seaming?
Yes, always. After completing your seam, thread each tail onto your tapestry needle and weave it back and forth through several stitches on the wrong side of the fabric, changing direction at least once to lock it in place. Trim any excess close to the fabric. Unsecured ends can work loose with washing or wear, especially on items like bags that get regular use.
What is the slip stitch join — is it different from whipstitch?
Yes, the slip stitch join is a third option that uses your crochet hook rather than a tapestry needle. You hold the pieces together, insert the hook through both layers, and work a slip stitch across the seam. It creates a firm, slightly raised ridge similar to whipstitch but worked with your hook. It is faster than needle seaming for long straight edges and is often used to join granny squares in continuous rows. Whipstitch and mattress stitch are done with a needle after the crochet is finished.