Monster doll crochet: the complete guide to cute collectible amigurumi
Design your own little monster, give it a toothy grin, fluffy fur, ears and outfits, then shrink it to keychain size: everything you need to crochet a whole collectible crew.

Some crochet projects are about precision. Monster dolls are about personality. A round little body, a pair of ears, a toothy grin and a coat of fluffy fur, and suddenly you are holding a creature nobody else in the world owns. Make one and you will want a whole crew. This guide shows you how to design your own monster, choose your materials, make the grin, tame fur yarn, and then dress, shrink and gift your monsters.
Why little monster dolls are so much fun to crochet
No original to copy and no single right look: a monster can be anything you imagine.
Most amigurumi are measured against something real: a bear needs bear ears, and if the proportions are off, everyone notices. A monster has no rulebook. One horn or three, round ears or floppy ones, one big eye or two tiny ones: every choice is right as long as it looks cute and holds together.
Technically, a monster is straightforward amigurumi: balls and tubes worked in spirals, small shaped ears or horns, and a face made with embroidery or felt. If you can crochet a basic plushie, you can crochet a monster. New to amigurumi? Read our complete beginner's guide to amigurumi first.
Design your own little monster character
Before you pick up a hook, sketch three or four tiny thumbnails and play with four building blocks:
Silhouette. Start with a ball, an egg, a pear or a bean. A big head on a small body reads as cute, and a one-piece body is the easiest to crochet and stands most steadily. One signature feature. A single horn, oversized round ears, a curly tail, freckles or a third eye: one strong feature beats five small ones. A limited palette. Two or three colors keep a small character readable: a body color, a lighter face patch and a dark yarn for the details. Expression. Wide-set eyes look sweet and sleepy, close-set eyes look cheeky. A small grin low on the face reads as shy; a wide grin right under the eyes looks bold.
Then write everything down: your hook, your yarn and the stitch count of every round, so your second monster matches the first. If round-by-round notation still feels like decoding, our guide on how to read amigurumi patterns explains the shorthand, and our skill level guide helps you judge which details suit your current level.
"A monster doll does not have to look like anything else. It only has to look like it belongs to you."— Ava Collins, MrsCrochetWorld
Materials: hook, yarn, eyes and stuffing
No special supplies needed: a monster is made from the same basic kit as any other amigurumi.
Hook. Amigurumi needs a dense fabric so the stuffing never shows, so use a hook smaller than the yarn label recommends, and go down another size if stuffing still peeks through. Yarn. Smooth cotton or acrylic shows every stitch and is the easiest start. Plush, chenille and fur yarns feel cuddly but hide the stitches. Our comparison of cotton versus acrylic for amigurumi helps you choose. Stuffing. Add polyester fiberfill in small tufts and stuff the neck firmly so the head does not wobble. Notions. A locking stitch marker, a blunt tapestry needle, pins, white and dark felt for a felt grin, and a water-soluble fabric marker.
Safety eyes or embroidered eyes? Safety eyes look crisp and lock with a washer on the inside of the piece, so you place them before you close it; our tutorial on how to add safety eyes shows how to test-fit first, because the washer does not come back off. For babies and young children, embroider the eyes instead: satin stitch ovals or French knots have no small parts that could come loose.
Techniques: body, ears, toothy grin and fluffy fur
Four elements turn a plain ball of crochet into a monster with personality.
The body. Start with a magic ring so the top of the head closes without a hole, then work in continuous spirals. Our guide to crocheting in the round covers the basics, and evenly spaced increases and decreases keep the shape smooth instead of lumpy. Move your stitch marker up every round and check the count.
The ears. Ears are where character shows. Small round ears are mini balls you flatten instead of stuffing. Triangle ears grow from a magic ring with steady increases. Floppy ears are flat ovals left unstuffed so they fall to the side, and horns are short cones stuffed firmly so they stand up. Pin, check from the front and the side, then sew around each base with small, tight stitches.
The toothy grin. With embroidery, sketch the mouth with a water-soluble marker, backstitch it in dark yarn and satin stitch a few chunky white teeth along the line: two little fangs or a single snaggletooth both look charming. With felt, cut a dark mouth shape and small white teeth, layer them and sew them on with tiny stitches. Felt gives crisp, graphic edges, while embroidery looks softer. For children's toys, sew felt on securely instead of relying on glue.
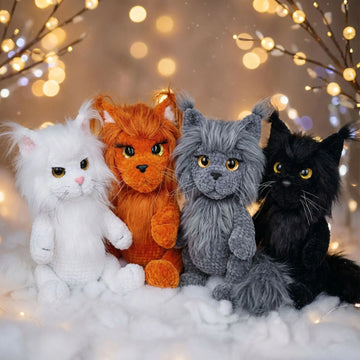
The fluffy fur. Crochet with a fur or eyelash-style yarn, hold a fur yarn together with a smooth one so you can still feel your stitches, or brush finished acrylic pieces with a slicker brush for a soft halo. Fur hides stitches, so count by feel, use a bright stitch marker and keep the shapes simple. Many fur yarns look fluffier on one side of the fabric; if that is the inside, turn the piece inside out before stuffing. Keep the face patch smooth, because eyes vanish in deep fur, and see why amigurumi gets holes if gaps appear.
Choosing colors and the size of your monster
The same pattern makes different sizes depending on your yarn and hook: a thin yarn and a small hook give a palm-sized mini, a thick yarn and a larger hook a cuddle-sized plush. Either way, keep the hook small for the yarn and keep your tension even, especially across color changes.
For color, think contrast: a light face patch on a darker body keeps the grin and eyes readable. Pastels feel sweet, brights feel playful, and a charcoal monster with white teeth looks perfectly spooky for Halloween. For a series, keep one element constant, such as the face patch, and change the body color.
Outfits, keychain minis, collecting and gifting
Outfits. Measure around the body, then crochet simple shapes to fit: a narrow rectangle becomes a scarf, a short tube a skirt and a small dome a hat. A button or a snap makes clothes easy to swap, and seasonal pieces keep your crew fresh all year.
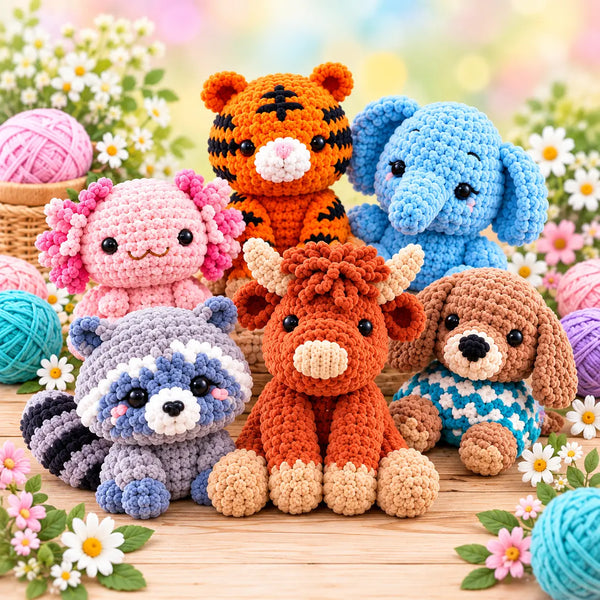
Keychain-size versions. Switch to a thinner yarn and a smaller hook, or reduce the rounds in each piece. Embroider the face, then sew the keyring through several rounds at the top of the head or attach it to a sturdy crocheted loop. Minis make great bag charms, but keychain hardware does not belong in a baby's hands.
Collecting. Design one base body, then make editions: a color run, a seasonal set, a rare version with a secret detail. Sew a tiny name tag to each one, line them up on a shelf and swap minis with your crochet friends.
Gifting. A handmade monster with a name tag and a handwritten care card (spot clean or hand wash, dry flat) is a gift with real personality. Planning to sell? An original character you designed yourself is the best start; if you follow someone else's pattern, read whether you can sell items made from a crochet pattern and check that pattern's terms.
Patterns to practice your monster-making skills
Your monster is your own design. These pattern bundles teach the skills behind it: doll shaping, faces, cute-creepy details, outfits and minis.
6-in-1 Fantasy Amigurumi Bundle
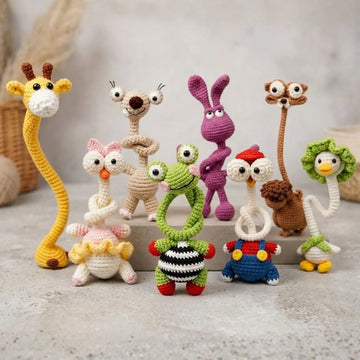
a cast of charactersSix collectible fantasy heroes in one step-by-step PDF, from a brave little adventurer and a wise old wizard to a sharp-eyed archer and a radiant mystical lady. Written in US crochet terms for intermediate crocheters, with detailed photos for every stage and tips for shaping, assembly and finishing: ideal practice for building a cast of figures in one shared style. Prefer a gentler warm-up? See our easy amigurumi favorites.

12-in-1 Princess Crochet Doll Pattern Bundle
12 dolls, 12 looksTwelve fairy-tale princess dolls in one PDF, written in US crochet terms and finishing at about 6–8 inches (15–20 cm) depending on yarn and hook. The patterns cover assembly, hair, dresses and finishing details, with safety eyes or embroidered eyes. Each princess has her own hairstyle and gown color, a lovely lesson in giving dolls on one base their own personality.

Creepy Cute Spiders: 5-in-1 Halloween Amigurumi Bundle
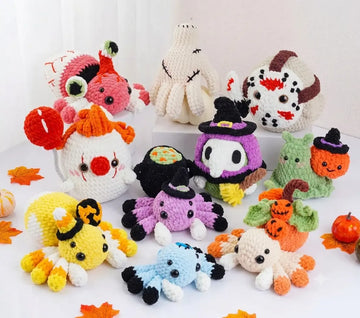
cute meets creepyFive spiders that show how far details can take one base: a round head, a teardrop body and eight chubby legs, turned into a patched-up voodoo doll spider, an eyeball spider, a candy spider, a pumpkin spider and a witch spider with a cauldron body. The 31-page PDF is written in English with US terms for intermediate makers, with step-by-step photos and, for some steps, QR codes linking to video tutorials.

50-in-1 No-Sew Amigurumi Bundle
minis without the sewingA 240-page PDF eBook with 50+ no-sew mini plushies and characters, small plush keychains of about 8–10 cm (3–4 in) and Christmas accessories such as hats and scarves. Worked in plush chenille yarn with a 3.75 mm hook and written in US terms with clear photos and row-by-row guidance, it suits beginners, and fewer seams mean fewer crooked ears.
Skills you'll sharpen on a monster doll
This project is a masterclass disguised as a toy. Here is what you will walk away knowing.
Continuous rounds
Head, body and horns are worked in seamless spirals, the core skill of all amigurumi.
Character design
Thumbnails, one signature feature and round-by-round notes turn you from pattern follower into designer.
Faces in yarn and felt
Grins, fangs, eyebrows and freckles, planned, placed and stitched with a tapestry needle.
Taming fur yarn
Counting by feel, simple shapes and a smooth face patch make even the shaggiest yarn manageable.
Doll clothing
Rectangles, tubes and domes become scarves, skirts and hats, a gentle on-ramp to garment-style crochet.
New to crochet?
Learn every foundational stitch first with our complete beginner's guide to crochet.
Ava's tips: common mistakes and quick fixes
- Stuffing that peeks through. Your hook is too big for the yarn or your tension is too loose. Go down a hook size and pull each loop snug.
- Losing count in fur yarn. Place a bright locking stitch marker every round and count by feel; fur yarn is hard to unravel.
- Snapping the eyes on too early. Safety eye washers do not come back off. Pin the eyes, take a photo and check from several angles first.
- Crooked ears. Pin both ears and look at the head from the front, from the side and in a photo. Cameras catch crooked placement that eyes forgive.
- Under-stuffing. A wobbly neck and a lumpy face mean too little filling. Stuff in small tufts until the piece feels firm but the stitches are not stretched.
- Freehanding the grin. Sketch the mouth line with a water-soluble marker first. Teeth are easy when the map is already there.
Ready to hook your own little monster?
Sketch a character, pick your colors and stitch the creature you have been imagining: your size, your style, your edition of one.
Browse amigurumi patternsShop beginner patternsFrequently asked questions
Is a monster doll hard to crochet?
It sits at the easy end of intermediate. If you can single crochet in the round, increase and decrease, you can make one; the ears and the toothy grin need patience rather than advanced skills.
How do I design my own monster character?
Pick a simple silhouette such as a ball, an egg or a pear, add one signature feature like a horn or big round ears, and stick to two or three colors. Write down the stitch count of every round as you crochet.
What yarn is best for a fluffy monster doll?
Fur or eyelash-style yarn gives the shaggiest look, chenille a soft velvety finish, and cotton or acrylic the clearest stitches. Fur yarn is easier to work when you hold it together with a smooth yarn.
What hook size should I use?
Use a hook smaller than the yarn label recommends, so the fabric is dense enough to hold the stuffing. If stuffing still shows between the stitches, go down another size.
How do I make a toothy grin?
Embroider it or use felt. Backstitch the mouth line in dark yarn and satin stitch a few white teeth along it, or layer a dark felt mouth with small white felt teeth and sew both on.
Should I use safety eyes or embroidered eyes?
Safety eyes look crisp but must go in before you close the piece. For babies, young children and keychain minis, embroidered eyes are the safer choice because there are no small parts.
How do I attach the ears so they stay in place?
Pin both ears, check the head from the front and the side, then sew all the way around each base with small, tight stitches. Leave floppy ears unstuffed and stuff horns firmly.
Can I make a keychain-size version?
Yes. Use a thinner yarn and a smaller hook or fewer rounds, embroider the face and sew the keyring through several rounds at the top of the head. Keychains are not toys for babies.
How do I make outfits for my monster doll?
Measure around the body and crochet simple shapes to fit: a rectangle for a scarf, a tube for a skirt and a small dome for a hat. A button or a snap makes them easy to swap.
Can I sell the monster dolls I make?
If the monster is your own original design, the character is yours. If you follow someone else's pattern, check that pattern's terms and read our guide on selling items made from a crochet pattern first.