How to Crochet a Cylinder: Straight Amigurumi Tubes That Never Flare
The simple no-increase formula that turns wobbly, cone-shaped tubes into clean straight sides for bodies, arms, legs and pots.

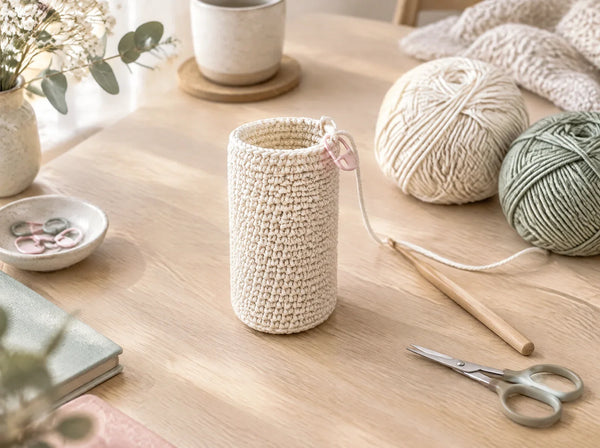
The cylinder is the most under-appreciated shape in all of amigurumi. Nobody writes love letters to it. Beginners race straight past it to get to faces and ears and tiny hats. But almost every plushie you have ever admired is built on one: the body is a cylinder, the arms are cylinders, the legs are cylinders, the neck is a cylinder, and the little pot your crocheted succulent sits in is a cylinder too. Get this shape right and your whole project looks professional. Get it wrong and your amigurumi looks like a melted ice cream cone, no matter how perfect the face is.
That is genuinely the whole secret, and it frustrates people because it sounds too simple to be the answer. If a cylinder is just "stop increasing", why does almost every beginner end up with a shape that quietly widens toward the top? Because the tube does not flare in one dramatic moment you could catch and fix. It flares one accidental stitch at a time, across twenty rounds, and by the time your eye registers that something looks wrong you are forty rounds in and the evidence is buried.
This guide takes the shape apart properly. You will learn the formula, the three mistakes that create flaring, how to read your own tube like a diagnostic tool, how to fix a shape that has already gone wrong, and how to adapt the cylinder for every part of an amigurumi from a chunky body down to a finger-sized arm. By the end you will be able to look at any tube and know, within a round or two, exactly where it went off course.
The three things that decide whether your tube stays straight
Flaring is never random. It comes from one of these three places, and once you can tell them apart the problem becomes trivial to solve.

One stitch per stitch, forever
A cylinder has exactly one rule: the stitch count in round twelve is identical to the stitch count in round two. No increases, no decreases, no exceptions. If your base round ends at 30 stitches, then every single round after it is 30 stitches. Most flaring happens because a maker works two stitches into the same stitch without noticing, usually right after the join or right where the yarn colour changes. One extra stitch per round across fifteen rounds is fifteen extra stitches, and that is the difference between a tube and a cone.
Master working in the round →
Read the silhouette, find the round
Stand your tube on a flat table and look at it from the side at eye level. A correct cylinder has two parallel vertical edges. If the edges angle outward toward the opening you have been gaining stitches. If they angle inward you have been losing them, usually by skipping the first stitch after the marker. The useful part is that the silhouette also tells you when it started: follow the straight section up with your finger and the exact round where the line begins to bend is the round that needs ripping back. You rarely have to frog the whole piece.
See the increase formula →
Every body part is a cylinder in disguise
Once the shape is reliable it becomes a building block. A body is a wide cylinder, usually 28 to 36 stitches around. An arm is a narrow one, often 8 to 12 stitches. A leg sits between them. A neck is a very short cylinder of only three or four rounds. Even a classic no-sew amigurumi is mostly a stack of cylinders that are decreased or joined at the ends. Learning to produce a clean tube at any width is the single skill that unlocks the widest range of patterns.
Browse no-sew patterns →The step-by-step cylinder formula
This works for any width and any yarn. The only number you change is the stitch count of the base round.
- Start with a magic ring and six single crochet. Pull it closed tightly. A loose starting ring leaves a hole in the base of the tube that stuffing will push through later, and no amount of careful work above will hide it.
- Work a flat circle until it reaches your target diameter. Round two is an increase in every stitch for twelve. Round three is one single crochet then an increase, repeated, for eighteen. Keep adding six stitches per round. Twenty-four, thirty, thirty-six, and so on.
- Stop increasing the moment the circle is wide enough. This is the decision point. Lay the circle flat and measure it. If it is the diameter you want the finished tube to be, you are done increasing forever.
- Move your stitch marker to the first stitch of the new round. Do this before you work a single stitch of the straight section. The marker is now the only thing standing between you and a lost count.
- Work one single crochet into every stitch around. No increases. The count stays identical. The fabric will immediately start standing up at a right angle to the base, which is exactly what you want.
- Count the round before you move the marker. Every round, without exception. It takes eight seconds and it is the entire difference between a straight tube and a cone.
- Repeat until the tube reaches your target height. Measure the height against the pattern or against the other limb you already made, not against your memory of how tall it looked.
- Finish according to the pattern. Decrease to close it, fasten off for an open tube, or leave a long tail for joining.
Base round counts for common amigurumi parts
Use this as a starting reference with worsted weight cotton and a 3.0 mm hook. Adjust up or down by one round of increases for thicker or thinner yarn.
| Part | Base round | Approx. diameter | Typical height |
|---|---|---|---|
| Tiny arm or antenna | 6 stitches | 1.5 cm | 6 to 10 rounds |
| Standard amigurumi arm | 8 to 10 stitches | 2 cm | 10 to 14 rounds |
| Leg or thick limb | 12 stitches | 2.5 cm | 12 to 18 rounds |
| Small body or head base | 24 stitches | 4.5 cm | 14 to 20 rounds |
| Standard plushie body | 30 stitches | 5.5 cm | 18 to 26 rounds |
| Chunky body or pot | 36 to 42 stitches | 7 cm | 20 to 30 rounds |
Five habits that keep tubes straight
- Move the stitch marker at the start of each round, never at the end, so a paused project always resumes in the right place.
- Count in groups of five rather than one by one. It is faster and far more accurate over thirty stitches.
- Keep the working loop small. A loose loop is the most common source of an accidental extra stitch.
- Stop at a round boundary when you put the project down, never mid-round.
- Check the silhouette every five rounds instead of only at the end, when fixing it is cheap.
A cylinder is not a difficult shape. It is an honest one. It shows you every stitch you were not paying attention to.— Ava, MrsCrochetWorld
Why your tube flares even when you did not increase
This is the situation that drives people genuinely mad. You counted. You are certain the count is right. The tube still widens. There are four real causes, and none of them involve adding a stitch.
Your tension loosens as you relax
Almost everybody crochets the first few rounds of a project tightly and then gradually loosens as their hands warm up and the rhythm takes over. The stitch count stays correct but each stitch gets fractionally bigger, so the circumference grows anyway. The fix is not willpower. Work a few rounds, then compare the current round against the base round by holding the piece flat. If the newer round is visibly wider, go down one hook size for the rest of the tube.
You are working into the wrong part of the stitch
Dropping into the front loop only, even inconsistently, adds a small amount of slack and a visible ridge. Working under both loops every single time keeps the fabric dense and the diameter stable. If your tube has a faint horizontal line where the shape changed, this is usually what happened.
The base circle was never flat
If your starting circle cupped or ruffled before you began the straight section, the tube inherits that distortion and amplifies it. A ruffled base means too many increases and will always produce a flared tube no matter how perfectly you work the sides. Fix the circle first and the cylinder fixes itself.
Overstuffing is stretching the fabric
Sometimes the tube is perfect and the stuffing is the problem. Pushing fiberfill in hard forces the stitches apart, and a tube stuffed from the bottom up with too much at the top will visibly bell outward. Stuff in small pinches, a little at a time, and stop while the shape still holds its own outline.
Troubleshooting at a glance
Tube widens toward the top
You gained stitches, or your tension loosened. Count the current round against the base round and go down a hook size if the count is correct.
Tube narrows toward the top
You are skipping a stitch, most often the first one after the marker. Check that the marker sits in the stitch itself and not in the gap beside it.
A diagonal seam spirals up the side
That is normal for continuous spiral rounds and is not a mistake. Position it at the back of the finished piece, or use joined rounds instead.
Stuffing shows through the fabric
Your stitches are too loose for the yarn. Drop half a hook size and work the tube again. A dense fabric is the whole point in amigurumi.
The base will not sit flat
Too many increases in the circle. Rip back to the last flat round and redistribute the increases more evenly before starting the sides.
Two limbs came out different lengths
You counted height in centimetres instead of rounds. Always match limbs by round count, then check the measurement as a secondary confirmation.
Keep exploring

Fifty beginner-friendly plushies built from the cylinder and sphere shapes in this guide.
View pattern →
The companion shape. Pair a sphere head with a cylinder body for a balanced plushie.
Read the guide →
Every cylinder starts with a flat circle. Get the base right before you build the sides.
Read the guide →Adapting the cylinder for real projects
Very narrow tubes for arms and antennae
Below about eight stitches a tube becomes awkward because the opening is too small for your fingers and the fabric wants to curl in on itself. Use a smaller hook, work slowly, and accept that the first two rounds will feel cramped. Many makers find it easier to leave narrow limbs unstuffed entirely, or to push a tiny amount of fiberfill in with the blunt end of a hook once the piece is finished. Unstuffed narrow arms also hang more naturally on a finished plushie.
Tall tubes that need to stand up
A cylinder taller than about twenty-five rounds will slump unless the fabric is dense and the stuffing is firm. Work at a tighter gauge than you think you need, and stuff in layers rather than all at once, pressing each layer down before adding the next. For a pot or basket that must hold its shape, consider working the whole tube in back loops only for a ribbed effect, which adds surprising structural rigidity.
Changing colour without changing shape
Colour changes are the single most common place where an accidental stitch sneaks in, because your attention moves to the yarn instead of the count. Change colour in the last pull-through of the final stitch of the round, then immediately count the completed round before continuing. Treat every colour change as a mandatory checkpoint rather than a casual transition.
Joining a cylinder to another piece
If you are working no-sew, the cylinder is usually continued directly into the next shape by increasing or decreasing from the final round. If you are sewing, leave a tail roughly three times the circumference of the opening, and pin the piece in position before you place a single stitch. A cylinder sewn on crookedly ruins an otherwise flawless plushie faster than any stitch error inside the tube itself.
Frequently asked questions
How do I crochet a cylinder that does not flare out?
Work your flat circle base to the width you want, then stop increasing entirely and work exactly one single crochet into every stitch for every remaining round. The stitch count must stay identical from the first straight round to the last. Count each round before moving your stitch marker, because flaring is almost always caused by one unnoticed extra stitch repeated over many rounds.
Why does my amigurumi tube get wider even though I am not increasing?
The most likely cause is tension drift. Most crocheters tighten up at the start of a project and loosen as their hands relax, so the stitches grow slightly even though the count is correct. Hold a recent round against the base round to compare width. If the count matches but the newer round is wider, go down one hook size for the rest of the tube.
How many stitches should the base of an amigurumi body be?
A standard plushie body usually starts from a 30-stitch flat circle using worsted weight cotton and a 3.0 mm hook, which gives roughly 5.5 cm of diameter. Arms generally start at 8 to 10 stitches and legs around 12. Use those as starting points and adjust by one full increase round if your yarn is noticeably thicker or thinner.
Do I work a cylinder in spiral rounds or joined rounds?
Either works, and the choice is about appearance. Continuous spiral rounds produce a smooth surface with a faint diagonal seam running up the side, which is the standard for amigurumi. Joined rounds produce a visible vertical seam but make counting easier. Most plushie patterns assume spirals, so position the diagonal line at the back of the finished piece.
How do I fix a tube that has already flared?
Stand it on a table and look at the silhouette from the side. Trace the straight edge upward with your finger until the line starts to bend outward, and that is the round where the error began. Rip back to the last round before the bend, recount your stitches carefully, and work upward again. You rarely need to frog the whole piece.
Why is my crochet tube getting narrower instead of wider?
You are losing stitches, which usually means you are skipping the first stitch after your marker. Check that the marker is clipped into the stitch itself rather than into the gap beside it, and confirm that you work into the stitch the marker sits in rather than the one after it. A narrowing tube is almost always a marker placement problem.
What hook size should I use for amigurumi cylinders?
Use a hook one to two sizes smaller than the yarn label recommends. For worsted weight cotton that usually means 2.5 mm to 3.0 mm. The goal is a fabric dense enough that stuffing cannot show through the gaps between stitches. If you can see fiberfill through the tube when it is stuffed, your hook is too large.
Should I stuff a cylinder as I go or at the end?
Stuff as you go for anything taller than about fifteen rounds. Once the opening narrows it becomes very difficult to distribute fiberfill evenly in the lower section, and you end up with a dense top and a hollow base. Add small pinches every five rounds or so and press each one down firmly before continuing.
How do I make two arms exactly the same length?
Match them by round count, not by measuring with a ruler. Write down the number of rounds you worked on the first arm and work exactly that number on the second. Tension varies slightly between pieces, so two limbs with identical round counts will look matched even if a ruler shows a millimetre of difference.
Can I crochet a cylinder without starting from a flat circle?
Yes. For an open-ended tube such as a sleeve, a neck or a pot rim, start with a foundation chain, join it into a ring, and work single crochet around without increasing at all. The stitch count of your chain becomes the circumference. This method leaves both ends open, which is exactly what you want for a piece that gets joined on both sides.
Why does my tube have a visible ridge partway up?
You most likely switched which loops you were working into, dropping into the front loop only for a round before returning to both loops. Working under both loops consistently keeps the surface smooth. A deliberate back loop only round is sometimes used on purpose to create a crisp fold line, but an accidental one just looks like an error.
How tall can a crochet cylinder be before it slumps?
Around twenty-five rounds is the practical limit before an average-tension tube starts to bend under its own weight. Beyond that you need a denser gauge, firmer layered stuffing, or structural help such as working in back loops only for a ribbed texture. For tall pots and baskets, a tighter hook does more for stability than extra stuffing.
About the author
Ava is the designer behind MrsCrochetWorld and has been writing beginner-friendly amigurumi patterns since 2019. She has published more than two hundred crochet patterns and pattern books, and tests every shape formula on real projects before it appears in a guide. The cylinder counts and measurements in this article come from worsted weight cotton samples worked at 3.0 mm, the same gauge used across the MrsCrochetWorld pattern library, so the numbers transfer directly to any pattern in the shop.
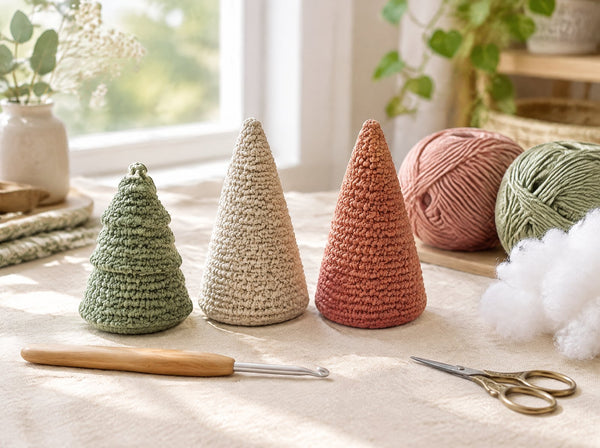
Everything here reflects how these shapes behave in practice rather than in theory, including the failures. The three-tube comparison exists because flaring and narrowing are the two questions readers send in most often, and seeing all three silhouettes next to each other explains the difference faster than any written description can.
Put the cylinder to work
Pick a pattern that uses the shape you just learned and build your first clean-sided plushie this weekend.
Shop no-sew amigurumi patterns Get a free pattern