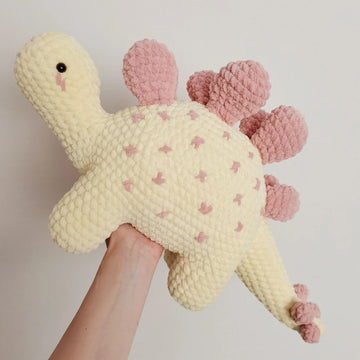
If your amigurumi always turns out a little lumpy, slightly egg-shaped, or flat on one side, the problem almost always comes down to one thing: the sphere. Nearly every cuddly crochet creature — the head, the belly, the little round paws — is built from a sphere. Learn to crochet a truly round ball, and suddenly every amigurumi you make looks more polished, more professional, and more squishable.
The good news? There is a simple, repeatable amigurumi ball formula that works for any size. Once it clicks, you will never need to hunt for a "small ball pattern" again — you will be able to crochet a perfect sphere in any yarn, at any size, entirely from memory. In this guide, you will learn exactly how the formula works, why it makes shapes round instead of blocky, and how to avoid the four mistakes that ruin most beginner spheres.
Quick promise: By the end of this guide you will understand the increase-plain-decrease rhythm that makes crochet balls round, be able to size a sphere up or down on demand, and know the pro tricks (stitch markers, invisible decreases, firm stuffing) that give amigurumi that clean, store-bought look.
Why the Sphere Is the Most Important Amigurumi Shape
Amigurumi looks complicated, but almost every pattern is secretly just a handful of spheres and half-spheres stitched together. A round head sits on a round-ish body; ears, arms, and legs are tapered tubes; the muzzle is a tiny flattened ball. If you can crochet a smooth sphere, you already own 80% of the skills you need to make almost any cute crochet animal.
That is why the sphere is the single best shape to practice first. It teaches you the two moves that drive all three-dimensional crochet — increasing (adding stitches to make the piece grow wider) and decreasing (removing stitches to close it back up) — plus how to keep even tension while working in a continuous spiral.

Rows vs. Rounds: Why Spheres Are Worked in a Spiral
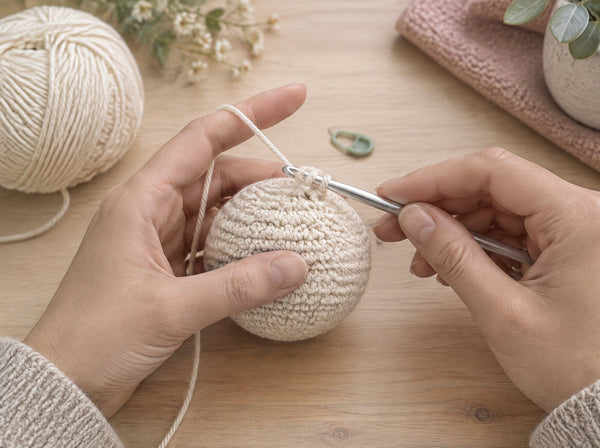
Flat items like scarves are worked in rows — back and forth, turning at the end of each line. Amigurumi spheres are worked in continuous rounds, spiralling round and round without ever turning or joining. This is what creates a seamless, tube-like fabric with no visible seam running up the side.
Because there is no join, you always need a stitch marker in the first stitch of each round to track where you are. Without it, the count drifts, and a drifting count is the number-one reason spheres come out crooked. Move the marker up as you begin every new round.
The Amigurumi Ball Formula (Copy This)
Here is the classic 6-stitch sphere — the foundation of thousands of patterns. It is worked in single crochet (US terms) starting from a magic ring. Read inc as "2 single crochet in the next stitch," dec as "invisible decrease," and sc as a plain single crochet.
R1: 6 sc in a magic ring
(6)R2: inc in each st around
(12)R3: (sc, inc) ×6
(18)R4: (2 sc, inc) ×6
(24)R5–R8: sc in each st around
(24) — the plain "equator"R9: (2 sc, dec) ×6
(18)R10: (sc, dec) ×6
(12)R11: dec ×6
(6) — stuff firmly before closingFasten off, weave the tail through the last 6 stitches, and cinch closed.
Notice the shape of the numbers: they climb (6 → 12 → 18 → 24), hold steady, then fall back the same way they rose (24 → 18 → 12 → 6). That mirror pattern is the entire secret. The increases build the top half, the plain rounds form the widest middle (the "equator"), and the decreases close the bottom half symmetrically.

How Increases and Decreases Make It Round
Each increase round adds exactly 6 stitches, and each is staggered so the extra stitches never stack on top of each other. If your increases lined up in a column, you would get a hexagon or a flat disc, not a dome. Spreading them out is what curves the fabric gently into a bowl and then a ball.
For the closing half, always use an invisible decrease rather than a standard one. A regular decrease leaves visible holes and bumps around the bottom of the sphere; the invisible decrease keeps the surface tight and smooth so no stuffing peeks through.
Step-by-Step: Crocheting Your First Sphere
Let's walk through the medium 24-stitch ball slowly, so you can see exactly what happens at each stage. Grab a smooth cotton yarn, a hook one to two sizes smaller than the label, a stitch marker, a yarn needle, and some fiberfill. Work everything in a continuous spiral — never turn, never join.
Stage 1 — Build the top dome (Rounds 1–4)
Start with 6 single crochet in a magic ring and pop your stitch marker into that very first stitch. This first round is the pole of your sphere. Each following round adds 6 stitches through evenly spaced increases: 12, then 18, then 24. As you go, you will feel the fabric start to cup into a shallow bowl — that curve is the top half of your ball forming. Keep your tension firm and consistent; loose loops here will show up as gaps later.
Stage 2 — Work the equator (Rounds 5–8)
Now stop increasing and simply single crochet around, keeping the count at 24. These plain rounds create the widest belt of the sphere — the equator. Because you are neither adding nor removing stitches, the fabric stops widening and forms a short straight cylinder. Resist the urge to add too many plain rounds; four is plenty for a round ball. Add more only if you want a slightly elongated egg or body shape.
Stage 3 — Close the bottom dome (Rounds 9–11)
Mirror your increases with decreases: 24 down to 18, then 12, then 6. Around Round 10, pause and stuff the ball firmly through the shrinking opening — it is much easier to reach inside now than at the very end. Finish the last decrease round, cut a long tail, and thread it through the yarn needle. Weave the tail through the front loops of the final 6 stitches and pull tight to cinch the hole shut, like closing a tiny drawstring bag. Weave in the end, and your first perfect sphere is complete.
The Right Tools and Yarn for Smooth Spheres
Great shaping starts with the right supplies. You do not need much, but a few smart choices make the difference between a lumpy ball and a crisp, professional-looking one.
Yarn: Smooth cotton or a cotton blend in a light, solid color is the gold standard for amigurumi. It shows stitch definition clearly, holds its shape, and does not split under the hook. Save fuzzy, fluffy, or very dark yarns for later — they hide your stitches and make counting harder while you are still learning.
Hook: Go one to two sizes down from the yarn label. A tighter gauge stops stuffing from peeking through and gives that firm, springy feel good amigurumi is known for. An ergonomic handle helps a lot during long stuffing-heavy projects.
Extras: A locking stitch marker (or a scrap of contrast yarn) is non-negotiable for spiral rounds. A blunt yarn needle makes closing the sphere neat, and quality polyester fiberfill keeps the finished ball light and washable. If you want to explore this further, our guide to the best yarn for amigurumi breaks down every option in detail.
Sizing Your Sphere Up or Down
The 6-stitch formula scales beautifully. To make a bigger ball, keep adding one more increase round before the plain section — and add the matching decrease round at the end. To make a smaller ball, use fewer increase rounds. The rule is simple: however many increase rounds you work, mirror them with the same number of decrease rounds.
| Sphere Size | Increase to | Plain rounds | Great for |
|---|---|---|---|
| Tiny | 12 sts | 1–2 | Noses, berries, beads |
| Small | 18 sts | 2–3 | Cheeks, small paws |
| Medium | 24 sts | 3–4 | Animal heads, keychains |
| Large | 30–36 sts | 4–6 | Bodies, plushie bellies |

4-in-1 Rainbow Belly Bears Amigurumi Bundle
Put your new sphere skills to work on these adorable round-bellied bears — perfect projects for practising smooth increases, firm stuffing, and clean closures.
Get the pattern bundle →
Stuffing: The Step Everyone Underestimates
A perfectly crocheted sphere can still look sad if it is under-stuffed. Add fiberfill gradually and press it firmly into the sides as you go, before the opening gets too small to reach into. The ball should feel springy, not squishy — think stress-ball, not marshmallow.
Stuff a little more than feels necessary; the fabric relaxes over time. If you can see gaps of stuffing through your stitches, your tension is too loose — drop down a hook size. For a full walkthrough, see our complete guide to stuffing amigurumi.
4 Mistakes That Ruin Crochet Spheres (and the Fixes)
1. Losing your place in the spiral
Working in a continuous round is easy to lose track of. Fix: always keep a stitch marker in the first stitch of the round and move it up every round. Count your stitches after each increase and decrease round.
2. Stacked increases
Putting increases directly above each other creates points and flat panels. Fix: follow the staggered spacing in the formula — (sc, inc), then (2 sc, inc) — so the extra stitches spread evenly.
3. Visible decrease holes
Standard decreases leave gappy bumps. Fix: use the invisible decrease through the front loops only for a smooth finish.
4. Loose tension
Loose stitches let stuffing show and make the ball floppy. Fix: use a hook one to two sizes smaller than the yarn label suggests. Tighter fabric = crisper spheres. Not sure which hook? Check our crochet hook size guide.

50-in-1 No-Sew Amigurumi Bundle
Ready to turn spheres into finished creatures? This mega bundle of 50 no-sew patterns lets you build entire amigurumi from simple rounded shapes — no fiddly seaming required.
Explore the bundle →Frequently Asked Questions
Why does my amigurumi ball come out egg-shaped instead of round?
An egg shape usually means your increases and decreases are not mirrored, or your plain "equator" section is too long. Make sure you use the same number of increase and decrease rounds, and keep the middle straight section short — only 3 to 4 plain rounds for a medium sphere.
What does the amigurumi ball formula mean by "inc" and "dec"?
"Inc" means an increase — working two single crochet stitches into one stitch to add a stitch. "Dec" means a decrease — combining two stitches into one, ideally with the invisible decrease method. These two moves grow and shrink the sphere.
Do I need a magic ring to start a crochet sphere?
A magic ring is strongly recommended because it closes the center hole completely, which matters when the ball is stuffed. If you are brand new, you can start with "chain 2, then 6 sc in the second chain," but you may need to cinch the small hole closed afterward.
Why should I use an invisible decrease?
A regular decrease creates a small visible hole and a bump. The invisible decrease works through the front loops only, keeping the surface smooth and tight so stuffing does not show. It makes the bottom of your sphere look clean and professional.
What hook size should I use for amigurumi spheres?
Use a hook one to two sizes smaller than your yarn label recommends. For worsted/aran cotton yarn, a 3.0mm to 3.5mm hook is typical. Tighter fabric prevents stuffing from peeking through the stitches and gives crisper, rounder shapes.
How do I make a bigger sphere without a pattern?
Add more increase rounds at the start following the pattern (30, 36, 42…), work a few plain rounds in the middle, then decrease back down using the exact same number of rounds you increased. As long as increases and decreases are mirrored, the ball stays round.
When should I stuff the sphere?
Start stuffing during the decrease rounds, before the opening becomes too small for your fingers. Add fiberfill gradually and press it firmly into the sides. Fill it a little more than seems necessary, since the fabric relaxes over time.
Why can I see stuffing through my stitches?
Visible stuffing means your tension is too loose or your hook is too large for the yarn. Switch to a smaller hook to tighten the fabric. Dark or light stuffing can also show through very pale yarn, so match your fiberfill color to your yarn when possible.
Do I count the stitches every round?
Yes, especially after each increase and decrease round. Continuous spirals drift easily, and a single missed increase throws off the whole shape. Counting after shaping rounds catches errors early while they are still easy to fix.
Can I use the sphere formula for animal heads and bodies?
Absolutely. Most amigurumi heads are full spheres, and bodies are slightly elongated spheres made by adding extra plain rounds in the middle. Once you master the ball formula, you can adapt it into heads, bellies, and rounded limbs for almost any pattern.
What yarn is best for practising crochet spheres?
Smooth cotton yarn in a light, solid color is ideal for learning. It shows your stitches clearly so you can spot mistakes, holds the round shape well, and does not split. Avoid fuzzy or very dark yarn while you are still learning the shaping.
Ready to Turn Spheres Into Cuddly Creatures?
You have the formula — now bring it to life. Explore MrsCrochetWorld's beginner-friendly amigurumi patterns and start stitching adorable, perfectly round friends today.
Browse Crochet Patterns