How to Crochet a Flat Circle: The Increase Formula That Always Works
Stop fighting ruffles and taco-shaped discs. One simple increase rule gives you a perfectly flat crochet circle every single time.

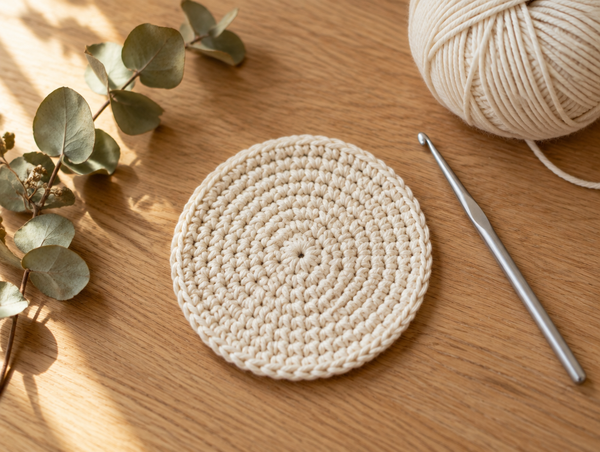
The flat crochet circle is the quiet workhorse of the entire craft. It is the base of every coaster, every round basket, every granny-free placemat, every amigurumi head and every round tote bag. It is also, for a huge number of beginners, the very first project that goes visibly, frustratingly wrong. You follow the rounds, you count your stitches, and somewhere around round five your tidy little disc starts to lift at the edges like a taco shell, or it erupts into a wavy frill that no amount of blocking will flatten.
That is the whole secret, and it is genuinely that simple once somebody writes it down plainly. But understanding why the formula works is what turns it from a rule you memorise into a tool you can adapt. Once you understand the geometry underneath it, you can start a circle with any number of stitches, switch to a different stitch height, work with a chunky yarn or a lace-weight thread, and still produce something that lies perfectly flat on the table.
In this guide we will build the circle from the centre outwards. You will learn the magic ring start and its alternatives, the universal increase formula, how to stagger your increases so no spokes appear, how to read the three warning signs your circle is going wrong, and how to fix a circle that has already gone wrong without frogging the whole thing. We will also cover the adjustments you need for half double crochet, double crochet and treble crochet, because the six-stitch rule is only the beginning of the story.
Everything here uses US crochet terms. If you normally work from UK or Australian patterns, remember that what we call a single crochet is a double crochet for you, and adjust the stitch names accordingly. The maths, happily, is identical in every language.
The three stages of a perfect flat circle
Every flat circle is built the same way: a closed centre, a predictable rate of growth, and a clean finish. Get these three right and the rest is just repetition.

Close the centre properly
A flat circle begins with a tight, closed middle. The magic ring is the cleanest option: you wrap the yarn around your fingers, work your first round of stitches into that loop, then pull the tail to cinch the hole shut. Six single crochet into a magic ring is the classic beginning, and it is the number almost every pattern assumes.
If the magic ring still defeats you, there is a perfectly respectable alternative. Chain two, then work six single crochet into the second chain from the hook. The centre will be slightly looser than a magic ring, but for a coaster or a basket base nobody will ever notice, and you can always sew the small hole closed with the yarn tail at the end.
Whichever start you choose, place a stitch marker in the first stitch of the round before you go any further. Working in a spiral without a marker is the single most common reason beginners lose their count, and a lost count is the fastest route to a wobbly circle.
Master the magic ring step by step →
Increase at exactly the right rate
Here is the geometry that makes the formula work. The circumference of a circle grows in a straight line as the radius grows. Each round you add is one more unit of radius, so each round needs exactly one more unit of circumference. In crochet terms: each new round needs the same number of extra stitches as the round before it.
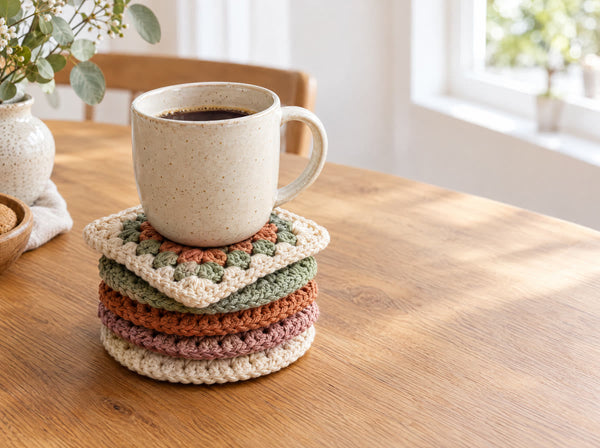
If you started with six stitches, every round adds six. If you started with eight, every round adds eight. The three circles in the photograph show what happens when you get this wrong. The cream circle on the left follows the rule and lies flat. The sage circle in the middle was given too many increases, so the fabric has more stitches than the geometry needs and the excess has nowhere to go but upwards into a frill. The rose circle on the right was given too few, so the fabric is pulled tight around a circumference it cannot reach and it curls into a shallow bowl.
Neither of those outcomes is a disaster, incidentally. Deliberate over-increasing is how you make ruffled flowers and wavy edges, and deliberate under-increasing is exactly how amigurumi makers shape a sphere. The skill is choosing which one you want.
Learn to count stitches and rounds accurately →
Close the edge without a step
When your circle has reached the diameter you want, you need to leave the spiral behind cleanly. Work a slip stitch into the next stitch, cut your yarn with a tail of roughly six inches, and pull it all the way through the loop. That slip stitch sits at the same height as the surrounding stitches and prevents the small visible jog that an abrupt cut would leave.
For an invisible finish, thread the tail onto a yarn needle, skip the first stitch of the round and insert the needle under both loops of the second stitch, then take it back down through the centre of the last stitch you made. You have just drawn a fake stitch top over the gap, and the join disappears entirely.
Finally, weave the tail through the back of several stitches in two different directions before trimming. Cotton coasters get washed, and a tail woven in only one direction will eventually work its way loose.
Browse the flower coaster pattern bundle →The flat circle round by round
Here is the complete single crochet circle, written out exactly as you would find it in a pattern. Work in a continuous spiral and do not join the rounds unless the pattern tells you to. Move your stitch marker up at the start of every round.
- Round 1. Make a magic ring and work 6 single crochet into it. Pull the tail firmly to close the centre. You have 6 stitches.
- Round 2. Work 2 single crochet into every stitch around. You have 12 stitches, and you have added 6.
- Round 3. Single crochet 1, then 2 single crochet in the next stitch. Repeat around. You have 18 stitches.
- Round 4. Single crochet 2, then 2 single crochet in the next stitch. Repeat around. You have 24 stitches.
- Round 5. Single crochet 3, then 2 single crochet in the next stitch. Repeat around. You have 30 stitches.
- Round 6. Single crochet 4, then 2 single crochet in the next stitch. Repeat around. You have 36 stitches.
- Round 7 and beyond. Each round, work one more plain single crochet between increases than the round before. The pattern of the round number continues forever.
- Finish. When the circle is the size you want, slip stitch into the next stitch, fasten off and weave in the tail.
Notice the structure hiding in those instructions. In round three you work one plain stitch before each increase. In round four, two. In round five, three. The number of plain stitches is always one less than the round number. That is all you need to remember to continue the circle indefinitely, long past the point where any written pattern stops.
The universal increase table
Use this table whenever you need to check your stitch count or plan a project. The left column is the round, the middle column is the stitch count for a circle that starts with six, and the right column is the count for a circle that starts with eight. An eight-stitch start produces a slightly larger, slightly flatter centre and is popular for baskets and bag bases.
| Round | Six-stitch start | Eight-stitch start | Plain stitches between increases |
|---|---|---|---|
| 1 | 6 | 8 | No increases, base round |
| 2 | 12 | 16 | 0 |
| 3 | 18 | 24 | 1 |
| 4 | 24 | 32 | 2 |
| 5 | 30 | 40 | 3 |
| 6 | 36 | 48 | 4 |
| 7 | 42 | 56 | 5 |
| 8 | 48 | 64 | 6 |
| 9 | 54 | 72 | 7 |
| 10 | 60 | 80 | 8 |
The pattern in the right-hand column is the thing worth internalising. Plain stitches between increases always equal the round number minus one, no matter which start you chose. Once that clicks, you will never need to look up a circle pattern again.
Why your increases should never line up
There is one refinement that separates a decent circle from a genuinely professional one, and almost no beginner pattern mentions it. If you always place your increase in the same position relative to the previous round, those increases stack vertically and create six visible radiating lines. The circle becomes a faint hexagon rather than a true round.
The fix is to stagger. Instead of starting every round with the increase, shift the position each round. In round four, for example, work one plain stitch first, then begin the increase sequence. In round five, work two plain stitches first. The increases then spiral outwards instead of stacking, and the edge of your circle becomes smoothly curved rather than faceted.
For small projects like coasters the difference is subtle. For a large round rug or a basket base worked in thick cotton, staggering is the difference between a piece that looks handmade in the good sense and one that looks like a stop sign.
Five habits that guarantee a flat circle
- Move your stitch marker at the beginning of every single round, before you make the first stitch, not after.
- Count your stitches at the end of every round and check the number against the table above. Catching an error in round four costs you two minutes, catching it in round twelve costs you an hour.
- Keep your tension consistent and relatively firm. A circle worked loosely in one section and tightly in another will warp even if the stitch count is perfect.
- Use a hook one or two sizes smaller than the yarn label suggests. Tighter fabric holds its shape far better and keeps stuffing or table dirt from showing through.
- Lay the circle flat on the table every few rounds and look at it from the side. Problems are obvious early and nearly invisible until they are expensive to fix.
A flat circle is not a skill you learn once. It is a formula you understand, and then it works for every yarn, every hook and every project you will ever make.— Ava, MrsCrochetWorld
Taller stitches need different numbers
The six-stitch rule is written for single crochet, which is a short, square stitch. Taller stitches cover more vertical distance per round, so each round represents a bigger jump in radius, and a bigger jump in radius needs more circumference. That means more increases.
The practical starting numbers are straightforward. For half double crochet, begin with eight stitches in the ring and increase by eight each round. For double crochet, begin with twelve and increase by twelve. For treble crochet, begin with sixteen and increase by sixteen. These numbers are approximations derived from stitch proportions rather than exact geometry, so expect to adjust by a stitch or two depending on your yarn and tension.
Double crochet circles are the ones most people encounter, because they grow quickly and are the standard choice for granny-style placemats, round blankets and large doilies. A twelve-stitch double crochet start gives you a flat disc in a quarter of the rounds a single crochet circle would need. The trade-off is a looser, more open fabric with visible gaps between stitches, which is lovely for a decorative mat and unsuitable for an amigurumi head.
Diagnosing a circle that has gone wrong
Almost every flat circle problem falls into one of three categories, and each has a distinct visual signature you can learn to spot in seconds.
The circle ruffles and will not lie down. The outer edge waves, frills or forms soft folds. You have too many stitches for the circumference. The cause is usually an extra increase slipped in somewhere, or a stitch count that drifted upwards across several rounds without being checked. Count the current round carefully, compare it to the table, and work one round with the correct number of increases minus the excess to bring the count back in line.
The circle cups into a bowl. The edges lift and the centre bulges downwards. You have too few stitches. This is often caused by missing the last increase of a round, which is extremely easy to do when the stitch marker has slipped. Add the missing stitches across the next round, distributed evenly rather than all in one place, and the fabric will relax back down.
The circle lies flat but looks like a polygon. Your stitch count is correct, but your increases are stacking. Stagger the increase positions as described above and the shape will round out within two or three rounds.
There is a fourth and less common problem worth mentioning: the circle is flat and correctly counted, but one section is visibly denser than another. That is a tension issue, not a maths issue. It happens most often when you crochet across several sessions and your grip changes. A gentle blocking with a damp cloth and some patience will even out a mild case, and a firmer consistent tension will prevent the next one.
Choosing yarn and hook for a circle that holds its shape
Fibre matters more for flat circles than for almost any other crochet shape, because a circle has nowhere to hide. Mercerised cotton is the traditional choice for coasters, mats and basket bases. It has almost no stretch, it holds a crisp stitch definition, and it washes repeatedly without distorting. Worsted weight cotton with a hook one size below the label recommendation is a reliable combination for a first project.
Acrylic is softer and cheaper but has a tendency to stretch under its own weight once a circle gets large. For a rug or a floor cushion that stretch becomes very obvious very quickly. If you want to use acrylic for a large flat piece, choose a firm, tightly plied yarn rather than a soft, lofty one, and work at a tension that feels slightly too tight while you are making it.
Wool sits in the middle. It blocks beautifully, which means a slightly imperfect circle can often be coaxed flat with pinning and steam, but it also has memory and will gradually return towards its original shape. For amigurumi bases where the circle will be stuffed and shaped anyway, wool is entirely fine. For a placemat that must stay flat on a table for years, cotton wins.
Keep exploring

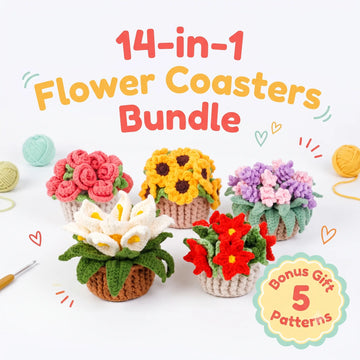
Fourteen flat-circle coaster patterns that put the increase formula straight to work.
View pattern →
A beginner round tote built on a large flat circle base, with a full PDF walkthrough.
View pattern →
The same logic applied to an oval base for bags, baskets and amigurumi bodies.
Read the guide →
What happens when you deliberately break the flat-circle rule to shape a ball.
Read the guide →What to make with a flat circle
- Coasters and mats The fastest possible use of a flat circle. One coaster takes under thirty minutes in worsted cotton and makes a genuinely useful gift.
- Basket and bag bases Crochet the circle flat to the diameter you want, then work one round in back loops only to create a crisp fold and build the sides upwards.
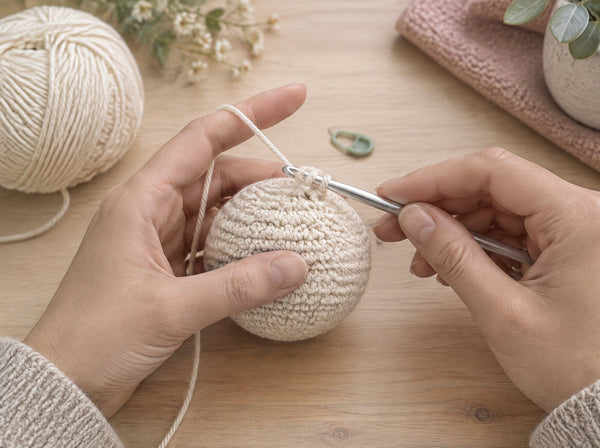
- Amigurumi heads and bodies Every sphere starts as a flat circle. You simply stop increasing once you reach the width you need, then work straight rounds.
- Round rugs and floor cushions Hold two or three strands of cotton together with a large hook. The formula is identical, the result is just much faster.
About the author
Ava is the designer behind MrsCrochetWorld. She has written and tested more than two hundred published amigurumi and home decor patterns, and has taught beginner crochet workshops for the better part of a decade. Every technique in this guide has been worked, photographed and corrected on real yarn rather than copied from another article. The circle formula here is the same one used in every MrsCrochetWorld pattern that starts in the round, which means that once you learn it here, every pattern in the shop will feel familiar.
If a step in this guide does not work for you, that is useful information rather than a personal failing. Crochet tension is individual, and a formula that is exactly right for one maker may need a half-step adjustment for another. Start with the numbers in the table, check your work against the three diagnostic signs, and adjust from there.
Frequently asked questions
How many stitches should I start a flat crochet circle with?
Six single crochet in a magic ring is the standard start and the one most patterns assume. Eight works equally well and gives a slightly larger, flatter centre, which is useful for basket and bag bases. Whatever number you choose, you must increase by that same number in every subsequent round.
Why does my crochet circle ruffle at the edges?
Ruffling means you have too many stitches for the circumference. Somewhere you added an extra increase, or your count drifted upwards over several rounds. Count the current round, compare it to the increase table, and work the next round with fewer increases to bring the total back in line.
Why does my crochet circle curl up into a bowl?
Cupping means you have too few stitches. The most common cause is missing the final increase of a round, which happens easily when a stitch marker slips. Add the missing stitches evenly across the next round and the fabric will relax flat again. Very tight tension can also cause mild cupping even with a correct count.
Do I need to join each round or work in a spiral?
For a flat circle in single crochet, a continuous spiral is usually better because it avoids the visible seam line that joined rounds create. Use a stitch marker to track the start of each round. Joined rounds are preferred when you are working in double crochet or when the pattern needs a defined round boundary for colour changes.
Where exactly should I place the increase in each round?
Stagger the position rather than always increasing at the same point. If you always increase in the same relative spot, the increases stack vertically and create six visible spokes, turning your circle into a faint hexagon. Shifting the start of the increase sequence by one or two stitches each round spreads them out and keeps the edge smoothly curved.
How do I crochet a flat circle in double crochet?
Start with twelve double crochet in a magic ring and increase by twelve stitches in every round. Taller stitches cover more vertical distance per round, which means each round needs more circumference. Half double crochet uses eight, and treble crochet uses sixteen. Expect to adjust by a stitch or two depending on your yarn and tension.
What hook size should I use for a flat crochet circle?
Go one or two sizes smaller than the yarn label recommends. Flat circles look and wear much better in firm, dense fabric. For worsted weight cotton, a 3.5 mm or 4 mm hook is a reliable choice, even though the label may suggest 5 mm.
Can I make a flat circle without a magic ring?
Yes. Chain two and work your first round of six single crochet into the second chain from the hook. The centre will be slightly looser than a magic ring produces, which is invisible on a coaster and only matters when stuffing must not show through. You can also close the small hole afterwards with the yarn tail and a needle.
What yarn is best for flat crochet coasters and mats?
Mercerised cotton is the best choice. It has almost no stretch, holds crisp stitch definition and survives repeated washing without distorting. Acrylic is softer and cheaper but stretches under its own weight on larger pieces. Wool blocks beautifully but has memory and gradually returns towards its original shape.
How do I know when to stop increasing?
Stop when the circle reaches the diameter your project needs. Measure across the widest point with a ruler rather than counting rounds, because diameter depends on your yarn weight and tension. For a basket or bag base, stop at the base diameter and then work one round in back loops only to create the fold line for the sides.
Can I fix a circle that has already gone wrong without frogging?
In most cases yes. If the circle ruffles, work a correction round with fewer increases than the formula calls for until the count matches the table. If it cups, add the missing stitches evenly across one round. Only a severely distorted piece with errors across many rounds is genuinely worth frogging back to the last correct round.
Why does my circle look flat but hexagonal?
Your stitch count is correct but your increases are lined up in columns. Each stacked increase creates a corner, and six stacked columns create six corners. Stagger the increase positions across the next two or three rounds and the shape will round out without any change to the stitch count.
How big will a six-stitch circle be after ten rounds?
That depends entirely on your yarn and hook. In worsted weight cotton on a 4 mm hook, a sixty-stitch circle at round ten is roughly four to five inches across, which is a generous coaster. In chunky yarn on an 8 mm hook the same ten rounds will give you something closer to nine inches. Always measure rather than assume.
Put the formula to work today
You now have everything you need to crochet a flat circle in any yarn, at any size, with any stitch height. Pick a pattern and make something with it.
Shop crochet patterns Get a free pattern