There is something quietly magical about a little crochet mushroom. With its plump red cap, cheerful white polka dots, and soft cream stem, a crocheted toadstool is the kind of project that makes people smile before you have even finished sewing on the last dot. Mushrooms are everywhere in cottagecore decor right now — on shelves, in nursery mobiles, on keyrings, and tucked into gift baskets — and the amigurumi version is one of the friendliest projects a beginner can pick up.
In this guide you will learn exactly how to crochet a mushroom amigurumi from start to finish. We will cover the yarn and hook you need, the core stitches, a clear round-by-round method for both the cap and the stem, a genuinely no-sew friendly assembly approach, and the small finishing touches that turn a lumpy first attempt into a plushie you are proud to display. Whether this is your very first amigurumi or your fiftieth, you will finish with a mushroom you actually want to keep.

Why the Mushroom Is a Perfect Beginner Amigurumi
The mushroom is built from two simple shapes: a shallow dome for the cap and a short cylinder for the stem. There are no legs to attach evenly, no ears to match, and no tricky facial expressions to embroider. That makes it an ideal confidence builder.
You will practice the three skills that carry over to almost every amigurumi you ever make: working in a continuous spiral, increasing to widen a piece, and decreasing to close it. Master them here on something forgiving, and elephants, cats, and dinosaurs suddenly feel a lot less intimidating.
Materials You'll Need
Amigurumi mushrooms are a wonderful stash-buster because they need so little yarn. A few leftover meters of red and cream cotton will get you a full plushie.
| Item | Recommendation | Why |
|---|---|---|
| Yarn | Worsted / DK cotton in red, cream/off-white, and a scrap of white | Cotton holds stitch definition and keeps the spots crisp |
| Crochet hook | 2.5–3.5 mm (US C/D/E), a hook smaller than the yarn label suggests | A tighter fabric hides the stuffing and keeps holes closed |
| Fiberfill | Polyester stuffing | Gives the cap its rounded, squishy shape |
| Notions | Stitch marker, tapestry needle, scissors | The marker tracks your spiral; the needle closes and attaches |
| Optional | Safety eyes (6–8 mm) for a kawaii face | Turns a plain toadstool into a cute character |

Best Yarn for Amigurumi: The Complete Guide
Not sure which red to grab? See exactly which fibers, weights, and brands give plushies the cleanest, firmest finish.
Read the yarn guide →Abbreviations (US Terms)
- MR – magic ring
- sc – single crochet
- inc – increase (2 sc in one stitch)
- dec – invisible decrease (crochet 2 stitches together)
- st / sts – stitch / stitches
- BLO – back loop only
- ( )x6 – repeat the sequence in brackets 6 times

Before You Start: Set Up for Success
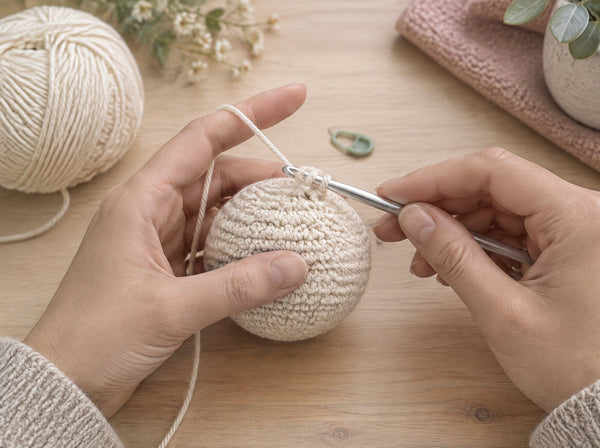
Wind your yarn, grab your smaller-than-usual hook, and clip a stitch marker into the first stitch of every round. Because amigurumi is worked in a continuous spiral (not joined rounds), that marker is the only thing standing between you and a miscount.
Keep your tension firm and even. If you can see stuffing peeking through your fabric later, your hook is too big — drop down a size. A tidy, dense fabric is the single biggest secret to a professional-looking plushie.
How to Crochet the Mushroom Cap
The cap is a wide, shallow dome. We increase quickly to make it flare out like a toadstool, then work a few straight rounds before curving under.
- R1: 6 sc in MR (6)
- R2: inc in each st (12)
- R3: (sc, inc) x6 (18)
- R4: (2 sc, inc) x6 (24)
- R5: (3 sc, inc) x6 (30)
- R6: (4 sc, inc) x6 (36)
- R7–R9: sc in each st (36) — this gives the cap its height
- R10: (4 sc, dec) x6 (30)
- R11: (3 sc, dec) x6 (24) — begin stuffing firmly now
- R12: sc in BLO around (24) — the back-loop round creates a crisp lip where the cap meets the stem
Do not close the cap. Fasten off, leaving a tail, and set it aside with its opening facing up. That BLO round in R12 is what makes the mushroom look like a real toadstool with an overhanging cap.
How to Crochet the Stem
The stem is a simple cylinder that is slightly narrower than the cap opening, so the cap can perch over it.
- R1: 6 sc in MR (6)
- R2: inc in each st (12)
- R3: (sc, inc) x6 (18)
- R4–R10: sc in each st (18) — work these rounds in the cream yarn for the classic mushroom look
Stuff the stem firmly but keep the top edge open. Leave a long tail for attaching. A firmly stuffed stem stands up straight; an under-stuffed one flops, so be generous.

How to Crochet a Magic Ring (Perfect Every Time)
Both the cap and stem start with a magic ring. If yours keeps unravelling, this step-by-step fix will make it click.
Master the magic ring →
Assembling Your Mushroom (No-Sew Friendly)
Here is the trick that keeps this project low-sew: because the cap's R12 opening (24 sts) sits neatly over the stem's open top (18 sts), you can crochet the two pieces together in a final joining round instead of sewing all the way around.
Line up the stem inside the cap opening, insert your hook through both layers, and single crochet around to close them as one. If you prefer to sew, a simple whipstitch through both edges works just as well — but the crochet-join is faster and gives a sturdier seam.
Adding the Signature White Spots
The polka dots are what make a plain red dome read instantly as a mushroom. You have three easy options:
- Surface slip stitch circles: work small spirals of white directly onto the cap for a raised, tactile dot.
- Duplicate stitch: embroider over existing stitches with white yarn for flat, tidy spots.
- Felt or fabric dots: glue or stitch on pre-cut circles for the fastest finish.
Aim for 5–7 spots of varying sizes, scattered asymmetrically. Perfectly even spacing looks artificial; a slightly random layout looks charming and hand-made.

How to Stuff Amigurumi for Smooth, Shaped Plushies
A lumpy cap usually means uneven stuffing. Learn how much fiberfill to use and how to shape it as you go.
Get the stuffing guide →Troubleshooting Common Mushroom Mistakes
My cap is a cone, not a dome
You likely worked too many straight rounds before decreasing, or your increases were too spread out. Follow the increase rounds exactly and keep R7–R9 to just three straight rounds.
Stuffing shows through the fabric
Your hook is too large for your yarn. Drop down half a millimeter to a full millimeter and your stitches will close up.
The cap won't sit on the stem
Check your stitch counts. The cap opening should be wider than the stem top — 24 versus 18 stitches — so the cap overhangs slightly, just like a real toadstool.
My mushroom leans to one side
Usually an under-stuffed stem. Add more fiberfill and pack it firmly right up to the join before you close it.
Fun Variations to Try
- Mini keychain mushrooms: stop the cap at R6 (36 sts is optional) and the stem at R6 for a pocket-sized charm.
- Woodland set: make three mushrooms in different sizes and colors — classic red, soft brown, and pastel pink — for a shelf display.
- Glow-garden mushrooms: use variegated or speckled yarn for a whimsical fairy-tale look.
- Amigurumi character: add safety eyes, a tiny embroidered smile, and stubby arms for a cottagecore friend.
Ready for Your Next Cozy Project?
Explore beginner-friendly, no-sew amigurumi patterns designed to build your skills one adorable plushie at a time.
Browse No-Sew Patterns
Best No-Sew Amigurumi Patterns for Beginners
Loved this method? Keep the momentum with more easy plushies that skip the fiddly sewing.
See the pattern list →Frequently Asked Questions
How long does it take to crochet a mushroom amigurumi?
Most beginners finish a mushroom plushie in one to two hours once they are comfortable with single crochet. The cap and stem are small, and the assembly is quick. Adding spots and a face takes an extra 20–30 minutes.
What size crochet hook should I use for an amigurumi mushroom?
Use a hook one to two sizes smaller than your yarn label recommends — typically 2.5–3.5 mm for worsted or DK cotton. A smaller hook creates a tight fabric that hides the stuffing and keeps your stitches neat.
Can I make a crochet mushroom without sewing?
Yes. Because the cap opening is wider than the stem, you can crochet the two pieces together in a single joining round instead of sewing all the way around. This keeps the project almost entirely no-sew.
What yarn is best for a crochet mushroom?
Cotton in worsted or DK weight is ideal because it holds stitch definition and keeps the white spots looking crisp. Acrylic works too and is softer, but cotton gives the cleanest, most structured toadstool shape.
How do I make the white spots on the mushroom cap?
You can surface-crochet small white spirals directly onto the cap, use duplicate stitch to embroider flat dots over existing stitches, or glue and stitch on pre-cut felt circles. Scatter 5–7 dots of varying sizes for the most natural look.
Why is my mushroom cap pointy instead of rounded?
A pointy cap usually means you worked too many straight rounds before decreasing, or your increases were spaced unevenly. Follow the increase rounds exactly and keep the straight middle section to just three rounds for a proper dome.
Do I need safety eyes for a crochet mushroom?
No — a classic toadstool needs no face at all. Safety eyes are optional and only used if you want a cute kawaii character. If you do add them, place them on the stem before stuffing, since they cannot be repositioned once clipped.
How much stuffing does a mushroom amigurumi need?
Stuff both the cap and the stem firmly. A well-packed cap holds its dome shape, and a firm stem stands straight instead of flopping. If the piece feels squishy but keeps its shape when pressed, you have it right.
Is a crochet mushroom a good beginner project?
Absolutely. It uses only single crochet, increases, and decreases — the three foundational amigurumi skills — on simple shapes with no fiddly limbs to align. It is one of the best confidence-building first plushies.
Can I sell crochet mushrooms I make from this pattern?
You can sell the finished plushies you make yourself. What you cannot do is copy, resell, or redistribute a designer's written pattern. Always make and sell your own physical items rather than sharing the instructions.
How do I make a mini mushroom keychain?
Work a smaller cap (stop increasing around 24–30 stitches) and a shorter stem, then attach a keyring or lobster clasp to the top of the cap with a short chain. Mini mushrooms make fast, giftable craft-fair items.