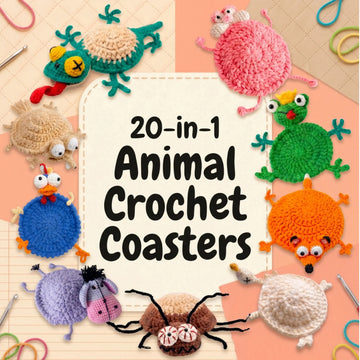
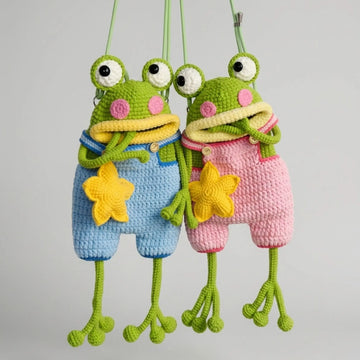
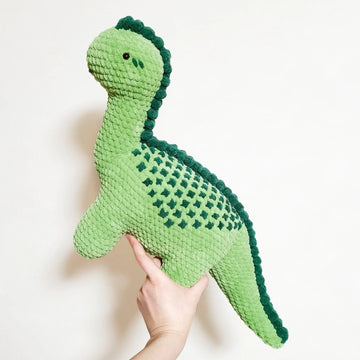
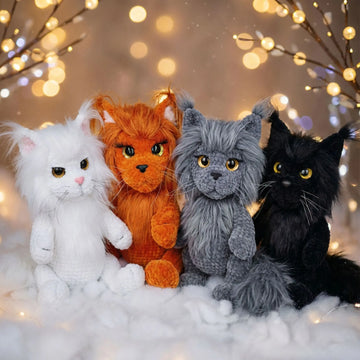
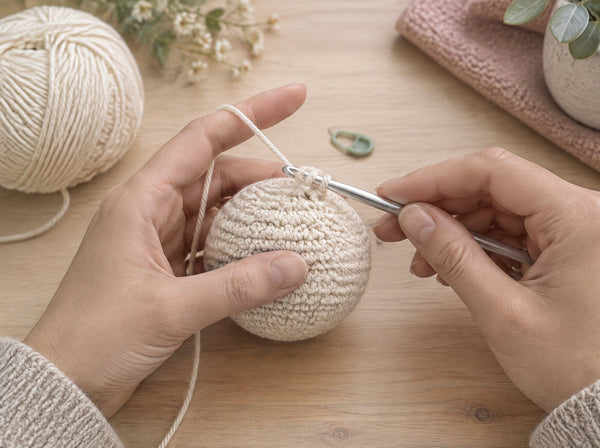
No-Sew Amigurumi Guide
Best No-Sew Amigurumi Patterns for Beginners: Start with Easy Plushies
Learn what makes no-sew amigurumi beginner-friendly, which skills matter first, and how to choose an instant PDF bundle you can actually start today.
By MrsCrochetWorld · Updated August 9, 2026 · 11 min read

Ready to start with no-sew plushies?
50-in-1 No-Sew Amigurumi Bundle gives you a full instant PDF library of cute no-sew projects in US crochet terms.
Instant digital download · No physical item shipped · Opens on phone, tablet, or computer.
The best no-sew amigurumi patterns for beginners are designs where every part — head, body, ears, and limbs — is built into one continuous crocheted piece, so you never need a yarn needle to assemble anything. If you can make a magic ring and single crochet in continuous rounds, you already have what it takes to start your first no-sew plushie today.
This guide covers everything a first-time amigurumi maker needs: what "no-sew" really means in crochet, the exact techniques you'll use, a plain-English walkthrough of the core stitches, how to choose yarn and hook size, tips for getting clean results, and where to find the best beginner no-sew patterns. Whether you want to crochet a round bear, a simple bunny, or a tiny fruit, you'll finish this article knowing exactly where to start.
What Does "No-Sew" Mean in Amigurumi?
Traditional amigurumi involves crocheting each body part separately — head, body, arms, legs, ears, tail — then sewing them all together at the end using a yarn needle and a technique called invisible seaming or mattress stitch. For many beginners, that final assembly step is the hardest and most frustrating part. Pieces end up lopsided. Yarn tails poke through. The join looks nothing like the pattern photo.
No-sew amigurumi solves this by redesigning the construction itself. Instead of crocheting parts separately and seaming them, no-sew patterns use:

Start with the magic ring
The magic ring is one of the most useful beginner skills for no-sew plushies because it creates a neat center for rounded amigurumi shapes.
- **Integrated construction:** Ears, limbs, and facial features are crocheted as part of the main piece — you just keep going without stopping.
- **Crocheted-on joins:** Appendages are attached live — you crochet directly into a finished piece while the body is still on the hook.
- **One-piece shaping:** Strategic increases, decreases, and shaping rounds create the illusion of a head-body transition without a seam.
The result looks identical to a traditionally assembled amigurumi, but the process is faster, cleaner, and infinitely more beginner-friendly.
<!-- ZIG-ZAG SECTION 1: IMAGE LEFT, TEXT RIGHT -->
The Magic Ring: Your Most Important Amigurumi Skill
[INLINE IMAGE 2 — magic ring technique — LEFT]
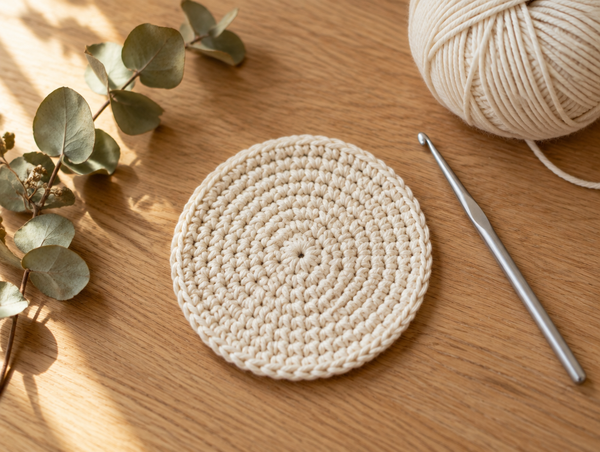
Almost every amigurumi — no-sew or traditional — begins with the magic ring (also called adjustable ring or magic circle). It's a starting loop you can pull tight to eliminate the hole that would otherwise appear in the center of your work. On a stuffed toy, that hole would show the fiberfill inside, so closing it completely matters.
How to Make a Magic Ring
- Drape the yarn over your non-dominant hand, tail end hanging down.
- Loop the working yarn (from the ball) over the tail to form an X.
- Insert your hook through the center of the X, catch the working yarn, and pull up a loop.
- Chain 1 (this does not count as a stitch — it just secures the ring).
- Work the required number of single crochet stitches into the ring (usually 6).
- Pull the tail end firmly to close the center hole.
- Join with a slip stitch to the first single crochet if the pattern is in joined rounds, or simply continue in a spiral for continuous rounds.
Beginner tip: If the magic ring feels awkward for the first few tries, you can start with a slip knot and chain 2, then work into the second chain from the hook. It leaves a tiny center hole, but it's a fine substitute while you're learning the magic ring.
Why no-sew feels easier
No-sew construction reduces finishing steps and helps beginners focus on stitch rhythm, shaping, and stuffing instead of assembly.

<!-- ZIG-ZAG SECTION 2: TEXT LEFT, IMAGE RIGHT -->
No-Sew vs. Traditional Amigurumi: What's the Real Difference?
[INLINE IMAGE 3 — no-sew vs traditional comparison — RIGHT]
It helps to see the difference clearly before you choose your first pattern.
| Feature | Traditional Amigurumi | No-Sew Amigurumi |
|---|---|---|

Build a simple beginner setup
A good starter setup only needs yarn, a matching hook, stitch markers, stuffing, safety eyes, and a clear PDF pattern you can follow step by step.
| Body parts | Crocheted separately | Built into one piece |
| Assembly step | Required — yarn needle seaming | None (or minimal) |
| Yarn tails | Many tails to weave | Fewer tails |
| Skill required | Magic ring + seaming technique | Magic ring only |
| Best for | Detailed characters with poseable limbs | Beginners, fast projects, gifts |
| Time | Longer (due to assembly) | Shorter overall |
Neither approach is "better" — they're different tools for different projects. For beginners, no-sew patterns eliminate the steepest learning curve so you can focus on getting comfortable with tension, stitch counting, and shaping.
The Core Stitches for No-Sew Amigurumi
You need exactly five things:
- **Magic ring** — to start rounds without a hole
- **Single crochet (sc)** — the main stitch for every round
- **Increase (inc)** — two single crochets in the same stitch, used to make the piece wider
- **Invisible decrease (inv dec)** — inserting through the front loops of two stitches and crocheting them together; creates a neater decrease than standard sc2tog
- **Slip stitch (sl st)** — used to close rounds (in joined patterns) or to add ear details
That is the complete toolkit. Every beginner no-sew amigurumi pattern in existence uses combinations of those five operations.
<!-- ZIG-ZAG SECTION 3: IMAGE LEFT, TEXT RIGHT -->
How to Read a No-Sew Amigurumi Pattern
[INLINE IMAGE 4 — beginner at cozy desk crocheting — LEFT]
Amigurumi patterns look dense at first glance, but they follow a reliable format once you understand the shorthand.
Standard Abbreviations
| Abbreviation | Meaning |
|---|---|
| MR | Magic ring |
| sc | Single crochet |
| inc | Increase (2 sc in 1 stitch) |
| inv dec | Invisible decrease |
| sl st | Slip stitch |
| ch | Chain |
| st(s) | Stitch(es) |
| BLO | Back loop only |
| FLO | Front loop only |
| R or Rnd | Round |
Reading a Round
A typical pattern round looks like this:
> R5: sc 4, inc, sc 4, inc — (14)
This means: in round 5, work 4 single crochets, 1 increase, 4 single crochets, 1 increase. The number in parentheses — (14) — is your stitch count at the end of the round. Count your stitches at the end of every round and match that number exactly. If your count is off by even one stitch, the shaping will drift.
Stitch Markers Are Non-Negotiable
Because amigurumi is worked in a continuous spiral (not joined rounds), the beginning and end of each round is invisible unless you mark it. Place a locking stitch marker or a loop of scrap yarn into the first stitch of every round and move it up as you complete each round. This single habit prevents 90% of beginner counting errors.
Choosing Yarn and Hook Size for Your First No-Sew Amigurumi
Yarn
Worsted weight yarn (weight 4) is the most forgiving choice for beginners:
- The stitches are large enough to see and count easily.
- It works up quickly, so you finish a project before losing motivation.
- It's widely available and affordable.
- Both acrylic and cotton work well.
Acrylic yarn (like standard craft store acrylic) is soft, affordable, color-fast, and machine-washable — ideal for toys. Cotton yarn gives crisper stitch definition if you want to see every stitch clearly while you're learning.
Avoid fuzzy or novelty yarns for your first project. Textured yarns hide the stitches and make it nearly impossible to count or correct mistakes.
Hook Size
Use a hook one size smaller than the yarn label recommends. This creates a tighter fabric with smaller gaps between stitches, so the stuffing doesn't peek through. For worsted weight yarn (recommended hook 5.0mm on the label), use a 4.0mm or 4.5mm hook.
Stuffing
Use polyester fiberfill stuffing. Fill the piece firmly enough that it holds its shape and the surface feels smooth, but not so tightly that the stitches pull apart and show white stuffing through the gaps.
Step-by-Step: Your First No-Sew Amigurumi Ball (Starter Project)
Before jumping into a character, practice with a simple sphere. This is the exact shape that forms the base of nearly every amigurumi head — master it and you've mastered the hardest part.
Materials: worsted weight yarn in any color, 4.0mm or 4.5mm hook, fiberfill stuffing, stitch marker
Instructions:
- **R1:** MR, 6 sc — (6)
- **R2:** inc x 6 — (12)
- **R3:** [sc 1, inc] x 6 — (18)
- **R4:** [sc 2, inc] x 6 — (24)
- **R5:** [sc 3, inc] x 6 — (30)
- **R6–R10:** sc in each st — (30) [work 5 rounds even]
- **R11:** [sc 3, inv dec] x 6 — (24)
- **R12:** [sc 2, inv dec] x 6 — (18)
- **R13:** [sc 1, inv dec] x 6 — (12) *— add stuffing now*
- **R14:** inv dec x 6 — (6)
- Fasten off, leaving a 6" tail. Thread tail through remaining 6 stitches, pull tight to close. Weave in ends.
You just crocheted a perfect amigurumi sphere with no sewing whatsoever. Scale the yarn and hook up or down to change the size.
Tips for Getting Clean Results
Tension Consistency
Uneven tension is the number-one issue for beginners. Your grip on the hook and the way you hold the yarn both affect how tight each stitch is. Practice makes this automatic, but in the meantime: crochet every session with the same grip, and pull each stitch snug (not tight, not loose) to the same degree.
Count Every Round
Write the round number and your stitch count on a sticky note as you go. Or use a row counter app. Catching an error two rounds back is frustrating; catching it ten rounds back is heartbreaking.
Closing the Final Round Cleanly
When you decrease down to the last 6 stitches, don't try to slip stitch the gap shut. Instead, cut your yarn leaving a 6-inch tail, thread the tail onto a yarn needle, and pass it through the front loops of all remaining stitches. Pull tight like a drawstring. This gives a much cleaner closure than any stitch method.
Weaving in Ends Securely
Weave each tail in at least three different directions — forward through several stitches, back through several more, forward again. A tail that's only woven in one direction can work loose over time, especially in a toy that gets handled frequently.
50 No-Sew Amigurumi Patterns to Try Right Now
If you want a large library of beginner no-sew patterns without hunting through dozens of individual PDFs, the 50-in-1 No-Sew Amigurumi Bundle from MrsCrochetWorld has everything you need in one download.
<!-- CTA BOX — PRODUCT PLACEHOLDER -->
🧶 50-in-1 No-Sew Amigurumi Bundle
[PRODUCT CTA BOX — IMPLEMENTATION NOTE FOR CMS]
Use the MCW standard product CTA card component with the following data:
- **Product name:** 50-in-1 No-Sew Amigurumi Bundle
- **Short description:** 50 beginner-friendly no-sew amigurumi patterns in one PDF bundle. Animals, fruits, characters, and more — all crocheted without a sewing needle.
- **CTA button text:** Get All 50 Patterns — Instant Download
- **Product URL:** `https://mrscrochetworld.com/products/50-no-sew-amigurumi-patterns-crochet-bundle-pdf?utm_source=blog&utm_medium=seo&utm_campaign=mcw_seo_cluster_20260809`
- **Product image:** Use verified Shopify product image (featured-image skill required for CMS implementation)
- **Note:** Do not add fictional reviews, star ratings, or sale prices. Use only live data from Shopify.
Every pattern in the bundle uses the no-sew construction approach — there's no seaming step, no assembly chart, no yarn-needle required. The bundle is designed so a beginner can download it today and start crocheting their first character within the hour.
What to Make First: A Beginner No-Sew Project Roadmap
Not sure which project to tackle after the basic ball? Here's a suggested progression:
- **Plain sphere** — practice the magic ring, increases, decreases, and invisible closure (see the starter project above)
- **Round animal head with integrated ears** — same sphere base, but ears are crocheted directly on during construction; introduces the concept of crocheting into stitches of a finished piece
- **Simple fruit character** (strawberry, apple, pear) — introduces color change and a textured surface
- **Small round animal with arms** — adds integrated limb construction
- **Full character with head, body, and features** — combines everything into a complete toy
Each step builds exactly one new skill on top of the last. By the time you reach step 5, you'll find the pattern format intuitive and the construction logical.
Common Beginner Mistakes (and How to Avoid Them)
Mistake 1: Skipping the stitch count at end of every round
The fix: always count. Every round. No exceptions until the habit is automatic.
Mistake 2: Crocheting in joined rounds instead of continuous spiral
Most amigurumi patterns work in a continuous spiral. If you join each round with a slip stitch, you create a visible jog in the fabric. Unless the pattern explicitly says "join," keep going without joining.
Mistake 3: Not stuffing firmly enough
Under-stuffed amigurumi goes floppy and sad-looking. Stuff firmly. Push extra stuffing in as you close the final rounds.
Mistake 4: Using standard sc2tog instead of invisible decrease
Standard sc2tog leaves a V-shaped bump on the right side of the fabric. Invisible decrease (through front loops only) sits flat and clean. Take the few extra seconds to use it correctly.
Mistake 5: Crocheting too loosely
If you can see the stuffing through your stitches when the piece is done, your tension is too loose. Go down a hook size or practice pulling each stitch a little tighter.
Frequently Asked Questions
<summary>What does "no-sew" mean in amigurumi patterns?</summary>
<div class="mcw-faq-answer">
<p>A no-sew amigurumi pattern is designed so that all parts — body, head, limbs, ears — are crocheted as one continuous piece or joined using crochet techniques rather than a yarn needle. Instead of stitching separate pieces together after finishing, you use methods like crocheted joins or integrated construction so the needle never comes out.</p>
</div>
<summary>Can a complete beginner make no-sew amigurumi?</summary>
<div class="mcw-faq-answer">
<p>Yes. No-sew designs are often easier for beginners because they eliminate the most frustrating step in traditional amigurumi: invisible seaming. If you can make a magic ring, single crochet, increase, and decrease, you have enough skills to start many beginner no-sew patterns.</p>
</div>
<summary>What stitches do I need to know for no-sew amigurumi?</summary>
<div class="mcw-faq-answer">
<p>The core stitches are the magic ring (adjustable ring), single crochet (sc), increase (inc or 2sc in one stitch), and invisible decrease (inv dec or sc2tog). Some patterns also use slip stitch (sl st) and chain (ch) for ears or small details. That's the complete toolkit for most beginner no-sew amigurumi.</p>
</div>
<summary>What hook size and yarn should I use for beginner no-sew amigurumi?</summary>
<div class="mcw-faq-answer">
<p>Most amigurumi patterns recommend a hook one size smaller than the yarn label suggests, so the fabric stays tight enough to hide the stuffing. For worsted weight yarn (the most beginner-friendly), a US size G/4.0mm hook is a popular starting point. Cotton yarn and acrylic yarn both work well; cotton gives crisp stitch definition while acrylic tends to be softer.</p>
</div>
<summary>How do I attach safety eyes in a no-sew amigurumi?</summary>
<div class="mcw-faq-answer">
<p>Safety eyes are pushed through the fabric between stitches and locked from the inside with a plastic washer before you close the piece. In no-sew patterns, you typically insert safety eyes while the piece is still open, add the stuffing, then close the final round. For items intended for young children, embroider the eyes with yarn instead of using plastic safety eyes.</p>
</div>
<summary>How long does it take to crochet a beginner no-sew amigurumi?</summary>
<div class="mcw-faq-answer">
<p>Small no-sew amigurumi like a simple ball, a round bear head, or a mini fruit can take 30 minutes to two hours depending on your crochet speed. A complete character with integrated ears and limbs might take three to five hours. The no-sew construction actually saves time compared to traditional amigurumi because you skip the assembly and seaming phase.</p>
</div>
<summary>Are no-sew amigurumi safe for babies and toddlers?</summary>
<div class="mcw-faq-answer">
<p>The construction method itself — no loose sewn-on parts — is generally safer than traditional amigurumi with attached limbs that could pull off. However, plastic safety eyes and buttons are choking hazards for children under 3. For baby-safe amigurumi, replace all hard accessories with embroidered or crocheted features, use only soft stuffing, and check regularly for wear.</p>
</div>
<summary>What is the magic ring and why is it important for amigurumi?</summary>
<div class="mcw-faq-answer">
<p>The magic ring (also called adjustable ring or magic circle) is the most common starting point for amigurumi worked in the round. It lets you pull the center tight so there's no hole in the middle of your work — essential for stuffed plushies where a gap would show the fiberfill inside. It takes practice but becomes second nature within a few tries.</p>
</div>
<summary>What does "working in continuous rounds" mean?</summary>
<div class="mcw-faq-answer">
<p>Most amigurumi are crocheted in a spiral — you never join the end of a round to the beginning; you just keep going. This is called working in continuous rounds. To keep track of where each round starts and ends, place a stitch marker (a small clip or piece of contrasting yarn) in the first stitch of every round and move it up as you go.</p>
</div>
<summary>Can I sell amigurumi I make from MrsCrochetWorld patterns?</summary>
<div class="mcw-faq-answer">
<p>MrsCrochetWorld patterns include a small-batch maker license that allows you to sell finished handmade items in limited quantities. Each pattern page lists the specific terms. You may not resell the PDF pattern itself or claim the design as your own.</p>
</div>
Author Box
<!-- AUTHOR BOX COMPONENT — implement with standard MCW author card -->
Author: Mrs. Crochet World
Bio: Amigurumi designer, pattern writer, and crochet educator. Creator of the MrsCrochetWorld pattern library — hundreds of beginner-friendly crochet designs used by makers in over 80 countries.
Website: mrscrochetworld.com
Internal Linking Notes (for CMS implementation)
The following internal links should be added during CMS implementation using MCW standard inline link cards (with image previews — required per blog-master skill):
- **How to Read a Crochet Pattern** → `https://mrscrochetworld.com/blogs/crochet-blog/how-to-read-a-crochet-pattern-abbreviations-rounds-rows-2026`
- Card description: "New to pattern abbreviations? This complete guide explains every symbol, round notation, and bracket so you can follow any crochet pattern with confidence."
- Card CTA: Read the Guide →
- **50-in-1 No-Sew Bundle Product Page** → `https://mrscrochetworld.com/products/50-no-sew-amigurumi-patterns-crochet-bundle-pdf?utm_source=blog&utm_medium=seo&utm_campaign=mcw_seo_cluster_20260809`
- Card description: "Get 50 no-sew amigurumi patterns in one instant-download PDF. Perfect for beginners — no sewing needle needed."
- Card CTA: See the Bundle →
*Use verified product/article images from Shopify/Shopify CDN for both cards (per featured-image skill).*
SEO / Technical Notes (for CMS implementation)
- **Meta title:** Best No-Sew Amigurumi Patterns for Beginners | MrsCrochetWorld
- **Meta description:** Discover the best no-sew amigurumi patterns for beginners. No yarn needle required — just a crochet hook and five basic stitches. Start your first plushie today.
- **Focus keyword:** no-sew amigurumi patterns for beginners
- **Canonical URL:** `https://mrscrochetworld.com/blogs/crochet-blog/best-no-sew-amigurumi-patterns-for-beginners`
- **OG image:** use hero image (best-no-sew-amigurumi-patterns-for-beginners-hero.jpg)
- **Alt texts:** see Image Concepts section above
- **Schema:** Article + FAQPage + BreadcrumbList + Product (see JSON-LD block at top)
- **Internal links:** minimum 2 inline link cards (see Internal Linking Notes above)
- **FAQ accordion:** implement as `<details>/<summary>` per blog-master skill; closed by default
- **Zig-zag layout:** Section 1 (magic ring) → image LEFT; Section 2 (comparison table) → image RIGHT; Section 3 (pattern reading) → image LEFT
- **E-E-A-T signals:** author box required; experience demonstrated through step-by-step starter pattern; authority via MrsCrochetWorld brand
- **Word count:** ~2,600+ words (meets 2,000-word minimum)
Ready to start with no-sew plushies?
50-in-1 No-Sew Amigurumi Bundle gives you a full instant PDF library of cute no-sew projects in US crochet terms.
Instant digital download · No physical item shipped · Opens on phone, tablet, or computer.