The Invisible Decrease: How to Shape Amigurumi Without Bumps
One small change to how you insert your hook removes the lumpy ridge that ruins smooth amigurumi curves.

You have crocheted a beautiful round head. The stitches are even, the stuffing is firm, the colour is perfect. Then you start the decrease rounds that close the top, and a bumpy, puckered line appears across the crown like a scar. It did not come from bad tension or a wrong stitch count. It came from the decrease method almost every beginner pattern assumes you already know how to avoid.
A standard decrease — usually written sc2tog — works a single crochet across two stitches using both loops of each. That means four strands of yarn get gathered into one stitch head. In a flat project nobody notices. In amigurumi, where the fabric is dense, firmly stuffed and viewed from every angle, those four strands pile up into a visible lump. Repeat it six times per round across several rounds and you get a ridged, dimpled surface.
The invisible decrease, popularised by designer Planet June, solves this by halving the bulk. It uses only the front loops, leaving the back loops to sit behind the fabric where the stuffing hides them. The result is a decrease that reads as an ordinary stitch from the outside. This guide covers exactly how to work it, when to use it instead of the standard version, how it behaves in spirals versus joined rounds, and the handful of mistakes that stop it looking truly invisible.
What actually changes
The difference is three millimetres of yarn placement — and it transforms the finished surface.

Why standard decreases leave a ridge
Both spheres here use the same yarn, the same hook and the same stitch counts. The left one was shaped with sc2tog through both loops; the right one with invisible decreases. On the left you can trace exactly where every decrease sits, because each one gathered four yarn strands into a single stitch head and pushed that extra bulk to the surface. Stuffing makes it worse by pressing the fabric outward against those thick points. The right-hand sphere went through identical decrease rounds, but the surface gives nothing away.
Browse amigurumi patterns →
Front loops only, both stitches
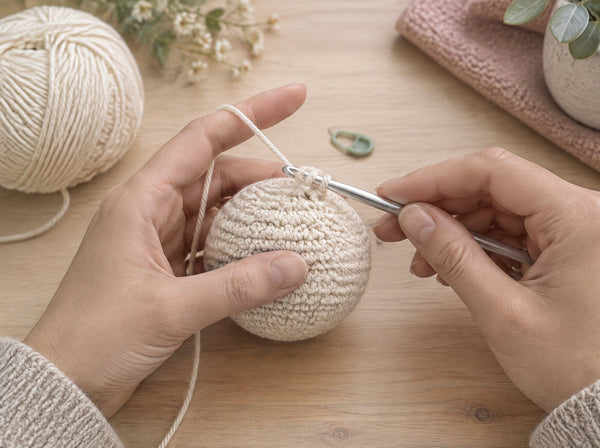
This is the whole technique in one image. The hook has travelled horizontally through the front loop of the first stitch and straight on through the front loop of the second, so two front loops now sit on the hook with the back loops untouched behind them. From here you yarn over and draw through both of those front loops at once, which leaves two loops on the hook, then yarn over and draw through both to finish. Keep the hook parallel to the round rather than dipping down into the stitch, and the loops stay flat and even.
Shop beginner patterns →
Curves that close cleanly
Every shaped area on this head — the crown, the cheeks, the curve behind the muzzle — used invisible decreases, and the surface stays unbroken. This matters most on heads, because that is where the eye lands first and where embroidered features need a smooth base to sit on. It also matters on any piece you shape in a strong curve: snouts, paws, closed limb ends and the top of a ball. Once the technique becomes automatic it costs no extra time, and the finish difference is permanent.
See best-selling patterns →Step by step
Work these slowly the first few times. Once your hands learn the path, it becomes as automatic as a plain single crochet.
- Identify the two stitches. Look at the top of your work. Each stitch head is a V made of two strands. The strand nearer you is the front loop; the one behind it is the back loop. You will use only the front strands.
- Insert into the first front loop. Slide your hook from front to back under the front loop of the next stitch only. Do not go under both loops as you normally would.
- Insert into the second front loop. Without yarning over, move the hook horizontally into the front loop of the following stitch. Keep the hook roughly parallel to the top of the round.
- Check your hook. You should now have two front loops sitting on the shaft, plus the working loop already there. Three loops total.
- Yarn over and pull through two. Wrap the yarn and draw it through both front loops in one movement. Two loops remain on the hook.
- Yarn over and pull through both. Wrap again and draw through the remaining two loops. The decrease is complete and counts as one stitch.
- Keep the tension even. Do not pull the finishing yarn over tighter than your normal stitches. A decrease worked too tight puckers the fabric just as visibly as a bulky one.
- Carry on in pattern. Work the next stitches normally. The two back loops you skipped stay inside the piece where the stuffing conceals them.
- Check from the right side. After a full round, look at the outside of the work. A correct invisible decrease blends into the fabric. If you can still see it, your hook probably caught a back loop.
When to use which decrease
The invisible decrease is not automatically the right answer everywhere. Use this as a quick reference.
| Situation | Best choice | Reason |
|---|---|---|
| Amigurumi head crown | Invisible decrease | Most visible area of the toy; bulk shows immediately. |
| Closing a stuffed sphere | Invisible decrease | Keeps the curve smooth all the way to the final hole. |
| Muzzles, snouts, paws | Invisible decrease | Small shaped pieces where a ridge dominates the surface. |
| Shaping under the chin or body | Either | Rarely seen; choose whichever feels faster. |
| Flat pieces worked in rows | Standard sc2tog | Both sides of the fabric are visible, so a front-loop method looks uneven. |
| Garments and blankets | Standard sc2tog | Drape and reversibility matter more than hiding bulk. |
| Open-work or lacy stitches | Standard sc2tog | No stuffing behind the work to hide the back loops. |
Mistakes that make it visible again
- Catching a back loop by accident, which recreates exactly the bulk you were avoiding.
- Dipping the hook downward instead of travelling horizontally, which twists the front loops.
- Pulling the final yarn over too tight, so the decrease puckers inward.
- Working decreases in a straight stack round after round, which forms a visible seam line even when each stitch is perfect.
- Using slippery or loosely plied yarn, where the front loops split and the stitch loses definition.
- Forgetting that the decrease counts as one stitch, which throws out the round count.
- Switching between methods mid-piece, so the surface texture changes partway up.
Spirals, joined rounds and stacking
Most amigurumi is worked in a continuous spiral, which means your decreases drift slightly sideways with each round and naturally scatter around the piece. That drift is helpful. If instead you work in joined rounds, or your pattern places every decrease at the same point, the decreases line up vertically and form a faint channel down the work even when each individual stitch is flawless.
The fix is to offset them. If a round reads "sc 4, dec" repeated six times, try working a plain stitch or two before starting the next round's sequence so the decrease points rotate. Many well-written patterns already stagger this for you. When one does not, shifting the start of each decrease round by one or two stitches keeps the shaping distributed and the surface genuinely even.
Does it work with other stitches?
The principle transfers. For half double crochet, insert through the front loops of both stitches, yarn over, pull through all front loops, then complete the hdc as usual. The saving is smaller because hdc is already a taller, looser stitch, but it still helps on larger amigurumi worked at a bigger gauge.
For increases there is no equivalent, because adding stitches does not gather extra strands into one head — two single crochets in one stitch spread out naturally. If your increases look bumpy, the cause is tension or yarn choice rather than technique. And if you are working the very last rounds of a piece, stop decreasing once about six stitches remain and close the hole by threading the tail through the front loops of those final stitches and pulling tight. That gives the cleanest possible finish.
The difference between a homemade-looking plushie and a professional one is usually three millimetres of yarn placement.— Ava, MrsCrochetWorld
Keep exploring

The increase and decrease formula behind every round amigurumi shape.
Read the guide →
Finish the last six stitches without leaving a gap or a knot on the surface.
Read the guide →
Fifty one-piece plushies to practise smooth shaping on.
View pattern →
Twenty beginner-friendly animals with plenty of shaped heads and limbs.
View pattern →Three things to remember
- Front loop, not both. If the hook went under two strands per stitch, it is a standard decrease, not an invisible one.
- Travel horizontally. Keep the hook level with the top of the round. Dipping down twists the loops and reintroduces bulk.
- Stagger the stack. Offset decrease points between rounds so they never form a vertical channel down the piece.
Frequently asked questions
What is an invisible decrease in crochet?
It is a single crochet decrease worked through the front loops only of the next two stitches, instead of through both loops of each. Using half the yarn strands means the finished stitch has far less bulk, so it blends into the surrounding fabric rather than forming a visible bump.
How is it different from sc2tog?
A standard sc2tog gathers four yarn strands, both loops from each of two stitches, into one stitch head. The invisible decrease gathers only the two front loops. The back loops stay behind the work, which halves the bulk at the surface and removes the ridge.
Why does my invisible decrease still look bumpy?
The most common cause is accidentally catching a back loop on one of the two stitches, which recreates the bulk you were trying to avoid. Other causes are dipping the hook downward instead of travelling horizontally, or pulling the final yarn over too tight so the stitch puckers.
Can I use the invisible decrease in flat projects?
It is not recommended. In flat work both sides of the fabric are visible, and the skipped back loops show as an uneven line on the reverse. The technique relies on the back of the work being hidden by stuffing, so it suits pieces worked in the round.
Does the invisible decrease count as one stitch?
Yes. Like any decrease it turns two stitches into one, so it counts as a single stitch in your round total. Counting it as two is a frequent cause of stitch counts drifting out across several rounds.
Does it work with half double crochet?
Yes. Insert the hook through the front loops of both stitches, yarn over and pull through those front loops, then finish the half double crochet as normal. The improvement is smaller than with single crochet because hdc is already taller and looser, but it still helps at larger gauges.
Is there an invisible increase too?
No, and it is not needed. Increases work two stitches into one stitch, which spreads yarn outward rather than gathering it, so no extra bulk builds up. If your increases look bumpy the cause is usually tension or yarn choice rather than the technique.
Why do my decreases form a visible line down the piece?
Your decrease points are stacking vertically round after round. Even perfectly worked stitches create a faint channel when they line up. Offset the start of each decrease round by one or two stitches so the shaping points rotate around the piece.
Should I use it on every amigurumi decrease?
Use it anywhere the surface will be seen: heads, spheres, muzzles, paws and closed limb ends. For shaping hidden under the chin, inside a joint or beneath an attached part, either method works and you can choose whichever is faster for you.
Does the invisible decrease make the fabric weaker?
No. The skipped back loops remain part of the fabric and are still anchored by the surrounding stitches. The piece holds its structure normally and the decrease is no more likely to stretch or distort than a standard one.
What yarn works best for invisible decreases?
A smooth, firmly plied cotton or cotton blend gives the clearest stitch definition and makes the front loops easy to identify. Loosely spun, fuzzy or highly slippery yarns tend to split when the hook passes through only one strand, which blurs the result.
How do I finish the last few stitches of a piece?
Stop decreasing when about six stitches remain. Cut the yarn, thread the tail onto a tapestry needle, pass it through the front loop of each remaining stitch in turn, then pull tight to draw the hole closed. Push the tail inside the piece to secure it.
Practise it on a real project
Pick a pattern with plenty of shaped curves and let the technique become automatic.
Shop amigurumi patterns Get a free pattern