Amigurumi Right Side vs Wrong Side: How to Tell Which Side You Are Working On
Learn to read your fabric in seconds, spot an inside-out piece before round ten, and fix it without frogging your whole project.

You followed the pattern exactly. You counted every stitch, you used the right hook, you kept your tension even. And yet the little ball in your hands does not look like the photo. It looks bumpy, a bit ridged, almost like corduroy, while the picture in the pattern shows something smooth and round and polished. Nothing is wrong with your counting. You are simply looking at the wrong side of your fabric, and almost every amigurumi maker meets this moment in their first few projects.
This guide explains what those two surfaces actually are, why the difference appears at all, how to check your work in under five seconds, and what to do when you discover the problem late. It also covers the strange cases: pieces that look correct from the front but wrong from the back, flat circles that seem to have no right side at all, and the small number of projects where the bumpy side is genuinely the better choice.
Everything here uses US crochet terms, and every technique applies to single crochet worked in a continuous spiral, which is how the overwhelming majority of amigurumi patterns are written. If you are still getting comfortable with working in rounds at all, it is worth reading our walkthrough on how to crochet in the round first, then coming back here.
Reading your fabric: the three things to look for
Once you can recognise these three views, you will never have to guess again. Hold your work up to a window or a lamp, because raking light is what makes the texture readable.

The right side is a field of tidy V shapes
Look closely at a piece of single crochet from the front. Every stitch presents a small V, and all of those V shapes point in the same direction, stacked in clean diagonal columns that spiral gently around the piece. The surface between them is flat and even, with no raised bars interrupting the rhythm. This is the face the designer photographed, the face that takes embroidery cleanly, and the face that shows colour changes most crisply.
There is a useful memory trick here. The V is the top of the stitch seen from the outside, made of the two loops you normally insert your hook under. If you can count stitches easily by following the Vs, you are almost certainly looking at the right side.
Revisit the single crochet basics
The wrong side is ridged, bumpy and horizontal
Now compare that to the inside of the same fabric. Instead of orderly Vs you see horizontal bars running across the rounds, with small raised nubs sitting between them. The whole surface reads as ridged rather than smooth, and the eye slides sideways along the rounds instead of following neat columns. Those bars are the back bumps of your stitches, the part of the stitch that sits behind the two top loops.
This texture is not a mistake in itself. It is simply the reverse face of ordinary single crochet. It only becomes a problem when it ends up on the outside of a finished plushie, where it reads as slightly rough and makes safety eyes and embroidered features sit less cleanly.
See what else affects surface quality
Turning an inside-out piece the right way round
If you discover the bumpy side facing outward, do not frog anything. As long as the piece is still open and unstuffed, you can simply invert it. Hold the opening with one hand, push the closed end gently down through the middle with your thumb, and keep easing the fabric through until the whole shape has passed the opening. It behaves exactly like turning a sock, and takes about ten seconds.
The one thing to watch is your working yarn. After inverting, the yarn tail and your live loop will now be on the inside, so bring them back out through the opening before you continue. Your stitch orientation is unaffected, and nobody will ever be able to tell that the piece spent its early rounds the other way round.
Browse amigurumi patternsWhy amigurumi ends up inside out in the first place
The confusing part is that you never actually turn your work. In flat crochet you turn at the end of every row, which is why flat pieces alternate between showing you the front and the back. In amigurumi you work in a continuous spiral and never turn at all, so logically the same face should stay outward the entire time. And it does. The decision about which face that is gets made in a single moment at the very beginning, and then locked in for the rest of the project.
That moment is the first round after your magic ring. When you pull the magic ring closed you have a small flat disc, and that disc has two faces just like any other piece of crochet. Whichever face happens to be pointing away from you as you begin round two becomes the outside of your finished piece. If the disc flipped over while you were tightening the ring, or if you set your work down and picked it up the other way round, the wrong face is now pointing outward, and every subsequent round faithfully builds on that choice.
The five-second check, step by step
- Work at least four rounds. A two-round disc is too small and too curled to read reliably. By round four the texture difference is obvious.
- Find strong side light. Turn towards a window or angle a lamp across the surface. Flat overhead light hides the ridges and makes both faces look similar.
- Look at the outside of the cup. Your piece has started to form a shallow bowl. Examine the convex outer surface, not the inside of the bowl.
- Hunt for V shapes. Neat Vs in tidy columns means the right side is facing out and you can keep going with confidence.
- Hunt for horizontal bars. Ridged bars with bumps between them means the wrong side is facing out and the piece needs inverting.
- Invert now, not later. If the piece needs turning, do it immediately while it is still small, open and completely unstuffed.
- Mark the outside. Clip a stitch marker of a distinctive colour onto the correct outer face so you can re-orient instantly after every break.
| What you see | Which side | What to do |
|---|---|---|
| Even columns of V shapes, smooth surface | Right side | Keep working, this is correct |
| Horizontal bars with small raised bumps | Wrong side | Invert the piece through its opening |
| Piece already stuffed and closed | Either | Leave it, or unpick only the final rounds |
| Flat circle, coaster or appliqué | Both usable | Pick the face you prefer and stay consistent |
| Front and back look different on one piece | Mixed | You likely turned mid-project, see below |
| Deliberately textured or rustic look wanted | Wrong side out | Valid design choice, apply it to all parts |
Four habits that prevent the problem entirely
- Check at round four on every single part, including small ears and limbs. The check costs seconds and saves whole evenings.
- Always put your work down the same way, with the outer face upward. Most mid-project flips happen when you resume after a break.
- Use a marker colour that is reserved for orientation and never used for counting, so its meaning is never ambiguous.
- Finish one body part completely before starting the next, so you always have a correct reference piece to compare against.
When the two halves of one piece disagree
Occasionally a maker finds a single piece that shows tidy Vs across one area and ridged bars across another. That is not an optical illusion, and it is not a fault in the yarn. It means the work was genuinely inverted partway through, almost always without the maker noticing. The usual culprit is a soft, floppy piece that collapsed in a project bag and got picked up the other way round, so the following rounds were worked onto the inner face.
There is no way to correct this without undoing back past the transition point, because the stitches themselves were formed from the opposite side. The good news is that the transition is easy to locate. Find the round where the texture changes, count how many rounds sit above it, and frog just that many. This is one of the situations where a lifeline would have saved you, and our guide to frogging, tinking and lifelines covers how to undo work without losing your place.
It is also worth remembering that a very small mismatch, one or two rounds in a hidden area such as the underside of a foot, is genuinely invisible on a finished toy. Part of growing as a maker is learning which flaws matter and which do not. A slanting seam, by contrast, is visible from every angle, and we cover that separately in our piece on why amigurumi slants.
Does it matter for flat pieces and appliqués?
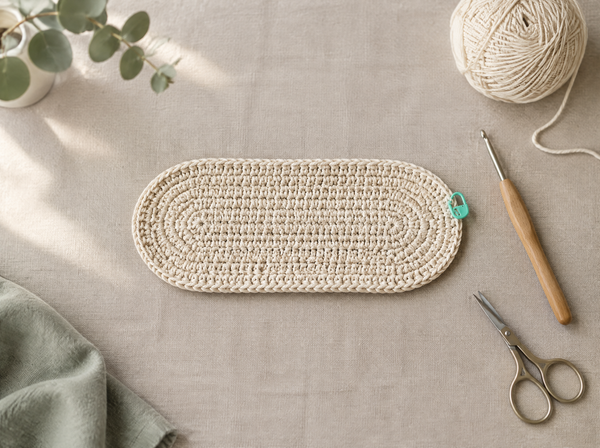
For a flat circle worked in rounds, such as a coaster, a face plate or a flower centre, both faces are perfectly usable. Neither is objectively better, and the fabric will lie flat either way. What matters is consistency: if you are making a set of six coasters, decide which face you prefer and use that face for all six, otherwise the set will look subtly mismatched when laid out together.
For appliqués and small motifs that get sewn onto a larger piece, the smoother right side is usually the better choice because it reads more cleanly at a distance and sits more neatly against the backing fabric. For anything that will be handled a lot, such as a keychain, the right side also tends to wear better, since the raised bars of the wrong side catch more readily on bags and pockets.
When the wrong side is the right choice
There is a small but genuine category of projects where the ridged face is deliberately turned outward. Some designers use it for animal bellies, tree bark, woolly sheep, sweater textures and anything meant to read as rough, rustic or heavily textured. Used intentionally and consistently it looks considered rather than accidental.
The rule is simple: if you choose the textured face, choose it everywhere on that piece or on a clearly defined section of it. A plushie with a smooth head and a bumpy body looks like a mistake. A plushie with a smooth body and a deliberately bumpy textured jumper looks like design. If your pattern does not say which face to use, it always means the right side.
A note on why this confuses so many beginners
Amigurumi is often someone's first experience of crochet worked in a spiral, and spirals behave differently from everything a beginner has learned up to that point. In flat rows, turning is constant and visible, so the idea of a front and a back is obvious and self-correcting. In a spiral you never turn, so the only opportunity to get it wrong is invisible, silent, and happens in the first thirty seconds of the project. Then it stays wrong for four hours.
That is why experienced makers build the round-four check into their routine rather than relying on noticing. It is not that they are better at seeing the difference. It is that they check at a point when the fix is free. Building that one habit is the single highest-value thing a new amigurumi maker can do, and it pays for itself on the very first project where it catches something.
Check your fabric at round four. It costs you five seconds and saves you an entire evening.— Ava, MrsCrochetWorld
Keep exploring

Fifty beginner-friendly plushies in US terms, all worked in the round with clear right-side guidance.
View pattern
The spiral seam explained, plus the increase placement fix that straightens it out.
Read the guide
Stuff firmly without stretching stitches or letting the fiberfill show through.
Read the guideCheck early, fix free
Round four is the sweet spot. The texture is readable, and inverting still costs nothing but ten seconds of your time.
Vs mean right
Columns of V shapes on a smooth surface always mean the right side is facing outward. Horizontal bars always mean the reverse.
Be consistent
Whichever face you choose, use it on every part of the project so the finished piece reads as intentional.
About the author
Ava is the designer behind MrsCrochetWorld and has been writing and testing amigurumi patterns for more than a decade. Every technique in this guide has been worked through on real pieces in cotton, acrylic and blended yarns, and refined through thousands of questions from beginners who hit exactly this problem on their first plushie. MrsCrochetWorld patterns are written in US crochet terms, tested before release, and built around no-sew construction wherever the shape allows it.
Frequently asked questions
How do I tell the right side from the wrong side in amigurumi?
Look at the outer surface under raking side light. The right side shows even columns of V shapes on a smooth surface. The wrong side shows raised horizontal bars with small bumps between them and no clear V shapes. Work at least four rounds before judging, because a very small disc is too curled to read.
Is my amigurumi inside out if it looks bumpy?
Almost certainly yes. A bumpy, ridged outer surface means the back bumps of your stitches are facing outward, which happens when the starting disc flipped during or just after the magic ring. As long as the piece is unstuffed and still open, push it back through its own opening to correct it.
Can I fix an inside-out amigurumi without frogging?
Yes, in most cases. If the piece is open and unstuffed, simply invert it through the opening like turning a sock, then bring your working yarn and tail back out. No stitches are lost and the orientation of your stitches is unaffected. Frogging is only necessary if the piece was inverted partway through.
At which round should I check which side is facing out?
Round four is ideal. Before that the disc is too small and tightly curled for the texture to read clearly. After about round eight the piece starts to cup enough that inverting becomes fiddly, and once it is stuffed and closed it is no longer practical at all.
Why does this happen even though I never turn my work?
Because the decision is made once at the beginning, not repeatedly. Whichever face of the starting disc points away from you as you begin round two becomes the permanent outside. If the disc flipped while you tightened the magic ring, every following round faithfully builds on the wrong face.
Does the right side matter for flat circles and coasters?
Functionally no, since both faces lie flat and wear well. Aesthetically it matters for sets. If you are making several matching coasters, pick one face and use it for all of them, otherwise the pieces look subtly different when laid out together.
What if one part of my piece looks smooth and another looks bumpy?
The work was genuinely inverted partway through, usually after being set down and picked up the other way round. Locate the round where the texture changes, count the rounds above it, and frog back to that point. There is no way to correct it without undoing past the transition.
Is the wrong side ever the correct choice?
Yes. Some designers deliberately turn the ridged face outward for tree bark, woolly sheep, animal bellies and knitted-look textures. Used consistently across a whole piece or a clearly defined section it reads as intentional. If a pattern does not specify, it always means the right side.
Does working in rounds versus rows change which side shows?
Yes, substantially. In flat rows you turn constantly, so both faces alternate and the concept is visible and self-correcting. In a continuous spiral you never turn, so one face stays outward for the entire project and the only chance to get it wrong is in the first few stitches.
How do I stop my piece flipping when I put it down?
Clip a stitch marker in a colour reserved only for orientation onto the correct outer face, and always set the work down with that face upward. Most mid-project flips happen when a soft unstuffed piece collapses in a project bag and gets picked up reversed.
Can I still add safety eyes to an inside-out piece?
You can, but it is worth inverting first. Safety eyes and embroidered features sit flatter and look crisper against the smooth right side. On the ridged wrong side the raised bars push slightly against the eye backing and features can look uneven.
Does the yarn I use make the difference easier or harder to see?
It makes a real difference. Smooth cotton and tightly plied acrylic show the V shapes and the bars very clearly. Fluffy, fuzzy or heavily textured yarns hide both, so with those it helps to check earlier, use stronger side light, or compare against a piece you already know is correct.
Ready to start a plushie that looks right from round one?
Beginner-friendly amigurumi patterns in US terms, written with clear round-by-round guidance and no-sew construction.
Browse amigurumi patterns Get a free pattern