How to Fix Crochet Mistakes: Frogging, Tinking & Lifelines Explained
Every crocheter makes mistakes — the difference between frustration and a finished project is knowing exactly how to undo, repair, and rescue your work without starting over.

You are ten rounds into a cute amigurumi, everything is going beautifully, and then you notice it: three rounds back, your stitch count is off. Your stomach drops. Do you rip it all out? Do you try to hide it? Do you abandon the project entirely and pretend it never existed?
Take a deep breath. Learning how to fix crochet mistakes is one of the most empowering skills you can develop, and it separates crocheters who finish projects from crocheters who have a drawer full of unfinished works-in-progress. The good news is that almost every crochet mistake — a dropped stitch, a miscount, a twisted foundation, a wrong-color round, even a tension problem — can be repaired. You just need the right technique for the right situation.
In this complete guide, we will walk through the three core rescue techniques every crocheter needs: frogging (ripping back), tinking (un-stitching one stitch at a time), and lifelines (a safety net that saves your progress). Then we will cover the most common mistakes — dropped stitches, miscounts, tension issues, twisted stitches, and magic ring failures — and exactly how to fix each one. By the end, you will approach mistakes with confidence instead of dread.

Frogging: The Art of Ripping Back
Frogging is crochet slang for pulling out multiple stitches or rows at once by simply unraveling your yarn. Why "frogging"? Because you "rip it, rip it" — which sounds like a frog's "ribbit, ribbit." It is the fastest way to undo a large mistake when the error is many rows back and un-stitching one at a time would take forever.
To frog, first slide your hook out of the active loop. Then gently pull the working yarn to unravel stitch by stitch. For big sections, you can pull the yarn in a steady, controlled motion and watch rows disappear quickly. Once you reach the row just above your mistake, stop, insert your hook back into the last good loop, and pull the working yarn snug to secure it.
Frogging is ideal when the mistake is deep in your work, when your stitch count has drifted far off, or when you simply do not like how a section looks. It feels dramatic, but it is often the cleanest fix.
50-in-1 No-Sew Amigurumi Bundle
Practice your fixing skills on beginner-friendly, no-sew patterns. Fifty adorable designs mean plenty of low-stakes projects to build muscle memory — and confidence when things go wrong.
Shop the Bundle →Tinking: Un-Stitching One Stitch at a Time
Sometimes frogging is overkill. If your mistake is only a stitch or two back — or if you are working a delicate, textured, or slippery stitch pattern that would be a nightmare to pick back up — you want tinking instead. "Tink" is simply "knit" spelled backwards (a term borrowed from knitting), and it means to reverse your stitches one at a time, working backwards exactly the way you came.
To tink a single crochet, for example, you reverse the motion: pull your hook out, gently tug the working yarn to un-form the last stitch, and carefully pull the loop back through so your hook sits in the previous stitch. You are essentially playing your stitch formation in reverse. It is slower than frogging, but it is precise and gives you total control — you will never accidentally rip out more than you meant to.
- Identify the last correct stitch you want to keep.
- Remove your hook from the current working loop.
- Gently pull the working yarn to loosen the most recent stitch.
- Ease the yarn back through the loop to reverse the stitch formation.
- Reinsert your hook into the newly exposed loop and pull snug.
- Repeat one stitch at a time until you reach the correct point.
Tinking is your best friend for small, localized errors: a missed increase, an extra stitch, a wrong stitch type, or a moment where you just lost your place. Because it is controlled, it is far less likely to cause new problems than frantic frogging. If you want to sharpen more of these small, high-value habits, our guide to 10 Hidden Crochet Tips and Tricks pairs perfectly with tinking.

Lifelines: Your Safety Net Against Disaster
A lifeline is a length of contrasting scrap yarn (or thin cotton thread) that you thread through an entire row or round of stitches at a point where you know your work is correct. If a mistake happens later and you need to rip back, the lifeline stops the unraveling exactly at that row — so you never lose more progress than necessary.
To place a lifeline, thread a tapestry needle with smooth scrap yarn in a color that contrasts your project. Run it through the top loops of every stitch across the row you want to protect, leaving long tails on both ends. Then keep crocheting as normal. If disaster strikes, frog back down to the lifeline, and the scrap yarn holds all those live loops open and counted for you.
Lifelines are especially valuable for lace, cables, colorwork, complex stitch patterns, and any project where re-inserting your hook into loose loops would be painful. Place one every few rounds on a tricky project and you will crochet with genuine peace of mind.
Fixing a Dropped or Missed Stitch
A dropped stitch happens when a loop slips off your hook and starts to unravel; a missed stitch happens when you skip inserting your hook where you should have. Both throw off your stitch count and can leave a small hole or a lopsided edge.
If you catch a dropped stitch immediately, you can often re-insert your hook into the loose loop and secure it before it travels further. If a stitch has already run down a few rows, use your hook to "ladder" it back up — catch the loose horizontal strand and pull it through the loop, one rung at a time, until you reach the top. If you missed a stitch (skipped one), the cleanest fix is usually to tink back to that spot and re-work the row correctly. Counting as you go is the single best prevention. Our detailed walkthrough on How to Read a Crochet Pattern will help you track increases and decreases so stitches stop going missing in the first place.
Fixing Tension Problems
Uneven tension — where some stitches are tight and some are loose — is one of the most common frustrations, especially for beginners and especially in amigurumi, where loose stitches let the stuffing peek through. Tension issues are not always a "mistake" you rip out; often they are a habit you adjust.
First, check your yarn and hook pairing. A hook that is too large for your yarn produces loose, gappy stitches; a hook that is too small produces stiff, tight ones. For amigurumi specifically, you generally want to go down a hook size from the yarn label so the fabric is dense enough to hide stuffing. Second, watch how you hold your working yarn — consistent yarn feed through your fingers creates consistent tension. Third, relax. Death-gripping the hook creates tight, painful stitches and sore hands. If a whole section is noticeably looser or tighter than the rest, frogging back and re-working it with corrected tension is usually worth it. Choosing the right fiber also matters enormously — see our guide to the Best Yarn for Amigurumi for tension-friendly recommendations.

16-in-1 Chonky & Tiny Cats Bundle
Amigurumi cats in two sizes are the perfect canvas for practicing even tension. Master dense, stuffing-hiding stitches on projects that stay cute even while you are still learning.
Shop the Bundle →
Fixing Twisted Stitches & a Twisted Foundation
A twisted foundation chain is a classic beginner heartbreak: you join your chain into a ring or work your first row, only to discover the base is twisted like a Mobius strip and can never lie flat. Unfortunately, there is no repair for a twisted foundation — you must frog back to the chain and rejoin, taking care to keep all stitches facing the same direction before you join.
Individual twisted stitches (where a loop got rotated on the hook) are more forgiving. If you spot one in the current row, tink back to it and re-work it correctly. If it is a row or two down and barely noticeable, many crocheters leave it — but if it distorts the fabric, ladder down or frog back to fix it. Always keep the "V" of your stitch tops facing you and uniform; that visual check catches most twists before they multiply.
Fixing Magic Ring Problems
The magic ring (or magic circle) is where nearly every amigurumi begins — and where a lot of early mistakes happen. The two most common issues are: (1) the ring loosens over time and leaves a hole in the center of your piece, and (2) the ring pulls closed too tightly and puckers.
For a loosening ring, the fix is prevention plus a firm finish: after working your first round into the ring, pull the short tail firmly to cinch the center closed, then weave that tail through the back of the stitches to lock it. If a completed piece has already developed a center hole, you can often thread the tail back through the center stitches with a tapestry needle and cinch again. For a ring that puckers, you likely worked too many stitches too tightly — frog the first round and re-work it, keeping the ring loose enough to close smoothly. If the magic ring simply refuses to cooperate, an alternative is the "chain-2 and work into the first chain" method, which some crocheters find more reliable.
When to Fix vs. When to Leave It
Not every mistake is worth ripping out. Part of becoming a confident crocheter is learning judgment. Ask yourself three questions: Will this mistake be visible in the finished piece? Will it affect the structure, fit, or function? Will it bother you every time you look at it?
If the answer to all three is no — for instance, a barely-visible tension blip on the back of an amigurumi that will be hidden by stuffing and seams — give yourself permission to keep going. Handmade means human, and small irregularities are part of the charm. But if a mistake affects stitch count, symmetry, or a visible front surface, fix it now. Fixing early is always faster than fixing late. Once you have solid stuffing and finishing habits, small internal quirks matter even less — our guide on How to Stuff Amigurumi shows how good finishing hides a multitude of minor flaws.
Preventing Mistakes Before They Happen
The best fix is the one you never need. A few simple habits dramatically reduce how often you have to frog, tink, or reach for a lifeline:
- Use stitch markers at the start of each round so you always know where a round begins and never miscount your join.
- Count every round and jot the number down. Ten seconds of counting saves ten minutes of frogging.
- Place lifelines on complex or long projects so a mistake never costs you more than a few rows.
- Work in good light so you can see your stitches clearly and catch twists and drops early.
- Read the whole pattern step before working it, so surprise increases or stitch changes do not trip you up.
- Take breaks — most mistakes happen when you are tired, distracted, or rushing to finish.
These habits compound. The more you build them, the less time you spend fixing and the more time you spend enjoying the meditative rhythm that makes crochet so rewarding in the first place.
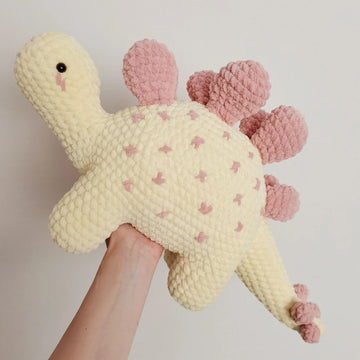
4-in-1 Dinosaur Amigurumi Bundle
Beginner-friendly dinosaurs with clear, well-counted rounds — perfect for practicing stitch markers, counting habits, and lifelines on projects that are forgiving and fun.
Shop the Bundle →Ready to Practice Your New Fixing Skills?
Grab a beginner-friendly bundle and put frogging, tinking, and lifelines to work on projects designed to be forgiving and adorable.
Browse All Patterns →Frequently Asked Questions: Fixing Crochet Mistakes
What does "frogging" mean in crochet?
Frogging means unraveling your crochet by pulling the working yarn to rip out multiple stitches or rows at once. The name comes from "rip it, rip it," which sounds like a frog's "ribbit, ribbit." It is the fastest way to undo a mistake that is several rows deep, though you should frog slowly with slippery yarns so you do not unravel past your target row.
What is the difference between frogging and tinking?
Frogging rips out many stitches or rows quickly by unraveling the yarn, while tinking reverses your stitches one at a time, exactly the way you made them. Use frogging for big mistakes that are far back in your work, and tinking for small, localized errors that are only a stitch or two away — tinking gives you far more control and prevents accidentally ripping out too much.
How do I use a lifeline in crochet?
Thread a tapestry needle with smooth, contrasting scrap yarn and run it through the top loops of every stitch across a row you know is correct, leaving long tails on both ends. Then keep crocheting normally. If you make a mistake later, you can frog back down to the lifeline and it will hold all those live loops open and counted — so you never lose more progress than necessary.
How do I fix a dropped stitch in crochet?
If you catch it immediately, re-insert your hook into the loose loop and pull the working yarn snug before it unravels further. If the stitch has already run down a few rows, use your hook to "ladder" it back up — catch each loose horizontal strand and pull it through the loop, one rung at a time, until you reach the top of your work.
Can I fix a crochet mistake without ripping out my whole project?
Yes, in most cases. Tinking lets you reverse just a few stitches, laddering can repair a single dropped stitch without unraveling everything, and lifelines let you rip back only to a safe point. You only need to frog an entire project when the mistake is fundamental — like a twisted foundation — or affects the whole structure.
How do I fix uneven tension in crochet?
Start by checking your hook-and-yarn pairing (too-large hooks cause loose stitches; too-small hooks cause tight ones). Keep the working yarn feeding consistently through your fingers, and relax your grip so you are not death-gripping the hook. For amigurumi, go down a hook size from the yarn label so the fabric is dense enough to hide stuffing. If one section is noticeably off, frog and re-work it with corrected tension.
How do I fix a twisted foundation chain?
Unfortunately a twisted foundation cannot be repaired in place — you have to frog back to the chain and rejoin. Before joining your chain into a ring or working the first row, lay it flat and make sure every stitch faces the same direction with no twists, then join carefully. Checking for twists before you commit is the only reliable way to avoid this.
Why does my magic ring keep coming loose?
A loosening magic ring usually means the tail was not cinched firmly or was woven in too early. After working your first round into the ring, pull the short tail firmly to cinch the center closed, then weave it through the back of the stitches to lock it — but wait until the piece is stuffed and closed before final weaving so the ring cannot creep back open.
Should I fix every crochet mistake I find?
No. Ask whether the mistake will be visible in the finished piece, whether it affects structure or fit, and whether it will bother you every time you look at it. If it is a hidden, structurally harmless blip — like a tension quirk on the back of an amigurumi — give yourself permission to keep going. Fix mistakes that affect stitch count, symmetry, or visible surfaces.
What is the best way to prevent crochet mistakes?
Use stitch markers at the start of each round, count every round and write the number down, place lifelines on complex projects, work in good light, read each pattern step before working it, and take breaks when you are tired. Most mistakes happen when you are rushing or distracted, so slowing down is the single most effective prevention habit.
How do I fix a missed or skipped stitch?
The cleanest fix for a skipped stitch is to tink back to the point where you missed it and re-work the stitches correctly. If you only notice it much later and it is not structurally important, you can sometimes leave it — but a skipped stitch usually throws off your count, so it is best to catch and fix it as early as possible by counting as you go.
Is it normal to make a lot of mistakes when learning crochet?
Absolutely. Every crocheter — including professional pattern designers — makes mistakes constantly. The difference is that experienced crocheters have learned to fix them quickly and calmly. Mistakes are a normal, universal part of the craft, not a sign you are bad at it. The more you practice fixing them, the more confident and relaxed your crocheting becomes.