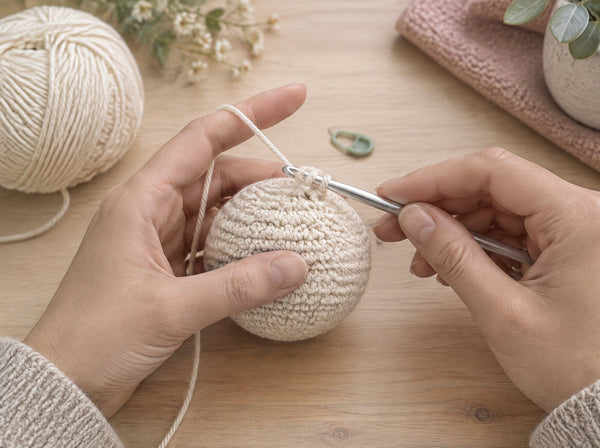
The best crochet tips and tricks are the ones most crocheters learn far too late. After years of hooking yarn here at MrsCrochetWorld.com, we have watched countless makers struggle with problems that a single small habit could have solved. This guide gathers 10 hidden crochet tips and tricks that will save you time, yarn, and frustration - no matter whether you are a nervous beginner or a confident stitcher looking to polish your finish.
None of these crochet hacks require fancy tools or expensive gadgets. They are the quiet, practical techniques that experienced crocheters use on every single project, often without even thinking about it. Master these and your work will look neater, come together faster, and simply feel more enjoyable. Let's dive into the crochet techniques for beginners and beyond that truly move the needle.

10 Crochet Tips and Tricks That Change Everything
Tip #1: Read the Pattern All the Way Through Before You Start
Read the entire pattern from top to bottom before you pick up your hook. This single habit prevents most mid-project disasters. When you skim a pattern, you miss special stitches, unusual construction, or a note that says "at the same time" that completely changes your plan three rows later.
A full read-through tells you what tools you need, which stitches to brush up on, and roughly how the piece is built. You will spot whether the pattern uses US or UK terms, whether it works in rounds or rows, and where color changes fall. For amigurumi especially, understanding the assembly order before you begin saves you from crocheting parts in the wrong sequence. Keep a highlighter handy to mark repeats and tricky sections. Ten minutes of reading up front can save you hours of frogging later - it is the most underrated of all beginner crochet tips.
Tip #2: Use Stitch Markers Generously - Not Just for the Magic Ring
Most beginners only reach for a stitch marker to mark the start of an amigurumi round. Experienced crocheters use them everywhere. Drop a locking marker into the first and last stitch of a row, into every stitch where a repeat begins, or at the exact spot you need to place a color change or increase.

Markers act as visual anchors. When you space them every ten stitches on a long foundation chain, you can count in chunks instead of recounting from one every time you lose your place. They also flag mistakes early: if the distance between two markers is wrong, you know the error is trapped in that small section, not scattered across the whole row. Cheap plastic locking markers work beautifully, but in a pinch a scrap of contrasting yarn or a bobby pin does the job. Generous marker use is one of the simplest crochet tricks with the biggest payoff.
Tip #3: Block Your Finished Pieces - It Transforms the Look
Blocking is wetting or steaming your finished crochet, gently shaping it, and letting it dry in place. It is the difference between a homemade look and a handmade one. Uneven stitches even out, curling edges lie flat, and lacework opens up to reveal its true pattern.
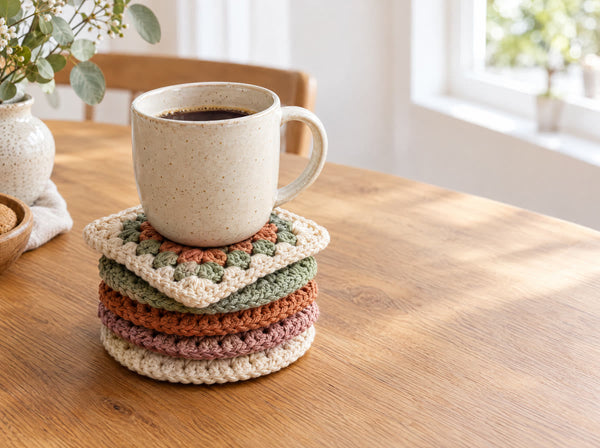
To wet-block, soak the piece in cool water, press out the excess (never wring), pin it to shape on a towel or foam board, and let it dry completely. For acrylic yarn, steam-blocking with an iron held just above the fabric works better, since acrylic can be "killed" into a permanent shape. Granny squares that refuse to sit flat suddenly become crisp and square; a shawl gains beautiful drape. Amigurumi is the main exception - stuffed toys generally should not be blocked. Once you see the transformation blocking brings to garments and homeware, you will never skip this crochet technique again.
Tip #4: The Invisible Join for Seamless Color Changes
The standard slip-stitch join at the end of a round leaves a visible bump and a slightly jagged edge. The invisible join hides it completely. After your last stitch, cut the yarn and pull the tail through the loop. Thread it onto a yarn needle, skip the first stitch, and insert the needle under both loops of the second stitch, then back down into the center of the last stitch you made.
This creates a fake stitch that blends seamlessly into the round, mimicking the natural V of your crochet. It is a game-changer for the tops of hats, the edges of amigurumi, and any project with color changes, where an ugly join would otherwise draw the eye. Practice it a few times on a swatch and it becomes second nature. This is one of those finishing crochet tips and tricks that instantly makes your work look professional.
Tip #5: Count Stitches Every Round With a Row Counter
Count your stitches at the end of every round or row, and track your rounds with a physical or digital row counter. Miscounting is the number one cause of wonky amigurumi and lopsided garments, and it compounds fast - one missed increase early on throws off every round after it.
A clicker counter, a counting app, or even tally marks on paper keep you honest. For amigurumi, the stitch count at the end of each round is usually printed in the pattern, so verify it before moving on. Catching an error while it is one round old means unraveling a few stitches; catching it ten rounds later means frogging a large chunk of work. Building the count-and-track habit feels slow at first but quickly becomes automatic, and it is one of the most reliable crochet techniques for beginners who want consistent, symmetrical results.
Tip #6: How to Fix a Dropped Stitch Without Frogging the Whole Piece
A dropped or split stitch does not mean starting over. First, stay calm and locate exactly where the error sits. If you have just noticed a split stitch a row or two back, insert a locking stitch marker into the live loop of your current work so it cannot unravel further.
Then gently pull out only the stitches back to the mistake, one at a time, keeping your working loop secured. Re-hook the correct loop and continue. For a stitch that was worked into the wrong loop, you can often un-work just that column of stitches with a spare hook and redo it, ladder-style, without disturbing the rest. Keeping a small crochet hook one size smaller on hand makes picking up dropped loops much easier. This targeted-repair mindset is one of the most confidence-building crochet hacks - mistakes stop being catastrophes and become quick, fixable bumps.

Tip #7: Choose the Right Hook for Your Yarn Weight
Matching your hook to your yarn weight is fundamental, yet many beginners grab whatever hook is nearest. Every yarn label lists a recommended hook size and gauge - use it as your starting point. Too large a hook makes loose, gappy fabric; too small a hook makes stiff, cramped work that is hard to stitch.
For amigurumi, most crocheters intentionally go a hook size or two smaller than the label suggests, because tight stitches stop the stuffing from showing through. For garments and blankets, matching or slightly adjusting the recommended size gives the drape you want. If your fabric feels wrong, change your hook before blaming your tension. Ergonomic handles also reduce hand fatigue on big projects. Understanding the hook-and-yarn relationship is one of the quietest but most important crochet tips and tricks, and it affects the outcome of every stitch you make.
Tip #8: Weave in Ends AS YOU GO - Not All at the End
Weave in your yarn tails as you finish each section, rather than saving a mountain of them for the end. Nothing kills the joy of a finished project faster than facing thirty loose ends after the last stitch, and the temptation to rush leads to ends that work loose over time.
Whenever you change colors or join a new ball, weave that tail in immediately while the join is fresh and easy to reach. Work the tail back and forth through several stitches in different directions so it locks in and survives washing. For amigurumi, you can often hide tails inside the stuffed body. Keeping a yarn needle threaded and within reach makes this painless. This habit turns finishing from a dreaded chore into a series of tiny, forgettable steps - easily one of the most practical beginner crochet tips on this list.
Tip #9: The Magic of Gauge Swatches - Save Time, Not Waste It
A gauge swatch is a small test square that tells you how many stitches and rows you get per inch with your chosen yarn and hook. For any project where size matters - sweaters, hats, gloves - the fifteen minutes spent on a swatch saves you from finishing an entire garment that does not fit.
Crochet a swatch at least 4x4 inches in the pattern stitch, then measure the stitches in the center where tension is most even. If you have too many stitches per inch, go up a hook size; too few, go down. It feels like a detour when you are excited to start, but a fitted item made without gauge is a gamble. For amigurumi and blankets, exact gauge matters less, though a swatch still helps you judge fabric density. Far from wasting yarn, a swatch is one of the smartest crochet techniques for guaranteeing your finished piece actually works.
Tip #10: Join a Crochet Community - Learning Accelerates 10x
The single fastest way to improve is to surround yourself with other crocheters. When you can ask a question and get an answer the same day, tricky stitches stop being roadblocks. Communities offer honest feedback, fresh inspiration, and the steady motivation that keeps projects moving.
Look for a local yarn-shop group, a Ravelry forum, a beginner-friendly Facebook group, or a Discord server. Share your works in progress, ask for help reading a chart, and celebrate finishes together. Many makers find that a single tip from a fellow crocheter unlocks a technique they had struggled with for months. You will also discover new patterns, yarn recommendations, and clever crochet hacks you would never have found alone. Community is not a "nice to have" - it is the accelerator that turns slow, solitary progress into rapid, joyful learning.
Crochet Tips and Tricks: Frequently Asked Questions
What are the most useful crochet tips and tricks for beginners?
The most useful crochet tips and tricks for beginners are reading your pattern all the way through first, using stitch markers generously, counting stitches every round, weaving in ends as you go, and choosing a hook that matches your yarn weight. These small habits prevent the most common mistakes and make projects far easier.
Do I really need to make a gauge swatch?
Yes, for any fitted or sized project a gauge swatch saves time rather than wasting it. A quick 4x4 inch swatch tells you whether your finished piece will match the pattern's dimensions. For amigurumi where tight stitches matter more than exact size, gauge is less critical, but it still helps you pick the right hook.
What is blocking and does crochet need it?
Blocking is the process of wetting or steaming finished crochet, shaping it, and letting it dry. It relaxes uneven stitches, opens up lace, and makes edges lie flat. Garments, doilies, and granny squares benefit hugely from blocking, while stuffed amigurumi usually does not need it.
How do I fix a mistake without unraveling my whole project?
You often do not need to frog the whole piece. For a dropped or split stitch, insert your hook back into the correct loop and re-secure it, or unravel back only to the error using a locking stitch marker to hold your place. This targeted fix saves the rest of your work.
What is an invisible join in crochet?
An invisible join is a finishing technique for rounds where you thread the yarn tail through the first stitch and back down, mimicking a real stitch. It hides the usual slip-stitch bump and creates a smooth, seamless edge, which is especially nice for color changes and the tops of hats or amigurumi.
How can I get better at crochet faster?
The fastest way to improve is to join a crochet community. Whether it is a local group, a Ravelry forum, or a supportive Facebook or Discord server, you get instant help with tricky stitches, honest feedback, and motivation. Learning alongside others accelerates progress far more than practicing in isolation.
Put These Crochet Tips and Tricks Into Practice
These 10 crochet tips and tricks are the small, quiet habits that separate frustrating projects from satisfying ones. Read your pattern first, mark generously, count carefully, weave as you go, block when it counts, and lean on your community. None of them are complicated - they simply take a little intention until they become second nature. Adopt even a few and you will notice your work getting neater, faster, and more fun almost immediately.
Ready to put your new skills to work? Explore the beginner-friendly patterns and step-by-step guides at MrsCrochetWorld, where every design is written to help you practice these techniques with confidence. Browse our crochet blog for more tutorials, or grab one of our cozy amigurumi and plushie patterns and start stitching today. Happy hooking!