How to Crochet a Heart: The Simple Formula for Flat and Puffy Hearts
One repeatable shaping formula that gives you clean lobes, a sharp point and a heart that actually looks like a heart, in any yarn and any size.

A crochet heart looks like it should be the easiest thing in the world. It is small, it is quick, and it uses stitches you already know. Then you make one, lay it on the table, and it is a lumpy blob with two shy bumps and a tail that wanders off to the side. The problem is almost never your stitching. It is that most heart patterns tell you which stitches to make without ever explaining the shape logic underneath them.
I have made hearts in thread for bookmarks, in worsted cotton for coasters, in chunky acrylic for garlands, and in fluffy chenille for plushies. Every single one of them used the same three-part structure. In this guide I will show you that structure, give you a written pattern for a flat heart and a puffy amigurumi heart, and walk through the five problems that make hearts go wrong.
This guide uses US crochet terms throughout. If you learned in UK terms, a US single crochet is a UK double crochet, and our glossary explains the rest. Everything here assumes you can make a chain, a single crochet, a double crochet and a magic ring. If any of those feel shaky, start with the basics and come back.
The three-part heart structure
Every crochet heart, flat or stuffed, thread or chunky, is built from the same three parts. Learn these and you stop needing to memorize patterns.

Start with two small half circles, not one shape
The top of a heart is two rounded bumps sitting side by side. In crochet terms each bump is a tiny half circle worked into a ring or a chain loop. If you try to make both lobes in one continuous pass, you get an oval. The lobes must be two separate curved units that you then connect.
The rule that governs the curve is the same flat circle rule used for coasters and amigurumi bases. In a flat half circle you place the same number of increases in every row that you have stitches in your first row. Put in fewer and the lobe cups inward. Put in more and it ruffles. Most small hearts need six to eight stitches per lobe, which is why a heart made from two half circles of six stitches each is such a reliable starting point.
Read the flat circle increase formula →
The centre dip is a join, not a decrease
The little valley between the two lobes is where most hearts fail. Crocheters try to create it by decreasing, which pulls the fabric into a pucker and makes the dip look like a mistake rather than a design feature. The dip is not a decrease. It is the natural gap that appears when you join two finished lobes side by side and then work across the top of both in one continuous row.
Practically this means you finish lobe one, do not fasten off, chain one or two, then work your second lobe, and finally work one combined row across both. The chain between them sets the width of the dip. One chain gives a tight narrow valley suited to small hearts. Two or three chains give a broader, softer dip that reads better in chunky yarn.
See the same logic in the 5-point star formula →
Decrease on both edges to build the bottom tip
Below the lobes the heart narrows to a point. The tip is made by decreasing at the start and end of every row, so the fabric tapers symmetrically. One decrease at each edge per row gives a gentle tapering point suited to larger hearts. Two decreases at each edge gives a sharp, short point that works well on small hearts and keychains.
The last important detail is how you finish. When you are down to three or four stitches, do not keep decreasing to one. Fasten off with a long tail, thread it through the remaining stitches, and pull closed. That gives you a crisp tip instead of a knobbly lump, the same technique used for closing amigurumi.
Browse beginner-friendly patterns →Flat crochet heart: the written pattern
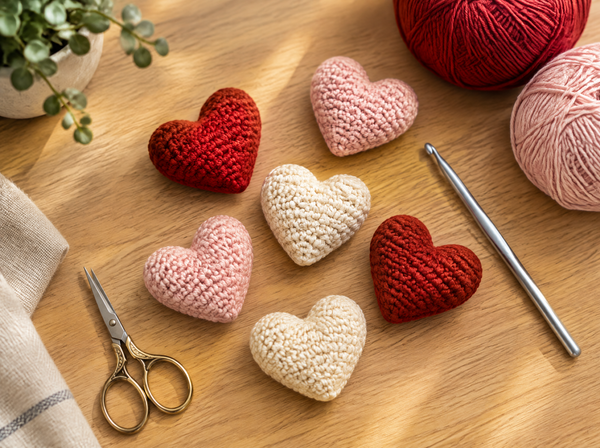
This is the workhorse heart. It is about 2.5 inches wide in worsted cotton with a 4 mm hook and works for appliques, coasters, garlands, card toppers and bag charms. It is worked in joined rows, turning at the end of each.
- Make the first lobe. Chain 4 and join with a slip stitch to form a ring. Chain 2, then work 6 double crochet into the ring. Do not fasten off.
- Chain the bridge. Chain 2. This chain becomes the dip between the two lobes, so keep it even and not too tight.
- Make the second lobe. Chain 4, join with a slip stitch to form a second ring, chain 2, and work 6 double crochet into that ring. You now have two small fans connected by a short chain.
- Join the lobes. Slip stitch into the top of the first lobe to close the pair into one piece. Turn your work.
- Work the shoulder row. Chain 2 and work 1 double crochet into each stitch across both lobes, placing 2 double crochet into the chain space at the dip. This row sets the full width of your heart.
- Begin tapering. Turn, chain 2, decrease over the first two stitches, work in double crochet across until two stitches remain, then decrease over those final two.
- Repeat the taper. Continue repeating the previous step until about 6 stitches remain. In worsted cotton this usually takes 3 to 4 rows.
- Sharpen the point. Switch to single crochet for the last row and decrease at both edges again, leaving 3 stitches.
- Close the tip. Fasten off with a 6 inch tail, thread it onto a yarn needle, run it through the remaining stitches and pull snug. Weave the end into the back.
- Edge it, optional but worth it. Join yarn at the dip and work a round of single crochet all the way around, with 3 single crochet at the bottom point and a single crochet decrease at the dip. This edging is what makes a homemade heart look finished.
| Yarn weight | Hook | Stitches per lobe | Finished width | Best for |
|---|---|---|---|---|
| Crochet thread size 10 | 1.75 mm | 5 | About 1 in | Bookmarks, earrings, card toppers |
| Sport / DK | 3.0 mm | 6 | About 2 in | Appliques, bag charms, garlands |
| Worsted cotton | 4.0 mm | 6 | About 2.5 in | Coasters, appliques, keychains |
| Aran | 5.0 mm | 7 | About 3 in | Cushion motifs, wall hangings |
| Chunky | 6.5 mm | 8 | About 4.5 in | Garlands, large decor, baskets |
Four habits that make hearts look professional
- Use cotton rather than acrylic for flat hearts. Cotton holds the point crisply, while acrylic softens and rounds it.
- Go down one hook size from your yarn label recommendation. A slightly tight fabric keeps the lobes from flopping.
- Block flat hearts. Pin the point, spray lightly with water, and let it dry. It takes ten minutes and transforms the shape.
- Always work the final edging round. It hides uneven row edges and unifies the whole outline.
Puffy amigurumi heart: worked in the round
A stuffed heart uses the same three-part logic but works it in continuous rounds, like any amigurumi shape. Instead of two flat lobes you make two small spheres that merge into one body, then decrease to the point. Use a stitch marker from the very first round, because losing your place in a spiral is the fastest way to end up with a lopsided heart.
- First bobble. Make a magic ring with 6 single crochet. Round 2: increase in every stitch to 12. Rounds 3 and 4: single crochet in every stitch. Fasten off and leave a tail.
- Second bobble. Repeat exactly, but do not fasten off. Keep this one live on your hook.
- Merge the bobbles. Single crochet 6 across the live bobble, then continue directly into the first bobble for 6 stitches, and keep working around both as one piece. You now have a 24 stitch round that forms the top of the heart.
- Close the inner gap. On the next round, decrease once at each side where the two bobbles meet. This closes the inner seam so no stuffing shows through later.
- Straight section. Work 2 to 3 plain rounds with no shaping. This is the widest part of the heart body.
- Taper evenly. Decrease 4 stitches evenly on each round. Spread the decreases out rather than stacking them, or the heart will spiral to one side.
- Stuff as you go. Add fiberfill when the opening is still wide enough for your fingers, roughly two rounds before the end. Stuff firmly into the two lobes first.
- Close the point. When 6 stitches remain, fasten off with a long tail, thread it through the front loops of the remaining stitches and pull tight.
- Shape the dip. Thread the leftover tail from the first bobble, take two or three small stitches down into the valley between the lobes and pull gently. This sculpts the dip and stops the heart looking like a ball.
- Weave in and check. Bury both tails inside the heart, then squeeze the whole shape to even out the stuffing.
Stuffing a heart without lumps
- Pull the fiberfill apart into cloud-like wisps instead of pushing in one dense ball.
- Fill both lobes before filling the body, so the top stays round.
- Under-stuff the point. A packed tip bulges and loses its shape.
- If stuffing shows through your stitches, your hook is too large for the yarn.
A heart is not a hard shape. It is two circles that agreed to meet in the middle and then came to a point.— Ava, MrsCrochetWorld
Five reasons your crochet heart looks wrong
After helping thousands of makers through shaping problems, the same five issues come up again and again. Each one has a quick diagnosis and a quick fix.
1. The lobes are flat instead of round
Your half circles do not have enough increases. A lobe needs its increases concentrated in the first two rows. If you spread them out over four rows, the curve stretches into a slope and the top of your heart looks like a hill rather than two bumps. Work 6 stitches into the ring, then increase in every stitch on the next row, and stop increasing after that.
2. The dip disappeared
You either skipped the bridging chain between the lobes, or you worked a decrease at the centre instead of working into a chain space. Rip back to the join row and place 2 double crochet into the chain space at the dip. The valley will reappear immediately.
3. The point curls under
You are decreasing too fast. If you take 12 stitches down to 3 in two rows, the fabric has nowhere to go but inward. Lengthen the taper by one or two rows so the reduction is gradual. This is the same curling physics that affects flat circles.
4. One lobe is bigger than the other
Almost always a counting problem. Place a stitch marker in the first stitch of each lobe and count before joining. In the round version, the merge round is where counts drift most, because it is easy to work an extra stitch at the transition.
5. The heart leans to one side
In the round version, this is the classic spiral slant. Your decreases are stacking on top of each other instead of being distributed. Offset them by two or three stitches each round, or switch to joined rounds for the tapering section.
| Symptom | Likely cause | Fix |
|---|---|---|
| Oval, no lobes | Worked as one piece | Make two separate half circles and join |
| Puckered centre | Decreased at the dip | Work 2 stitches into the chain space instead |
| Curling tip | Decreasing too fast | Add one or two taper rows |
| Lopsided top | Stitch count drift | Mark and count each lobe |
| Stuffing visible | Hook too large | Go down one hook size |
| Floppy flat heart | Loose tension | Tighten tension, block, add edging |
What to make with crochet hearts
A heart is one of the most useful motifs you can learn, because it scales into dozens of finished projects without a new pattern.
Garlands and bunting
Make 12 to 15 hearts in three colors and join them along a chain. A chunky yarn garland takes one evening and reads beautifully across a mantel or a nursery wall.
Keychains and bag charms
Small stuffed hearts with a keyring clip are the fastest craft-fair product I know. They use scrap yarn, take fifteen minutes, and sell in multiples.
Coasters and placemats
Worked in worsted cotton with a firm edging, a flat heart makes a sturdy coaster. Cotton absorbs, washes well and keeps the point sharp.
Appliques on finished makes
Sew a small heart onto a hat brim, a tote pocket or a baby blanket corner. It instantly turns a plain project into a gift that looks designed.
Amigurumi accents
A tiny heart in a plushie's paws, or stitched onto the chest of a bear, adds the kind of detail that makes handmade toys feel personal.
Scrap yarn busting
Hearts use a few yards each. Keep a basket going and work through leftovers whenever you need a short, satisfying project between bigger makes.
Keep exploring

Fifty beginner-friendly plushie patterns that use the same shaping logic you just learned.
View pattern →
The increase formula behind every lobe, coaster and amigurumi base you will ever make.
Read the guide →
Start every lobe with a closed centre instead of a hole you have to hide later.
Read the guide →
Turn your finished hearts into quick, giftable charms and craft-fair bestsellers.
Read the guide →Sizing a heart up or down
Once the structure makes sense, resizing is arithmetic rather than guesswork. The width of your heart is set by the stitch count per lobe, and the height is set by how many rows you spend tapering. Those two numbers are the only dials you need.
To make a bigger heart, add stitches to each lobe in pairs so both sides stay symmetrical, then add one taper row for every two extra stitches. A lobe of 8 stitches instead of 6 needs roughly one more tapering row to keep the proportions right. If you add width without adding height, the heart becomes squat and wide.
To make a smaller heart, reduce the lobes to 5 or even 4 stitches and taper in single crochet rather than double crochet. Short stitches give you finer control at tiny scales, which matters when the whole motif is an inch across. For thread hearts, drop the bridging chain to a single chain so the dip does not swallow the piece.
Yarn choice changes the result as much as stitch count. The same written pattern produces a 2.5 inch heart in worsted cotton and a 4.5 inch heart in chunky acrylic. If you need a specific finished size, make one heart as a test, measure it, and scale your stitch count proportionally. This is the same reasoning behind making a gauge swatch, and for a motif this small it costs you ten minutes at most.
One last consideration is drape. Hearts destined for garlands and appliques should be firm and slightly stiff, so use cotton and a smaller hook. Hearts that will be squeezed, like plushie accents or baby-safe toys, should be softer, so use acrylic or a cotton blend and accept a rounder point in exchange for cuddliness.
Frequently asked questions
How do you crochet a heart for a complete beginner?
Start with the flat version in worsted cotton and a 4 mm hook. Make two small half circles of 6 double crochet each, join them with a chain of 2, work one row across the top of both, then decrease at both edges each row until a few stitches remain and pull the tip closed. That is the whole shape. Avoid thread or chunky yarn for your first attempt, because mid-weight cotton shows your stitches clearly and holds the shape while you learn.
Why does my crochet heart look like an oval?
You almost certainly worked it as one continuous piece instead of two separate lobes. A heart needs two distinct half circles that are joined afterwards. If you increase around a single centre, geometry gives you a circle or an oval, never a heart. Rip back and make the two lobes separately, then connect them with a short chain before working across the top.
What yarn is best for crochet hearts?
Worsted weight cotton is the best all-round choice. It has stitch definition, it holds the bottom point crisply, and it blocks well. Acrylic is softer and better for stuffed hearts that will be squeezed, but it rounds off the point. Crochet thread is ideal for tiny hearts like bookmarks and earrings. Avoid fluffy or faux fur yarns for your first hearts, because the texture hides your stitches and makes counting very difficult.
How many stitches do I need for a crochet heart?
For a standard small heart, 6 stitches per lobe is the reliable number, giving 12 to 14 stitches across the top row after joining. Smaller thread hearts work at 4 to 5 stitches per lobe, and chunky decorative hearts at 8. Always add stitches in pairs so both lobes stay identical, and add one tapering row for roughly every two extra stitches you add.
Can I crochet a heart in the round?
Yes, and that is exactly how stuffed amigurumi hearts are made. You work two small spheres from magic rings, merge them into a single round of roughly 24 stitches, close the inner gap where they meet, work a couple of straight rounds, then decrease 4 stitches evenly per round down to the point. Use a stitch marker throughout, because losing your place in a continuous spiral is the main cause of lopsided hearts.
Why is the dip between the lobes puckering?
You are decreasing at the centre instead of working into the bridging chain space. The valley between the lobes is formed naturally by the gap between two joined half circles, not by pulling stitches together. Work 2 stitches into the chain space at the dip on your join row and the pucker disappears. If the dip then looks too shallow for chunky yarn, lengthen the bridging chain from 2 to 3.
How do I get a sharp point at the bottom?
Three things matter. Decrease gradually rather than collapsing many stitches in one row, switch to single crochet for the final row so the stitches are short and tight, and close the last 3 stitches by threading the tail through them rather than continuing to decrease. Blocking the finished heart with the point pinned out will sharpen it further.
How long does it take to crochet a heart?
A small flat heart in worsted cotton takes about 10 to 15 minutes once you know the pattern. A stuffed amigurumi heart takes 25 to 40 minutes including stuffing and shaping the dip. A chunky garland heart takes around 8 minutes each, which is why a full garland of 12 hearts is comfortably a single-evening project.
Do I need to block a crochet heart?
For flat hearts, yes, and it makes a visible difference. Pin the heart to shape with the point pulled out, mist it lightly with water, and let it dry fully. Cotton holds the blocked shape permanently. Stuffed hearts do not need blocking, because the fiberfill sets the shape from the inside, but you should squeeze and roll them after stuffing to even everything out.
Can I sell items made from this heart pattern?
Yes. The method described here is a basic shaping technique rather than a proprietary design, so hearts you make from it are yours to sell. What you cannot do is copy and resell a designer's written pattern or photographs. If you plan to sell finished hearts at markets or online, keychains and garlands are the strongest sellers because they are fast to make and priced for impulse purchases.
What hook size should I use for a crochet heart?
Go one size smaller than your yarn label recommends. For worsted cotton that means a 4 mm hook rather than a 5 mm. A slightly tighter fabric keeps the lobes from flopping, stops stuffing from showing on amigurumi hearts, and gives you a crisper point. If your finished heart feels floppy or you can see light through the stitches, drop another half size.
How do I join hearts into a garland?
Work your hearts first, then make a long foundation chain for the base. Attach each heart to the chain with a slip stitch through the dip at the top centre, spacing them 8 to 10 chains apart. Working the chain and attaching as you go is faster than sewing them on afterwards, and it keeps the spacing even. Leave a generous length of plain chain at both ends for hanging.
About the author
Ava is the designer behind MrsCrochetWorld, where she has published hundreds of amigurumi and beginner crochet patterns and written the shape-formula guides that thousands of makers use every week. She specialises in no-sew amigurumi construction and in explaining the geometry behind crochet shaping, so that crocheters can adapt patterns instead of following them blindly. Every technique in this guide has been worked, tested and photographed in her own studio.
MrsCrochetWorld patterns are written in US terms, tested by real beginners before release, and supported by step-by-step photography. If something in this guide did not work for you, that is useful information, and it feeds directly into how the next version is written.
Ready for your next project?
Put your new shaping skills to work with beginner-friendly patterns that build on exactly these techniques.
Browse beginner patterns Get a free pattern