How to Crochet an Oval: The Flat Oval Base Formula for Amigurumi
Learn the simple increase formula that turns a foundation chain into a perfectly flat oval base, the shape behind almost every amigurumi body, slipper sole and basket bottom.

The first time most crocheters try to make an oval, they chain a few stitches, work around, and end up with something that curls at the ends or ruffles along the sides. It looks almost right, and that is exactly what makes it frustrating. The oval is not a difficult shape. It just follows a different rule than the circle you already know, and nobody ever explains that rule clearly.
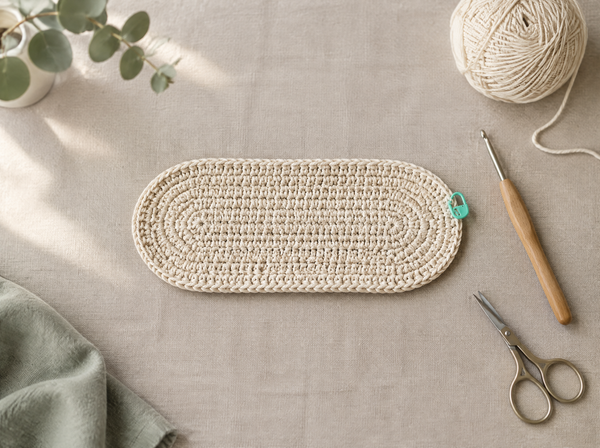
That single sentence solves most oval problems. Once you understand that an oval is simply a circle that has been cut in half and had a straight section inserted between the two halves, every increase placement makes sense. The curved ends still need the same rate of growth a circle needs. The straight sides need no growth at all, because straight edges do not get bigger as they move outward.
In this guide you will learn the exact stitch counts for the first six rounds, how to work into both sides of a foundation chain without twisting it, how to choose your starting chain length so the finished oval matches the proportions you want, and how to diagnose the two classic failures: the oval that cups into a bowl and the oval that ripples at the edges. By the end you will be able to design an oval of any size from scratch, without hunting for a pattern.
Understanding the oval before you pick up your hook
Three ideas that make the increase formula obvious instead of something you have to memorise.

An oval is a circle with a straight middle
Picture a flat crocheted circle. Now imagine slicing it straight through the centre and pulling the two halves apart, then filling the gap with a rectangle. That is an oval. The two rounded ends are still half circles and still behave exactly like circle halves. The straight sides are new, and straight sides never need increases. This is why the oval formula looks unusual at first and then becomes completely logical: you are running circle maths at the ends and doing nothing in the middle.
Compare working in the round →
You work into both sides of the chain
A circle starts from a magic ring. An oval starts from a foundation chain, and the trick is that you crochet along the top of that chain, work several stitches into the very last chain to turn the corner, then continue back along the unused loops on the underside. Those bottom loops are the bumps running along the back of your chain. Many beginners miss them entirely and accidentally work a flat row instead of a round, which is the single most common reason a first oval attempt fails.
Master the foundation chain →
The oval is the base of most amigurumi bodies
Round bases make spheres, and spheres make heads. But bodies, muzzles, feet, paws, slipper soles, basket bottoms and most animal snouts all begin with an oval. If you only know the circle, every project you make will be built from balls. The moment you learn the oval, you can build shapes that are longer in one direction than the other, which is what makes an amigurumi read as a dog rather than a bear, or a whale rather than a blob.
Browse amigurumi patterns →How to crochet an oval step by step
This walkthrough uses US crochet terms and single crochet throughout, worked in a continuous spiral without joining. Use a stitch marker in the first stitch of every round. The example starts with a chain of six, which gives a compact oval ideal for a small amigurumi body or a muzzle, but the method works with any chain length.
- Chain six. Make a slip knot and work six chain stitches. Keep them loose enough that you can comfortably get your hook back into them later. Tight chains are the second most common cause of a failed oval, because you physically cannot reach the bottom loops.
- Work five single crochet along the chain. Starting in the second chain from your hook, place one single crochet in each of the next five chains. You now have a short straight row sitting on top of your chain.
- Turn the corner with three stitches. In that same last chain, work two more single crochet. Three stitches now sit in one chain, which fans the work around the end so you can travel back down the other side. Do not turn your work over. You are rotating around the end, not flipping.
- Work back along the underside. Crochet one single crochet into each of the next four bottom loops. These are the bumps along the back of the foundation chain. Your work should now look like a narrow flat lozenge.
- Close the first round. Work two single crochet in the final bottom loop, which is the same chain where you made your very first stitch. Round one is complete with fourteen stitches. Place your marker in the first stitch of the next round.
- Round two: increase at the ends only. Work one increase, one increase, three single crochet, three increases, three single crochet, then one increase. You finish with twenty stitches. Notice the increases cluster at the two curved ends while the straight sections stay plain.
- Round three: push the increases outward. Work one single crochet, increase, increase, one single crochet, then four single crochet along the side, then one single crochet, increase, increase, one single crochet, then four single crochet. You end with twenty-four stitches, adding six again.
- Keep adding six per round. Every subsequent round adds six stitches, split as three increases at each rounded end, with one more plain stitch between each increase than the round before. The straight sides never gain stitches.
- Check flatness as you go. Lay the piece on a table every round or two. It should sit flat without help. If it does, continue until the oval is the size you want.
- Finish or build upward. For a flat piece such as a coaster or sole, fasten off and weave in the end. For an amigurumi body, stop increasing and work one round into the back loops only, which creates a crisp folded edge and makes the sides rise straight up.
Oval stitch counts at a glance
This table assumes a starting chain of six worked in single crochet. The pattern of six added stitches per round holds no matter what chain length you choose. Only the starting total changes.
| Round | Stitch count | Increases placed | Plain stitches between increases at each end |
|---|---|---|---|
| Round 1 | 14 | Built into the chain | None |
| Round 2 | 20 | 6 total, 3 per end | 0 |
| Round 3 | 26 | 6 total, 3 per end | 1 |
| Round 4 | 32 | 6 total, 3 per end | 2 |
| Round 5 | 38 | 6 total, 3 per end | 3 |
| Round 6 | 44 | 6 total, 3 per end | 4 |
Choosing your starting chain length
The starting chain controls the proportions of the finished oval, and this is where you move from following patterns to designing your own shapes. The rule is simple: the longer the chain, the longer and narrower the oval. A chain of four produces something that is almost round. A chain of twenty produces a long narrow shape suitable for a slipper sole or a snake body.
A useful way to plan is to think in terms of difference. The finished oval will be roughly as much longer than it is wide as your starting chain was long. If you want an oval that is about two inches longer than it is wide, start with a chain that measures about two inches. The rounded ends then grow outward equally in all directions, preserving that difference as the piece gets bigger.
This also means you cannot change an oval's proportions by adding rounds. Every round makes the oval bigger but keeps the same length-to-width difference. If your oval is too square, you must start over with a longer chain. There is no way to stretch it later, which is why it pays to swatch a small version before committing to a whole project.
Five habits that make oval bases come out right
- Mark the first stitch of every round with a locking stitch marker and move it up as you go. Spiral rounds have no visible join, and losing your place in an oval is far more confusing than in a circle because the increase positions shift.
- Count your stitches at the end of every round for the first six rounds. An oval hides errors well, and a single missed increase will not show until three rounds later when the shape begins to pull.
- Keep your foundation chain loose. If you struggle to insert your hook into the bottom loops, go up one hook size for the chain only, then switch back for the rounds.
- Work with a hook one size smaller than the yarn label suggests when making amigurumi. Tight fabric keeps stuffing from showing through and holds the oval shape far better.
- Lay the piece flat on a table after every second round. Catching a cup or a ripple at round four costs you two rounds of frogging. Catching it at round ten costs you the whole base.
Troubleshooting: when your oval will not lie flat
Almost every oval problem falls into one of two categories, and both have straightforward fixes once you know which one you are looking at.
If your oval cups into a bowl shape, you are not increasing enough. The outer edge is too short to go around the growing centre, so the fabric pulls inward and the piece rises at the edges. Count the stitches in your last round and compare them to the table above. You are most likely missing one or two increases at a rounded end. The other possible cause is tension: if your stitches are extremely tight, the fabric cannot relax into a flat plane even with correct counts. Try the same pattern with a hook one size larger and see whether the cupping disappears.
If your oval ripples or ruffles at the edges, you are increasing too much. There are more stitches around the outside than the circumference needs, so the extra fabric has nowhere to go and buckles into waves. This usually happens when increases creep onto the straight sides. Remember that the straight sides should never gain a single stitch, no matter how many rounds you work. Check your last round carefully and confirm that all six increases sit at the two curved ends.
If one end is noticeably pointier than the other, your three end increases are not evenly spaced, or you placed four at one end and two at the other. Lay the piece flat and look at the two ends side by side. The fix is to rip back to the last round that looked symmetrical and rework it, counting out loud as you place each increase.
If your oval twists or spirals visibly, check whether you accidentally turned your work when rounding the first end. The whole piece must be worked with the same face toward you throughout. A twisted first round will never correct itself.
A circle grows in every direction at once. An oval grows only where it curves. Once that clicks, you can design any flat shape you can picture.— Ava, MrsCrochetWorld
Where the oval base shows up in real projects
Learning the oval is not an academic exercise. It unlocks a surprisingly large share of the amigurumi and accessory world, and recognising it in finished pieces will change how you read patterns.
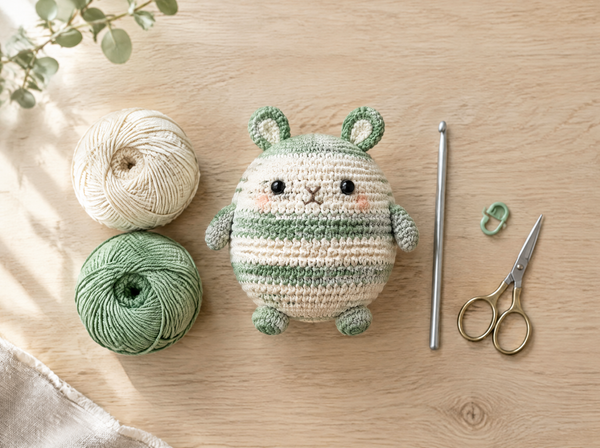
In amigurumi, the oval is the standard starting point for any body that is longer than it is wide. Dogs, cats, whales, turtles, sloths, dinosaurs and most four-legged animals begin with an oval base worked flat for several rounds, then built upward into three dimensions. The same shape, made smaller, becomes a muzzle or a snout. Smaller still, it becomes a paw pad or an ear.
Outside of amigurumi, the oval base is the bottom of nearly every basket that is not perfectly round, the sole of every crocheted slipper and bootie, the base of pencil cases and makeup bags, and the foundation of oval rugs and placemats. A bag that sits upright rather than slumping almost always has an oval base, because the straight sides give it structure a circle cannot.
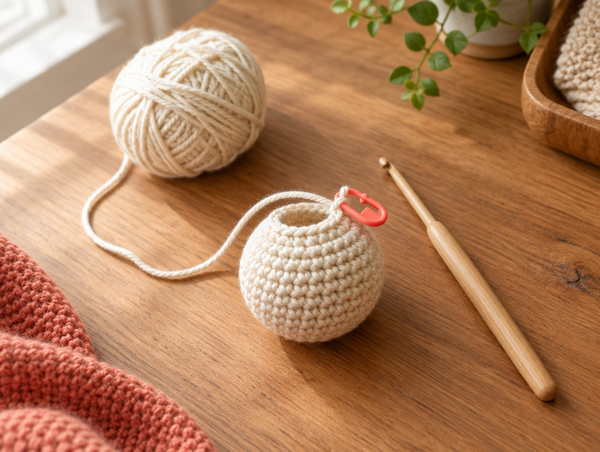
Once you can produce a flat oval reliably, the move into three dimensions is small. You simply stop increasing. The moment your rounds stop gaining stitches, the fabric has no choice but to turn upward, and your flat base becomes the floor of a three-dimensional shape. Working one round into the back loops only at that transition gives you a sharp, deliberate fold instead of a soft slope, which is exactly what you want for a basket or a bag.
Keep exploring

Fifty beginner-friendly plushies built from the circle and oval bases you just learned.
View pattern →
A printed beginner book that walks you through shaping bases step by step.
View pattern →
The companion guide for round shapes, with the same increase logic applied to balls.
Read the guide →Works in any yarn weight
The six-stitch rule is independent of yarn. Worsted cotton, DK acrylic and chunky blends all follow the same counts. Only the finished size changes.
Adapts to other stitches
Half double and double crochet ovals need more increases per round because taller stitches cover more ground. Start from the same end-only logic and add stitches until it lies flat.
Reversible by design
Because an oval is worked in a spiral with no turning, both faces are usable. Choose whichever side you prefer before you start building upward.
Frequently asked questions
How many stitches should I increase per round in a crochet oval?
Six stitches per round when working in single crochet, exactly the same as a flat circle. The difference is placement: all six increases go at the two rounded ends, three at each end, and the straight sides stay plain. Each round the number of plain stitches between those end increases grows by one.
Why does my crochet oval curl up at the edges?
Curling or cupping means you are not increasing enough. The outer edge is too short to travel around the growing centre, so it pulls the fabric into a bowl. Count your last round against the stitch table and look for a missed increase at one of the rounded ends. Very tight tension can also cause cupping even with correct counts, so try a hook one size larger.
Why does my crochet oval ripple or ruffle?
Rippling means you are increasing too much. The most common cause is placing increases along the straight sides instead of keeping them at the curved ends. The straight sides of an oval never gain stitches regardless of how many rounds you work. Check your last round and confirm all six increases sit at the two ends.
How do I work into both sides of a foundation chain?
Crochet along the top of the chain first, work several stitches into the very last chain to turn the corner, then continue back along the bumps on the underside of the chain. Those bumps are the unused loops. Do not flip your work over. You rotate around the end so the same face stays toward you throughout.
What chain length should I start with for an oval?
The chain determines how much longer the oval is than it is wide. A chain of four gives a nearly round shape, six gives a compact oval suitable for small amigurumi bodies, and fifteen to twenty gives a long narrow shape for slipper soles. Measure your chain: the finished oval will be roughly that much longer than it is wide.
Can I change the proportions of an oval by adding more rounds?
No. Every round grows the oval in all directions equally, which preserves the original difference between length and width. The shape gets bigger but not relatively longer. If your oval is too square or too narrow, you must start again with a different chain length.
Should I join each round or work in a continuous spiral?
Work in a continuous spiral for amigurumi and most flat bases. Spirals avoid the visible seam that joined rounds create. Use a locking stitch marker in the first stitch of each round and move it up as you work, because a spiral oval has no natural stopping point.
How do I turn a flat oval into a three-dimensional shape?
Stop increasing. The moment a round has the same stitch count as the round before it, the fabric has nowhere to grow outward and turns upward instead. For a crisp fold at the base, work one round into the back loops only at the transition, then continue in both loops.
Does the oval formula work with double crochet?
The placement logic is the same but the numbers change. Taller stitches cover more distance, so a double crochet oval needs roughly twelve added stitches per round instead of six. Keep all increases at the rounded ends and add stitches gradually until the piece lies flat on a table.
What is the difference between a crochet oval and a crochet rectangle?
A rectangle is worked in rows back and forth with turning chains and has four corners. An oval is worked in continuous rounds around a foundation chain and has two curved ends with no corners at all. Ovals are used for bases that need to become three-dimensional; rectangles stay flat.
Which projects start with an oval base?
Most amigurumi animal bodies that are longer than they are wide, plus muzzles, snouts, paws and ears. Outside amigurumi, oval bases are used for slipper soles, booties, pencil cases, makeup bags, oval baskets, placemats and rugs. Any bag that stands upright rather than slumping almost certainly has an oval base.
How do I keep my stitch count accurate in a spiral oval?
Move a locking stitch marker into the first stitch of every new round, and count the full round before moving on for at least the first six rounds. An oval hides a missed increase well, and the resulting distortion often does not become visible until two or three rounds later, when fixing it means ripping back much further.
Put your new oval base to work
Every plushie in our no-sew collection starts from a base just like the one you have learned. Pick a pattern and make something today.
Browse amigurumi patterns Get a free patternAbout the author
Ava is the designer behind MrsCrochetWorld. She has been crocheting amigurumi for over a decade and has published more than two hundred original patterns, with a focus on no-sew construction and beginner-friendly shaping. Every technique in this guide has been tested across hundreds of finished pieces and refined through feedback from the MrsCrochetWorld pattern community. All stitch counts here were worked and verified in worsted weight cotton with a 3.0 mm hook before publication.
Have a question about oval bases, or found a stitch count that behaves differently in your yarn? Our pattern support team answers every message, and reader corrections regularly shape updates to these guides.