How to Crochet an Egg Shape: The Amigurumi Egg Formula
One repeatable increase-and-decrease formula that turns a plain ball into a smooth, lopsided-free egg in any yarn weight and any size.

The egg is the shape nobody teaches you, and the shape you end up needing constantly. Bodies of birds and chicks, animal heads, acorns, little pears, gnome torsos, bunny bellies, mushroom caps turned upside down, and half the plushie bodies you have ever admired are not spheres at all. They are eggs. The problem is that most makers try to crochet an egg by crocheting a ball and hoping it goes wrong in a flattering direction. It does not. You get a lumpy sphere with a dent in the top.
Once you see an egg as a sphere with an unequal top and bottom, the shaping stops being guesswork. You are not inventing a new technique. You are reusing the increase and decrease maths you already know from the flat circle and the sphere, and simply spending different numbers of rounds on each half.
This guide gives you the formula in plain numbers, a full worked 6-round egg you can crochet today, a scaling table so you can make eggs from keyring-tiny to cushion-large, and the fixes for the four ways eggs usually go wrong. Every round below is worked in continuous spiral rounds with single crochet in US terms, which is the standard construction for amigurumi.
The three things that make a shape read as an egg
Before the numbers, understand what your eye is actually responding to. An egg has a specific silhouette, and three decisions produce it.

The widest point sits below the middle
On a sphere, the widest round is exactly halfway up. On an egg, it sits roughly 40% of the way up from the base. That single displacement is what stops a shape from reading as a ball. Everything above the widest round is taller and tapered; everything below it is shorter and rounder. If you remember nothing else, remember that the fat part of an egg is low.
Compare the sphere formula →
The two ends decrease at different speeds
The narrow end closes fast: you decrease on consecutive rounds with no plain rounds between them, so the curve pulls in steeply. The wide end closes slowly: you alternate every decrease round with a plain round, so the curve stays generous and rounded. Same stitches, same maths, different rhythm. Pacing is the whole trick, and it is why counting rounds matters more than counting stitches here.
Master the invisible decrease →
Stuffing finishes the curve, not the stitches
An unstuffed egg is a floppy tube. The shape you designed only appears under firm, even stuffing that pushes outward against the widest round. Stuff in small pinches as you go, starting before the opening gets tight, and work the narrow end firmer than the base. Under-stuffed eggs sag into pears; over-stuffed eggs go spherical and the stitches gap.
Read the stuffing guide →The egg formula in four phases
Every egg, in every size, follows the same four phases. The only thing that changes between a tiny keyring egg and a large decorative one is how many stitches you increase to in Phase 1 and how many rounds you spend in Phase 2.
- Phase 1 — Increase to the widest round. Start with a magic ring of 6 and work the standard flat-circle increase: each round adds 6 stitches, with one more plain stitch between increases every round. Stop when you reach your target widest-round count.
- Phase 2 — Hold the width. Work plain rounds with no shaping. This is the straight section that becomes the belly of the egg. Short here means a rounder egg; long here means a more elongated, almost capsule-shaped egg.
- Phase 3 — Close the wide end gently. Alternate decrease rounds with plain rounds. This produces the soft, full curve of the base. Expect this phase to take roughly one and a half times as many rounds as Phase 4.
- Phase 4 — Close the narrow end steeply. Decrease on every round with no plain rounds between. This pulls the top in quickly to the pointed end. Stuff firmly just before the opening becomes too small to work through, then close the final stitches.
Note the direction of travel. You begin at the narrow top and work down, or begin at the wide base and work up, depending on which end you want the neatest closing on. Starting at the narrow end is usually easier because the magic ring naturally forms a tight point, and your final closing happens at the generous base where a small imperfection is less visible and often sits against a surface anyway.
| Egg size | Widest round | Increase rounds | Plain rounds at width | Approx. finished height |
|---|---|---|---|---|
| Tiny (keyring, garland) | 18 sts | 3 | 3 | 4–5 cm / 1.5–2 in |
| Small (classic amigurumi) | 24 sts | 4 | 4 | 6–7 cm / 2.5–3 in |
| Medium (plushie body) | 30 sts | 5 | 6 | 8–9 cm / 3–3.5 in |
| Large (decor, bowl filler) | 36 sts | 6 | 7 | 10–12 cm / 4–4.75 in |
| Extra large (cushion-style) | 48 sts | 8 | 9 | 14–16 cm / 5.5–6.25 in |
Reading the table correctly
- Finished height assumes worsted or aran weight cotton with a 3.0 mm or 3.5 mm hook, the standard amigurumi pairing of a hook one or two sizes below the yarn label.
- Heights shift with your personal tension. If yours runs loose, drop a hook size rather than changing the stitch counts.
- The plain-round count is the single most expressive number in the table. Add two to it for a longer, more ovoid egg; subtract two for a rounder, apple-like egg.
- Every increase round adds exactly 6 stitches, so the widest round is always a multiple of 6. This is what keeps the decreases distributing evenly later.
An egg is not a harder shape than a ball. It is the same shape given more time at one end than the other.— Ava, MrsCrochetWorld
The worked pattern: a classic 24-stitch egg
This is the size most amigurumi bodies and heads use, and the one worth crocheting first because the proportions are forgiving. Work in continuous spiral rounds, US terms, and move a stitch marker into the first stitch of each new round. Do not join or chain between rounds.
You will need: worsted or aran weight cotton, a 3.0 mm or 3.5 mm hook, polyester fiberfill, a yarn needle, and one stitch marker. Abbreviations: sc = single crochet, inc = 2 sc in the same stitch, dec = single crochet two stitches together, and a number in parentheses is the stitch count at the end of that round.
| Round | Instruction | Count | Phase |
|---|---|---|---|
| 1 | 6 sc in a magic ring | (6) | Increase |
| 2 | inc in each st around | (12) | Increase |
| 3 | [sc 1, inc] repeat 6 times | (18) | Increase |
| 4 | [sc 2, inc] repeat 6 times | (24) | Increase |
| 5–8 | sc in each st around (4 rounds) | (24) | Hold width |
| 9 | [sc 2, dec] repeat 6 times | (18) | Wide end |
| 10 | sc in each st around | (18) | Wide end |
| 11 | [sc 1, dec] repeat 6 times | (12) | Wide end |
| 12 | sc in each st around — begin stuffing firmly | (12) | Wide end |
| 13 | dec repeat 6 times | (6) | Narrow end |
| 14 | Finish off, close the remaining 6 stitches | (0) | Close |
To close the final round, cut the yarn leaving a 15 cm tail, thread it onto a yarn needle, and pass the needle through the front loop only of each of the remaining 6 stitches in order. Pull the tail gently and the opening draws shut like a drawstring with no visible hole. Push the tail back through the centre of the egg, out the other side, pull slightly, and trim close so the end disappears inside the stuffing.
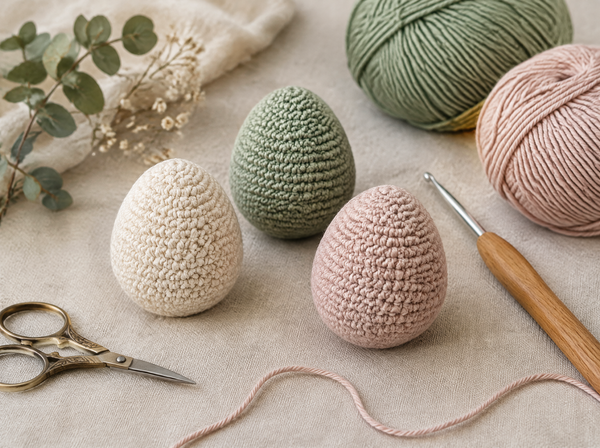
That sequence gives an egg with its widest point below centre, a steeply tapered top and a full rounded base. Crochet it once in a light colour where you can see the stitches clearly, and the proportions will be obvious in your hands in a way no diagram conveys.
Scaling the pattern to any size
To work any other size from the table, extend Phase 1 and mirror it in reverse. For a 30-stitch egg, add Round 5 as [sc 3, inc] repeated 6 times to reach 30, hold for six plain rounds, then decrease as [sc 3, dec], plain, [sc 2, dec], plain, [sc 1, dec], plain, dec around. The pattern is always a mirror: whatever you did going up, you undo coming down, with plain rounds inserted on the wide end and omitted on the narrow end.
This mirroring principle is why the shape formulas in this series are worth learning as a set rather than memorising individual patterns. The cone, the cylinder, the half-sphere dome and the egg are four arrangements of the same two moves.
When your egg goes wrong
Four problems account for nearly every disappointing egg. All four are fixable without starting over.
It looks like a ball
Your two ends are closing at the same speed. Add one or two plain rounds between the decreases on the wide end, and remove any plain rounds from the narrow end so it pulls in sharply.
The top is pointy and hard
You decreased too steeply too soon, or you stuffed the tip too firmly. Insert one plain round after your first narrow-end decrease round, and keep the stuffing at the tip softer than the belly.
It leans to one side
Your decreases are stacking in a vertical line. Shift the starting point of each decrease round by one or two stitches so the shaping spirals around the egg rather than forming a seam.
Stuffing shows through
Your tension is too loose for the yarn. Drop one hook size and restart, or line the inside with a thin layer of toy stuffing fibre pressed flat against the fabric before filling the centre.
A fifth, subtler problem deserves its own note: the flat base. If your egg will not stand and keeps rolling, you have not made a mistake, you have made a correct egg. Real eggs roll. To make a standing egg, work two extra plain rounds at the very end of the wide end before closing, and press the base flat with your thumb while the stuffing settles. For a permanently flat base, stuff the bottom third more firmly and weight it, which is the same approach used for any upright amigurumi.
What you can actually make with an egg
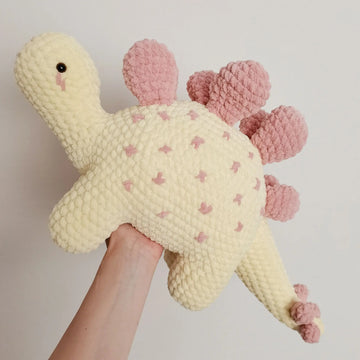
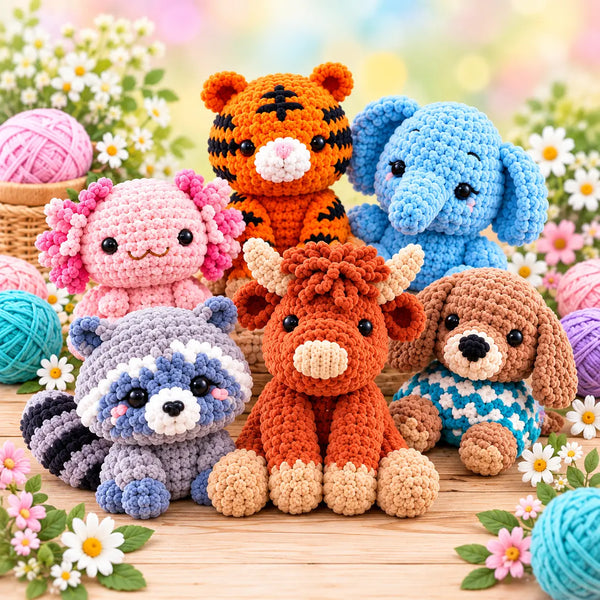
The reason this shape is worth owning rather than looking up each time is how many finished projects start from it. An egg with two ears becomes a bunny. An egg with a beak and tiny wings becomes a chick or a bird. An egg worked in brown with a textured top becomes an acorn. An egg on its side becomes an animal body. An egg with a stem becomes a pear, and a slightly squashed egg becomes a potato, a pebble, or a sleeping cat.
For seasonal work the shape is relentless: spring decorations, garlands, bowl fillers, table scatter, and small gifts that take under an hour each in a lightweight cotton. Because the formula scales cleanly, you can crochet a set of five in graduating sizes from the same table above and they will look like a deliberate collection rather than five separate attempts.
It is also a genuinely good shape for building confidence. There is no sewing, no colour changing, no fiddly limb attachment, and the whole thing is finished in one sitting. If you have been avoiding shaped amigurumi because assembly intimidates you, an egg is a complete, satisfying object with zero assembly.
Keep exploring

Fifty beginner plushie patterns built from simple shaped bodies, with no assembly sewing.
View pattern →
The ball formula the egg is built on, with the full increase and decrease maths.
Read the guide →
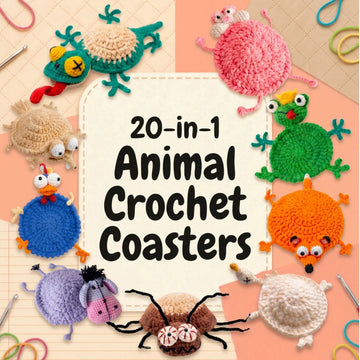
Twenty animal patterns whose bodies and heads use egg and sphere shaping throughout.
View pattern →
Even, lump-free filling so your egg holds the curve you crocheted into it.
Read the guide →A note on tension, yarn and why your egg may differ
Two makers can follow the identical round-by-round pattern above and produce eggs of noticeably different sizes and firmness. This is normal and it is not a fault in the pattern. Amigurumi is worked deliberately tighter than garment crochet so the stuffing cannot escape, and how tight is tight varies between hands.
Cotton gives the crispest definition and holds the egg silhouette best, which is why it dominates amigurumi. Acrylic is softer and more forgiving on the hands but blurs the shaping slightly, so an egg in acrylic will look a little rounder than the same pattern in cotton. Wool blends sit in between and block beautifully but can felt if handled roughly. For your first egg, choose a smooth light-coloured cotton: you will see every stitch, which makes counting and troubleshooting far easier than working in a dark or textured yarn.
If size accuracy matters, for example when you are matching an egg body to a head you have already made, crochet a small swatch or simply make Rounds 1 to 4 and measure the diameter of that disc before committing. Checking your gauge for three minutes is faster than finishing a whole egg at the wrong scale. Consistent tension across the whole piece matters more than matching anyone else's gauge exactly, because an egg that tightens halfway up will show a visible waist.
Finally, keep your stitch marker honest. In continuous spiral rounds there is no join to tell you where a round ends, and an egg that drifts by a stitch per round over fourteen rounds will be measurably lopsided. Move the marker before you work the first stitch of each round, not after, and count your stitches at the end of every shaping round rather than only at the end.
Frequently asked questions
What is the difference between crocheting an egg and a sphere?
A sphere increases to its widest round at the exact midpoint and then decreases symmetrically. An egg holds the widest round at roughly 40% of its height from the base, then closes one end steeply with consecutive decrease rounds and the other end gently by alternating decrease rounds with plain rounds. The stitches are identical; only the pacing of the rounds changes.
Should I start at the narrow end or the wide end of the egg?
Starting at the narrow end is easier for most makers. The magic ring naturally forms a tight point that suits the tapered top, and your final closing then happens at the wide base where a small imperfection is far less visible and often rests against a surface. Starting at the wide end works too, but you will be closing a tight point at the very end, which is fiddlier.
How many stitches should the widest round of my egg have?
Use a multiple of 6, because every flat-circle increase round adds exactly 6 stitches and that keeps your later decreases distributing evenly. 18 stitches gives a tiny keyring egg, 24 a classic amigurumi size, 30 a plushie body, 36 a decorative egg and 48 a large cushion-style egg.
Why does my crocheted egg look like a ball instead?
Both ends are closing at the same speed. Fix it by adding one or two plain rounds between the decrease rounds on the wide end, and removing all plain rounds from the narrow end so it pulls in steeply. You can also add one or two plain rounds at the widest point to elongate the silhouette.
Why is my egg lopsided or leaning to one side?
Your decreases are stacking directly above each other, forming a vertical seam that pulls the shape sideways. Shift the start of each decrease round by one or two stitches so the shaping spirals around the egg. A drifting stitch marker causes the same problem, so move the marker into the first stitch of each round before you work it.
How much stuffing does an amigurumi egg need?
Firmer than feels natural, but not so firm the stitches gap. Add stuffing in small pinches from around the point where the opening starts narrowing, pressing each pinch against the walls rather than dropping it into the centre. The belly should resist pressure with a slight give; the narrow tip should be softer so it keeps its taper rather than bulging.
What yarn and hook size work best for a crocheted egg?
Smooth worsted or aran weight cotton with a 3.0 mm or 3.5 mm hook is the standard amigurumi pairing and gives the crispest egg silhouette. Always use a hook one or two sizes smaller than the yarn label recommends so the fabric is dense enough to hide the stuffing. Light colours make the stitches easiest to count while you learn the shaping.
Can I make a crocheted egg that stands upright instead of rolling?
Yes. A correctly shaped egg rolls, because real eggs do. For a standing version, work two extra plain rounds at the end of the wide end before closing, stuff the bottom third more firmly than the top, and press the base flat with your thumb while the filling settles. Adding a small weight at the base makes it permanent.
Do I need to use the invisible decrease for an egg?
It is strongly recommended, especially on the narrow end where decreases are worked on consecutive rounds and any bulk shows immediately. The invisible decrease works through the front loops only of the two stitches, which keeps the surface smooth and prevents the small bumps a standard decrease leaves along the taper.
How long does it take to crochet one amigurumi egg?
A 24-stitch egg in worsted cotton takes most makers 30 to 45 minutes including stuffing and closing, and a tiny 18-stitch egg takes closer to 20 minutes. Larger 36- and 48-stitch eggs take one to two hours. The shape has no assembly, no colour changes and no sewn-on parts, which is what keeps it fast.
Can I use the egg formula for animal heads and bodies?
That is its most common use. Most amigurumi heads are eggs rather than spheres, with the narrow end becoming the muzzle or forehead, and a great many bodies are eggs worked point-up. Turn the egg on its side and it becomes an animal torso. Learning the formula once lets you adapt almost any shaped-body pattern.
What does it mean when a pattern says to work in continuous rounds?
It means you crochet in a spiral without joining each round with a slip stitch and without chaining up. The work climbs continuously, which avoids the visible seam a joined round creates. Because there is no join to mark the boundary, you must use a stitch marker in the first stitch of every round to keep your count accurate.
Put the egg formula to work
Shaped bodies are the foundation of every plushie. Pick a pattern and let the formula do the hard part.
Browse amigurumi patterns Browse beginner patterns