How Much Yarn Do You Need? A Simple Crochet Yarn Calculator Guide
A practical, no-nonsense way to work out how much yarn your next crochet project really needs, before you are halfway through and three rows short.

There is a very specific kind of heartbreak that only crocheters understand. You are deep into a project, the shaping is finally working, the color is perfect, and then your working ball gets suspiciously light. You squeeze it. You tell yourself it will be fine. Twelve stitches later you are holding a tail end of yarn and a half-finished piece, and the dye lot you bought three weeks ago no longer exists anywhere on the internet.
The good news is that this is an entirely solvable problem, and you do not need complicated math or a spreadsheet to solve it. You need to understand one key distinction, learn one simple weighing method, and build one habit around buffers. That is genuinely the whole system, and it works for amigurumi, blankets, bags, garments and everything in between.
This guide walks through how yarn is actually measured, why weight categories change how far a skein goes, how to estimate for round amigurumi versus flat projects, how big your safety buffer should be, and exactly what to do if you run short anyway. By the end you will be able to stand in a yarn shop, look at a pattern, and make a confident call about how much to put in your basket.
Yardage versus grams: the distinction that fixes everything
Almost every yarn-shortage story starts with someone buying grams when they needed yards.

Length is what you crochet with, weight is what you buy
Every stitch you make consumes a certain length of yarn. It does not consume grams. A gram is just how heavy that length happens to be, and how heavy a given length is depends entirely on how thick the yarn is and what fiber it is made from. This is why two skeins that both say 100 g on the label can contain wildly different amounts of usable yarn.
As a rough feel for the scale of the difference: a 100 g skein of worsted weight acrylic commonly runs somewhere around 200 to 220 yards, while a 100 g skein of lace weight yarn can easily carry 800 yards or more. Same weight on the scale, roughly four times the crocheting. If your pattern asks for 400 yards and you buy two 100 g skeins without checking the yardage, you may be fine or you may be 300 yards short.
Read the full yarn fiber guide →
Amigurumi and flat projects eat yarn differently
These two pieces look like they might use similar amounts of yarn. They do not, and the reason is stitch density. Amigurumi is crocheted deliberately tight, usually in continuous single crochet rounds with a hook a size or two smaller than the yarn label suggests. Tight fabric packs more stitches into the same surface area, and more stitches means more yarn per square inch.
Flat projects like bags, blankets and coasters are usually worked at a looser, more standard gauge, often with taller stitches. A double crochet covers far more ground per stitch than a single crochet does. So a small, dense amigurumi can quietly consume a surprising amount of yarn relative to its size, while a large, airy granny square panel can cover a lot of area with less.
Browse the granny square bag bundle →
Running short is recoverable, not fatal
Even with careful estimating, you will occasionally run out. It happens to everyone, and the fix is almost always better than starting over. If you can get more of the same yarn, joining a new skein cleanly takes about a minute and leaves no visible bump. If you cannot get the same dye lot, there are design-led ways to absorb the difference instead of fighting it.
The one thing that genuinely makes it worse is panicking and knotting the ends together. A knot in crochet fabric will work its way to the right side eventually, and in a stuffed amigurumi it creates a hard lump you can feel through the fabric. Learn one good join and the entire problem downgrades from disaster to minor admin.
Learn six seamless yarn joins →How yarn weight categories change the math
Yarn weight categories describe thickness, not heaviness, which is an unhelpful piece of naming that has confused beginners for decades. The standard system runs from lace at the finest end through to jumbo at the thickest. Each step up in thickness means fewer yards per 100 g, and each step means noticeably faster progress per stitch.
Here is the practical shape of it. These are common industry ranges rather than guarantees, and your specific yarn label is always the authority. Use this to build intuition, then check the band.
| Weight category | Typical yards per 100 g | What it suits |
|---|---|---|
| Lace | Roughly 700 to 1,000+ | Shawls, doilies, very fine detail work |
| Fingering / sock | Roughly 400 to 450 | Socks, lightweight garments, miniature amigurumi |
| Sport | Roughly 300 to 330 | Baby items, small detailed toys |
| DK / light worsted | Roughly 230 to 260 | Amigurumi, garments, versatile all-rounder |
| Worsted / aran | Roughly 200 to 220 | Most amigurumi, blankets, bags, beginner projects |
| Bulky | Roughly 100 to 130 | Fast blankets, chunky baskets, cushions |
| Super bulky | Roughly 60 to 90 | Very fast throws, oversized home items |
The headline takeaway from that table is simple: as you move down the list, the same 100 g gives you dramatically less length. If you decide to substitute a worsted weight pattern into bulky yarn to finish faster, you are not just changing the gauge, you are roughly halving how far each skein goes. A blanket that needed six worsted skeins might need ten or more in bulky, and the finished piece will also be substantially larger.
This is also why fiber matters. Cotton is denser than acrylic, so a 100 g cotton skein usually carries fewer yards than a 100 g acrylic skein of the same apparent thickness. Wool sits somewhere in between. If you are substituting fibers, compare the yardage numbers on the bands rather than assuming that gram for gram is a fair swap.
The swatch-and-weigh method: your actual yarn calculator
Forget formulas. The most reliable crochet yarn calculator is a small digital kitchen scale and ten minutes of your time. This method works because it measures your tension, your hook, and your yarn, rather than a generic average that may not describe how you crochet at all.
- Weigh your full skein first. Put the untouched ball on the scale and write the number down. Labels are usually accurate but not always exact, and you want your real starting figure.
- Make a test piece in the actual stitch pattern. For a flat project, crochet a square of roughly four inches by four inches in the stitch you will use. For amigurumi, crochet a simple sphere or the first section of the actual pattern. Use the same hook you intend to use for the real thing.
- Weigh the skein again. Subtract the new reading from your starting figure. The difference is exactly how many grams your test piece consumed.
- Work out how many test pieces fit in your project. For a flat project, divide the total surface area of the finished item by the area of your swatch. For amigurumi, compare the volume of your test sphere to the rough size of the finished pieces, counting every limb, ear and accessory separately.
- Multiply. Grams per test piece, times the number of test pieces, gives you your estimated grams needed.
- Add your buffer. Add twenty to thirty percent on top. This is not optional, and the next section explains why.
- Convert to skeins and round up. Divide your buffered gram total by the gram weight of one skein, then round up to the next whole skein. Always round up. Nobody has ever regretted having one spare ball.
Shortcuts that make this faster
- Keep a notebook of grams-per-project for things you make repeatedly. After three or four bears you will know your bear number by heart and never need to swatch again.
- If your scale only reads in whole grams, make a bigger test piece. Weighing a two-gram swatch on a one-gram-resolution scale gives you a huge margin of error.
- For multi-color projects, weigh each color separately. The main body color will always dominate, and accent colors usually need far less than people assume.
- Save your swatches with a note of the yarn and hook attached. They become a personal reference library that gets more useful every year.
- If you are following a written pattern, the designer's yardage figure is a good starting estimate, but their tension is not your tension. Treat their number as a sanity check on yours, not a replacement for it.
Estimating for amigurumi specifically
Stuffed toys follow slightly different rules because they are three-dimensional and worked at a deliberately tight gauge.
Six things that quietly change how much yarn you need
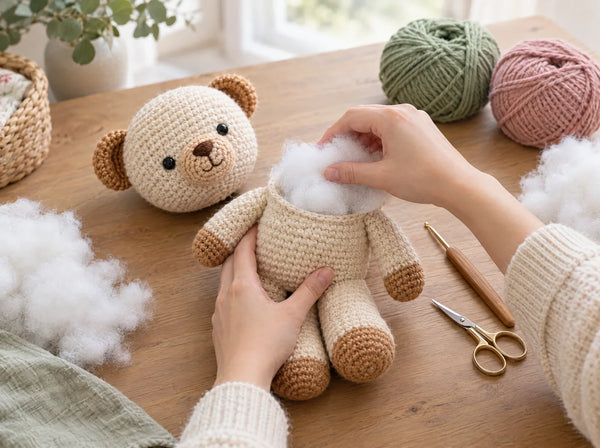
- Count every single piece. The body is the obvious part, but a typical animal also has a head, two arms, two legs, two ears, a muzzle, a tail and possibly a scarf. Beginners estimate for the body and get caught out by the accumulation of small parts, which together often rival the body itself.
- Tight gauge costs yarn. Amigurumi is worked with a smaller hook than the label recommends so stuffing does not show through. That density means more stitches per inch and therefore more yarn per inch of finished toy than the same yarn would use in a loose blanket stitch.
- Size scales steeply. Doubling the height of an amigurumi does not double the yarn. Because you are covering a surface that grows in two dimensions, a toy twice as tall can need roughly four times the yarn. Scaling a pattern up is far more expensive than it looks.
- Leave tails for sewing. Every separately crocheted piece needs a generous tail for attaching it. Across a dozen pieces, those tails add up to real yardage. Factor them in rather than treating them as rounding noise.
- Hair and fringe are hungry. Dolls with yarn hair can use as much yarn in the hair alone as in the entire head and body. If your project has hair, fringe or a mane, estimate it as a separate project in its own right.
- Small toys are forgiving. A keychain-sized amigurumi rarely uses more than a fraction of a worsted skein. For tiny projects you can usually skip the whole calculation and simply start, which is exactly what scrap yarn is for.
As a broad orientation rather than a promise: a small amigurumi animal of around five to six inches tall, worked in worsted weight at a typical tight amigurumi gauge, commonly sits comfortably within a single 100 g skein for the main color. A larger, chunkier plush in the twelve inch range can easily need two or three. These are starting intuitions, not measurements, and your own swatch-and-weigh result will always beat them.
Buy the extra skein. The worst case is a spare ball in your stash. The best case is that you finish the project you actually wanted to make.— Ava, MrsCrochetWorld
Estimating for flat projects: bags, blankets and coasters
Flat work is mathematically friendlier than amigurumi because you can think in simple surface area. Your swatch covers a known number of square inches and weighs a known number of grams. Your finished project covers a different number of square inches. Scale the grams by the ratio of the areas and you have your answer.
A worked example makes this concrete. Say your four-inch square swatch weighs eight grams. That swatch covers sixteen square inches, so you are using half a gram per square inch. A blanket measuring thirty by forty inches covers twelve hundred square inches, which gives you six hundred grams. Add a twenty-five percent buffer and you are at seven hundred and fifty grams, which rounds up to eight 100 g skeins.
Bags need one extra consideration: they are usually not a single flat panel. A simple tote is a front, a back, a base, two handles and often a lining edge. Add up the area of every component before you scale, and remember that handles are frequently worked at a much tighter gauge for strength, which makes them disproportionately yarn-hungry for their size.
Blankets have their own trap, which is border edging. A decorative border worked around the full perimeter of a large blanket can consume a genuinely surprising amount of yarn, especially if it is a multi-row shell or ruffle. If you are planning a border, estimate it separately rather than hoping it fits in the buffer.
| Project | What to measure | Easy-to-forget extras |
|---|---|---|
| Blanket | Length times width in square inches | Border rows, fringe, joining rounds between squares |
| Tote bag | Front, back, base and side panels | Handles, top edging, any lining or facing rounds |
| Coasters or placemats | Area of one, times the number in the set | Edging rounds, making a spare in case of mishaps |
| Scarf | Length times width, laid flat | Fringe, tassels, blocking stretch |
| Garment | Each panel measured separately | Seaming yarn, ribbing, button bands, sleeve easing |
How big should your buffer be?
A buffer is not pessimism, it is insurance against the many small things that quietly inflate real-world yarn use. Frogging and redoing a section uses yarn twice. Your tension loosens as you relax into a project. Sewing tails, blocking stretch and the unusable last few meters on each ball all take their share.
Here is how I size a buffer depending on circumstances.
- Fifteen percent for a repeat project. You have made this exact thing before in this exact yarn, you know your numbers, and you have the notebook entry to prove it.
- Twenty to twenty-five percent as standard. A familiar stitch pattern in a familiar yarn weight, with a reliable swatch behind the estimate. This is the default for most projects.
- Thirty percent for a new stitch pattern. Textured stitches such as bobbles, cables and dense post stitches consume substantially more yarn than plain fabric at the same dimensions, and it is hard to intuit by how much until you have made one.
- Thirty to forty percent for substitutions. When you are swapping to a different fiber, different brand or different weight than the pattern specifies, your uncertainty is genuinely high and the buffer should reflect that.
- Buy the whole project at once, in one dye lot. This matters more than the exact buffer percentage. Dye lots vary subtly, and a mid-project color shift is visible in daylight even when it looks identical in the shop.
One more habit worth building: keep the ball band. It carries the dye lot number, the exact yardage, the fiber content and the care instructions. If you do need to buy more, that little strip of paper is the difference between finding an exact match and guessing.
What to do when you run out mid-project
First, stop and assess before you make another stitch. How much do you have left, how much do you still need, and is the same yarn still available? Those three answers determine which of the following routes is right.
- Same yarn, same dye lot available. The easy case. Buy it, join it cleanly mid-row rather than at the edge where the join is more visible, and carry on. Nobody will ever know.
- Same yarn, different dye lot. Alternate between the old and new ball every two rows for a transitional stretch. This blends the shift so gradually that the eye reads it as even fabric rather than a hard line.
- Yarn discontinued, project nearly done. Consider finishing in a deliberate contrast. A different-colored border, cuff, base or pair of ears reads as a design decision rather than a compromise, and it often looks better than the original plan.
- Yarn discontinued, lots still to do. Rethink the size. Shortening a scarf, narrowing a blanket or making a smaller version of a toy is nearly always a better outcome than an unfinished project in a basket.
- Amigurumi, running low on one body part. Small parts hide substitutions well. Ears, paw pads, muzzles and soles in a contrast color look intentional on almost every animal.
- Never knot the join. Whichever route you take, use a proper join. Knots migrate to the right side of the fabric over time and create hard lumps inside stuffed pieces.
Preventing the problem next time
- Write the final gram total in your pattern notes the moment you finish. Future you will be grateful.
- Photograph the ball band before you throw it away, so the dye lot and yardage survive in your camera roll.
- When a yarn you love goes on sale, buy a spare skein of your most-used colors. Stash insurance costs very little and saves whole projects.
- For gift deadlines specifically, buy the buffer skein. A project you cannot finish on time is far more expensive than a spare ball of yarn.
Keep exploring

Small, yarn-efficient projects with clear material lists, ideal for using up single skeins.
View pattern →
Flat granny square projects that are perfect for practicing surface-area yarn estimates.
View pattern →
Which fibers hold stuffing well, which pill, and how each one affects your yardage.
Read the guide →
Six seamless joins for when you run out mid-round, with no knots and no visible bump.
Read the guide →
How hook and yarn choices change finished size, which directly drives your yarn total.
Read the guide →
Hook size sets your gauge, and gauge is the hidden variable in every yarn estimate.
Read the guide →About the author
Ava is the designer and writer behind MrsCrochetWorld, where she publishes beginner-friendly amigurumi and accessory patterns along with practical guides for crocheters who want to work more confidently and waste less yarn. She has spent years writing, testing and troubleshooting crochet patterns, and most of the advice in this guide comes from the same place the mistakes did: finishing real projects, occasionally running out of yarn, and keeping notes so it happened less often the next time.
Every guide on MrsCrochetWorld is written from hands-on crochet experience rather than aggregated from elsewhere. Where this article gives numerical ranges for yardage, those are common industry ranges intended to build intuition. Your yarn label is always the authoritative source for your specific skein, and your own swatch is always the authoritative source for your own tension.
Frequently asked questions
How much yarn do I need for crochet, in general?
It depends entirely on project size, stitch density and yarn weight, so there is no single answer. The reliable method is to crochet a small test piece, weigh your skein before and after, scale that gram figure up to the size of your finished project, then add a buffer of twenty to thirty percent. For a quick orientation, a small worsted weight amigurumi animal often fits within one 100 g skein, while a lap blanket typically needs six to eight.
Should I calculate in yards or in grams?
Estimate in grams because a kitchen scale is the easiest tool to use at home, but buy in yards because yardage is what actually determines whether you run out. Convert between the two using the ratio printed on the ball band. Two skeins of the same gram weight can hold very different lengths depending on thickness and fiber, which is the single most common cause of running short.
How many yards are in a typical 100 g skein of worsted weight yarn?
Most worsted weight 100 g skeins run roughly 200 to 220 yards, though this varies by brand and fiber. Cotton is denser than acrylic, so a 100 g cotton skein usually carries fewer yards than an acrylic one of similar thickness. Always check the specific ball band rather than relying on the general range.
How do I estimate yarn for amigurumi?
Crochet a small test sphere or the first section of the pattern, weigh the yarn used, then count every piece the finished toy needs, including arms, legs, ears, muzzle and tail. Scale the test weight across all those pieces, add tails for sewing, and add a buffer of twenty to thirty percent. Remember that amigurumi is worked at a tight gauge, so it uses more yarn per inch than loose flat fabric.
Why does my project use more yarn than the pattern says?
Almost always tension. If you crochet more loosely or more tightly than the designer, your fabric consumes a different amount of yarn for the same finished dimensions. Hook size, yarn substitution and frogging and reworking sections all add to the total as well. The designer's yardage figure is a useful sanity check, but your own swatch is the number that applies to you.
What buffer percentage should I add?
Twenty to twenty-five percent for a standard project in a familiar yarn and stitch. Drop to fifteen percent if you have made the exact item before and have notes. Go up to thirty percent for an unfamiliar textured stitch pattern, and thirty to forty percent if you are substituting a different fiber, brand or yarn weight than the pattern specifies.
Does yarn weight category change how much I need?
Significantly. Thicker yarn means fewer yards per 100 g, so you need more skeins by weight to cover the same area. A worsted pattern remade in bulky yarn can need close to double the number of skeins, and the finished piece will also come out noticeably larger unless you adjust the stitch counts.
How much yarn does a crochet blanket need?
Work it out from area. Measure your swatch, calculate grams per square inch, then multiply by the finished blanket dimensions and add your buffer. As a rough orientation, a worsted weight lap blanket of around thirty by forty inches commonly lands somewhere in the region of six to eight 100 g skeins, depending heavily on stitch choice and tension.
Do textured stitches use more yarn than plain ones?
Yes, often considerably more. Bobbles, popcorns, cables and dense post stitches all pack extra yarn into the same surface area to create their texture. If you are working a heavily textured pattern for the first time, use a thirty percent buffer rather than the standard twenty to twenty-five.
What should I do if I run out of yarn mid-project?
Stop before making another stitch and check whether the same yarn and dye lot is still available. If it is, buy more and join cleanly mid-row. If only a different dye lot is available, alternate between old and new balls every two rows to blend the transition. If the yarn is discontinued, finish in a deliberate contrast color or adjust the project size rather than abandoning it.
How do I join a new skein without a visible bump?
Use a proper join rather than a knot. Depending on the project and fiber, options include the magic knot, a Russian join, a felted splice for wool, or simply working over both tails for several stitches. Knots eventually work their way to the right side of the fabric and create hard lumps inside stuffed amigurumi, so they are worth avoiding entirely.
Why does dye lot matter when buying extra yarn?
Dye lots are individual production batches, and the same color number can vary subtly between them. Under shop lighting two balls may look identical, but in daylight the difference often becomes visible as a faint band across your finished fabric. Buying all the yarn for a project at once, from the same lot, removes the risk entirely.
Can I use a scale to see how much yarn is left in a part-used ball?
Yes, and it is the most accurate method available. Weigh the part-used ball, subtract the weight of the empty core if there is one, then use the ratio from the ball band to convert grams back into yards. That tells you whether your remaining yarn will carry you through the rest of a section.
How much yarn do I need for a small amigurumi keychain?
Very little, usually only a fraction of a worsted weight skein for a keychain-sized piece. For projects this small the full calculation is rarely worth the effort. Keychains and miniatures are exactly what leftover scrap yarn is for, and they are a good way to use up the buffer skeins from larger projects.
Ready to put your yarn to work?
Browse beginner-friendly MrsCrochetWorld patterns with clear material lists, so you know what you need before you start.
Browse all patterns Get a free pattern