How to Join Yarn in Crochet: 6 Seamless Methods for Amigurumi & Every Project
Run out of yarn mid-round or need to change colors without an ugly knot? Here are the exact joining methods experienced crocheters trust — with clear guidance on which one to use and when.
Best bundle for this project
Low Sew Crochet Dino Bundle — Practice clean joins on cute dinosaur amigurumi: 24 low-sew patterns in one instant PDF bundle.
Instant digital download · US crochet terms · no physical item shipped · opens on phone, tablet, or computer.

There is one small moment that trips up almost every crocheter — beginner and pro alike. You are cruising along on a cozy amigurumi, your rounds are neat, your tension is perfect… and then your yarn ball runs out. Or the pattern says “change to color B.” Suddenly you are staring at two loose ends wondering: do I just tie a knot and hope for the best?
Please don't just tie a knot and hope. A sloppy yarn join can create a hard lump inside a plushie, leave a visible bump on a color change, or — worst of all — work loose over time and unravel a project you spent hours on. The good news is that joining yarn in crochet is a genuine skill, and once you learn a handful of reliable methods, you'll never dread that “out of yarn” moment again.
In this complete guide you'll learn six proven ways to join yarn in crochet, exactly when to use each one, and the special tricks that keep amigurumi color changes invisible. Whether you're a beginner making your first plushie or an experienced maker chasing a flawless finish, this is your go-to reference. Let's untangle it together.
What you'll learn

Why How You Join Yarn Actually Matters
It's tempting to think a join is a join — surely any method that holds is fine? But the way you connect two strands of yarn affects three things that make or break a finished piece: strength, appearance, and comfort.
Strength: A weak join can slip apart with washing, stuffing, or normal handling. For anything that will be hugged, gifted, or sold, security is non-negotiable.
Appearance: On garments and blankets a bulky join shows. On amigurumi, a poorly placed color change leaves a smudge of the wrong color right where the eye lands.
Comfort: Inside a stuffed toy, a hard knot becomes a lump a child can feel. The best joins disappear into the fabric so the finished piece stays soft all the way through.
Quick rule of thumb: Use a secure knotted join (like the magic knot) when strength matters most and the join will be hidden. Use a no-knot method (like the Russian join or working over ends) when a smooth, invisible finish matters most.
The 6 Best Methods to Join Yarn in Crochet
Here are the six methods worth having in your toolkit, from the quickest beginner-friendly option to the tidiest invisible finish. Read through them all — you'll want different ones for different projects.
1. The Simple Overlap (Work Over the Ends)
This is the beginner's best friend and honestly the method many crocheters use most. When your old ball is running low (leave yourself at least 6 inches / 15 cm), simply drop the old strand, pick up the new one, and start crocheting. Lay both loose tails along the top of your stitches and work your next several stitches over them, trapping them inside the fabric.
Best for: Amigurumi, dense stitch fabric, single crochet projects. Pros: No knot, no lump, nothing to weave in later. Cons: Not ideal for loose, open, lacy stitches where the tails would show.
2. The Magic Knot
The magic knot is the go-to when you need a rock-solid, permanent join that will not slip. You tie a small slip knot in each strand around the other strand, then pull them tight so the two knots slide together and lock. Trim the tails close and you have a tiny, incredibly strong join.
Best for: Blankets, garments, granny squares, anywhere a hidden but bombproof join is needed. Pros: Extremely secure, no weaving in. Cons: Creates a small hard knot, so avoid it on the surface of amigurumi where it could be felt.
3. The Russian Join
The Russian join is the darling of anyone who hates weaving in ends. Using a tapestry needle, you thread each yarn tail back through the plies of its own strand, creating two interlocking loops. When pulled snug, the strands are woven into each other with no knot at all — just a slightly thicker section that blends right in.
Best for: Smooth yarns, garments, projects where you want zero knots and no weaving. Pros: Invisible, secure, tidy. Cons: Doesn't grip well on very slippery or single-ply yarns, and adds a touch of bulk.
4. The Braided (Felted) Join
If you work with wool or another animal fiber that felts, this feels like magic. Fray the ends of both strands, overlap them, add a drop of water, and rub them briskly between your palms. The friction and moisture felt the fibers together into one continuous strand — no knot, no needle, no ends.
Best for: 100% wool and other feltable natural fibers. Pros: Truly seamless and invisible. Cons: Only works on animal fibers — it will not work on acrylic, cotton, or superwash wool.
5. The Knot-and-Weave
A practical everyday method: tie a single loose knot to hold the strands together temporarily, keep crocheting, then untie the knot later and weave both ends in separately with a tapestry needle. The knot is only there to keep things from slipping while you work.
Best for: Any project, any yarn — a dependable default. Pros: Flexible, works everywhere. Cons: You do have to weave in the ends afterward.
6. The Standing Join / Fresh Start
Sometimes the cleanest move is to fasten off completely and start the new yarn fresh — especially at the start of a new round, motif, or color block. A “standing stitch” lets you begin a new strand with a crisp first stitch instead of a bulky joining slip stitch, which is a favorite trick for tidy granny squares and color-block rounds.
Best for: New rounds, motif edges, deliberate color blocks. Pros: Very clean starts. Cons: Leaves ends at each start/stop that need securing.

How to Change Colors Invisibly in Amigurumi
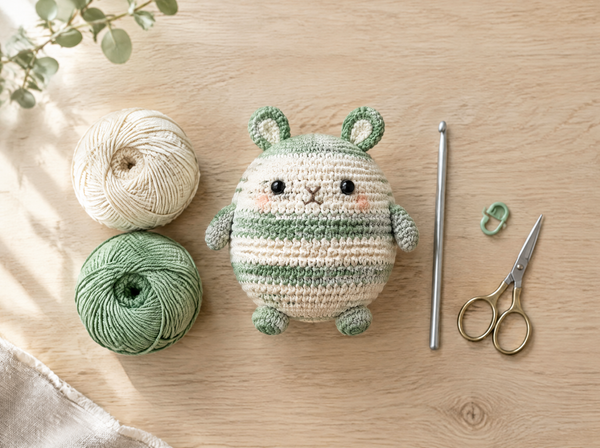
Color changes are where yarn joining gets its reputation for being fiddly — but there's one trick that makes them clean every single time. The secret is to change color on the last step of the previous stitch, not the first step of the new one.
Work your final stitch of the old color up until the very last yarn-over. Instead of finishing that yarn-over with the old color, yarn over with the new color and pull it through to complete the stitch. Your very next stitch will now be fully the new color, with no half-and-half stitch marking the transition.
For amigurumi worked in continuous rounds, combine this with the overlap method: carry or trap the old color's tail inside the next few stitches so there's nothing to weave in later and no lump inside your plushie.
- Stop one step early. Crochet your last old-color stitch until two loops remain on the hook.
- Grab the new color. Yarn over with the new strand and pull it through both loops to finish the stitch.
- Secure the tails. Lay both tails along the top of the round and work over them for the next 4–6 stitches.
- Keep tension even. Give the new color a gentle tug so the first new stitch isn't loose.
- Continue in pattern. Your color change is now crisp, secure, and virtually invisible.

Master color changes and seamless joins on 50 beginner-friendly, no-sew plushies — the perfect way to put every method in this guide into practice.
Shop the bundle →
Weaving In Ends So They Never Come Loose
Even the best join usually leaves a tail or two, and how you weave those ends in decides whether your project stays secure for years — or works loose after a few hugs and washes.
Thread the tail onto a blunt tapestry needle and weave it through the backs of several stitches, following the direction of the fabric. Then — and this is the step most people skip — reverse direction and weave back through a few stitches the opposite way. That change of direction is what locks the tail so it can't slither out.
Weave in at least 2 inches (5 cm), tug the fabric gently to let the tail settle, then trim close. On amigurumi, bury the tail deep inside the stuffing so it disappears completely and leaves the surface perfectly smooth.
Pro tip: Always weave in ends before you stuff and close an amigurumi. Once a piece is stuffed and sewn shut, burying a stray tail becomes far more awkward.
Common Yarn-Joining Mistakes to Avoid
Even seasoned crocheters slip into these habits. Sidestep them and your joins will be stronger and far less visible.
- Cutting tails too short. Always leave at least 6 inches (15 cm) to weave in safely. Short tails work loose fast.
- Relying on a single tight knot. A basic double knot can slip and it leaves a bump. Use a proper join method instead.
- Changing color too late. Finishing the old stitch fully before switching leaves a half-colored stitch. Change on the last yarn-over.
- Weaving in only one direction. Without a reversal, ends can slide back out. Always change direction as you weave.
- Joining in a visible spot. On amigurumi and garments, place joins where seams or dense stitches hide them.
- Using a felted join on the wrong fiber. It only works on feltable animal fibers, never on acrylic or superwash.

These adorable chonky cats are packed with color changes — ideal for practicing invisible joins and clean transitions on a project you'll love.
Shop the bundle →Ready to Put Your New Joins to Work?
Explore MrsCrochetWorld's beginner-friendly amigurumi patterns and turn perfect joins into finished plushies you'll be proud of.
Browse All PatternsFrequently Asked Questions
What is the best way to join yarn in crochet?
There's no single best method — it depends on your project. For amigurumi, working over the ends (the simple overlap) keeps things smooth and lump-free. For blankets and garments that need strength, the magic knot is bombproof. If you want zero knots and no weaving, try the Russian join. Match the method to whether you value strength, invisibility, or convenience most.
How do I join yarn without a knot?
There are three great no-knot options. The simple overlap traps both tails inside your stitches as you work over them. The Russian join uses a tapestry needle to weave each tail back into its own strand. And the felted (braided) join rubs frayed wool ends together until they felt into one strand. All three avoid a hard knot entirely.
How do I change yarn colors in amigurumi without it looking messy?
Change color on the last yarn-over of the previous stitch, not at the start of the new one. Crochet the old-color stitch until two loops remain, then yarn over with the new color and pull through to finish. Your next stitch will be fully the new color with no half-and-half transition. Trap the old tail inside the next few stitches so there's nothing to weave in.
Is it okay to just tie a knot to join yarn?
A single basic knot isn't recommended on its own. It can slip loose over time and it leaves a hard bump — especially uncomfortable inside a stuffed toy. If you do knot, use a purpose-built secure join like the magic knot, or tie a temporary knot and weave both ends in properly afterward.
What is the magic knot in crochet?
The magic knot is a super-strong join made by tying a small slip knot in each strand around the other strand, then pulling them tight so the two knots slide together and lock. It creates a tiny, extremely secure connection with no weaving in required. It's ideal for blankets and garments, but because it leaves a small hard knot, avoid it on the surface of amigurumi.
How do I join a new ball of yarn mid-project?
Before your old ball runs out completely, leave a tail of at least 6 inches (15 cm). Drop the old strand, pick up the new one, and continue crocheting — laying both tails along the top of your stitches and working over them to trap them inside. Alternatively, use a magic knot or Russian join for a more permanent connection.
How long should I leave the yarn tails when joining?
Always leave at least 6 inches (15 cm) of tail on each strand. This gives you enough length to weave in securely and reverse direction so the end can't work loose. Tails cut too short are the number-one reason joins come undone.
Does the Russian join work on all types of yarn?
The Russian join works best on plied yarns with a bit of grip, like most wool and wool blends. It's less reliable on very slippery, single-ply, or tightly spun yarns because the woven tails can pull free. On slick yarns, a magic knot or working over the ends is a safer choice.
How do I weave in ends so they stay secure?
Thread the tail onto a tapestry needle and weave through the backs of several stitches following the fabric direction. Then reverse direction and weave back through a few stitches the opposite way — this change of direction locks the tail in place. Weave at least 2 inches (5 cm), tug the fabric to settle it, then trim close.
Can I join yarn in the middle of a round?
Yes. For amigurumi and projects worked in continuous rounds, joining mid-round is completely fine — just use the overlap method and trap both tails inside the next several stitches. If possible, place the join on a less visible part of the piece, such as a back or underside, for the tidiest result.
Why does my color change look messy on the wrong side?
A messy reverse side usually means you're carrying floats too loosely or too tightly, or weaving in ends in a bulky spot. Keep carried strands relaxed but not saggy, trap tails within stitches as you work, and for amigurumi bury ends inside the stuffing. Practicing the last-yarn-over color change also keeps the transition clean on both sides.
Written and reviewed by the MrsCrochetWorld editorial team · Last updated July 30, 2026