Yarn Under vs Yarn Over: The Small Hook Move That Changes Your Amigurumi
One tiny change in how the yarn wraps your hook decides whether your amigurumi looks dense and professional or loose and gappy. Here is exactly when to use each.

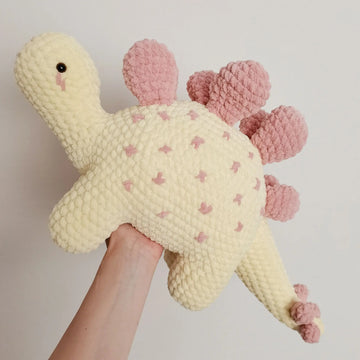
You followed the pattern exactly. You counted every stitch. You used the hook the designer recommended. And still, when you hold your finished amigurumi up to the light, you can see straight through it — little white dots of stuffing peeking between the stitches like freckles. Meanwhile the photo in the pattern shows a smooth, solid, almost fabric-like surface with no gaps at all. Nothing in the written instructions explains the difference, because the difference is not in the instructions. It is in the half-second move your hook makes before it pulls the loop through.
That is the short version. But the full picture is more interesting than a simple "use yarn under for amigurumi" rule, because yarn under also changes your stitch shape, your gauge, your stitch count visibility, and the direction your fabric wants to lean. Plenty of crocheters switch to yarn under, love the density, and then spend three projects wondering why their rounds suddenly look crooked or why their stitch markers keep landing in the wrong place.
This guide walks through what each method physically does to the loop, what it does to your finished fabric, when each one genuinely helps, and the handful of side effects nobody mentions in the tutorial videos. By the end you will be able to look at a project, decide which wrap it needs, and switch deliberately rather than by accident.
What actually happens at the hook
Before the opinions, the mechanics. Both methods make a single crochet. They just build it out of a differently shaped loop.

Yarn over: the standard wrap
Insert your hook into the stitch. Now bring the working yarn over the top of the hook shaft, moving from the back of the hook toward the front, so the strand rests in the throat of the hook. Pull that through the stitch and you have two loops on the hook. Yarn over again the same way, pull through both, and the stitch is complete.
This is the wrap that every standard pattern, every stitch dictionary and every gauge swatch assumes. The loop it creates sits upright and slightly open, which is why a yarn over single crochet looks like a small V when you view it from the front. That V shape is what makes stitches easy to count, and it is also why the fabric has a small amount of natural give.
Fix uneven tension first →
Yarn under: the twisted wrap
Insert your hook into the stitch exactly as before. This time bring the working yarn under the hook, scooping upward from the front toward the back, so the strand catches on the underside of the shaft before it settles into the throat. Pull through. Then — and this is the part people skip — complete the stitch with a normal yarn over for the final pull through both loops.
That single scooped wrap puts a half twist into the loop. The twist shortens the loop and closes the little window underneath it. Viewed from the front, a yarn under single crochet looks less like an open V and more like a tight, closed X. Stack a few rounds of those together and the fabric becomes noticeably denser, with far less space for stuffing to show through.
See the invisible decrease →
What the finished pieces look like
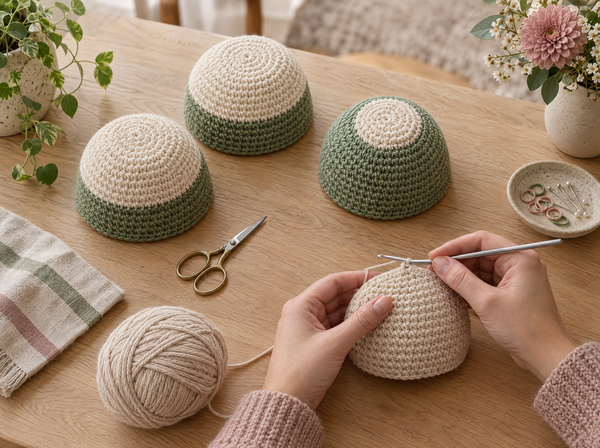
Work the same pattern twice, once with each method, and the two results will not be identical twins. The yarn under version comes out slightly smaller, firmer and smoother on the surface. The yarn over version comes out a touch larger, softer in the hand and more clearly textured, with the rounds easier to read at a glance.
Neither one is a mistake. A soft toy for a small child arguably benefits from the squishier yarn over fabric. A collectible figure that needs crisp edges and a flawless face benefits from yarn under density. The problem only appears when you switch mid-project without realizing it.
Browse amigurumi patterns →Yarn under vs yarn over at a glance
Here is the practical comparison, stripped of the forum arguments.
| Characteristic | Yarn over | Yarn under |
|---|---|---|
| Wrap direction | Over the hook, back to front | Under the hook, front to back |
| Stitch appearance | Open V shape | Closed X shape |
| Fabric density | Moderate, some give | Denser, firmer |
| Visible gaps | More likely with loose tension | Noticeably reduced |
| Stitch counting | Easy, V shapes are clear | Harder, X shapes compress |
| Finished size | Slightly larger | Slightly smaller |
| Fabric lean | Mild spiral lean | Stronger spiral lean |
| Hand and wrist load | Lower | Higher, more scooping motion |
| Works for rows and turning | Yes, reliably | Poorly, edges distort |
| Standard in written patterns | Yes, always assumed | No, must be specified |
| Best for | Garments, blankets, bags, flat work, most amigurumi | Dense amigurumi in the round, light-colored yarn over dark stuffing |
When yarn under genuinely helps
Yarn under is not a universal upgrade. It solves a specific, narrow set of problems extremely well. If you have one of these problems, it is worth learning. If you do not, yarn over is already doing its job.
Your stuffing shows through the stitches
This is the classic case. You made a white or cream amigurumi, the polyester fill is a slightly different shade, and the gaps between stitches read as a speckled surface. Yarn under closes those windows mechanically rather than by forcing you to crochet painfully tight. That matters, because strangling the yarn to close gaps is the fastest route to sore hands and a warped shape.
You want crisp, sculptural shaping
Dense fabric holds a form. If you are making a figure with a defined muzzle, a precise jawline, a flat-topped hat or any shape where the silhouette has to stay exactly where you put it, the firmer yarn under fabric resists sagging better once it is stuffed.
You are working with slippery or splitty yarn
Some cotton and cotton blends have very little grip. The extra twist in a yarn under loop adds a small amount of friction and structure, which can make a slippery yarn behave more predictably. It is not a cure for a genuinely unsuitable yarn, but it helps.
You crochet loosely by nature
If your natural tension is relaxed and you have already gone down two hook sizes without fixing the gaps, yarn under gives you density without asking your hands to grip harder. For loose crocheters this is often more comfortable than the alternative.
Signs yarn under is not the answer
- Your gaps appear only in certain rounds, not everywhere — that is usually a tension or increase placement issue, not a wrap issue.
- Your piece is flat or worked in rows with turning — yarn under distorts turned edges.
- Your pattern already specifies a hook two or more sizes below the yarn label — density is likely already handled.
- Your hands ache after twenty minutes — adding a scooping motion will make that worse, not better.
- You are struggling to count stitches as it is — yarn under makes counting harder, not easier.
Yarn under is not a better stitch. It is a different stitch that happens to solve one very common amigurumi problem.— Ava, MrsCrochetWorld
How to crochet yarn under, step by step
Work this on a practice swatch before you commit to a project. The motion feels wrong for roughly ten stitches and then becomes automatic.
- Start from a normal foundation. Make your magic ring and the first round of single crochet exactly as you always do, using standard yarn over. Trying to learn a new wrap inside a magic ring is unnecessarily hard.
- Insert the hook. Go into the next stitch under both loops as usual. Nothing changes here.
- Scoop, do not wrap. Move the hook tip down and toward you so it passes beneath the working yarn, then lift. The yarn should sit on the hook having come from underneath, not over the top.
- Check the strand position. Before you pull through, glance at the hook. With yarn under the strand crosses the shaft and looks slightly twisted. With yarn over it lies flat and open. If it looks flat, you did a yarn over.
- Pull through the stitch. You now have two loops on the hook. The new loop will feel tighter than you are used to — that is correct and expected.
- Finish with a normal yarn over. Wrap over the top for the final pull through both loops. Do not scoop twice. Scooping both wraps creates a twisted, hard, almost unworkable stitch.
- Keep the loop on the shaft. Let the new loop settle on the wider part of the hook rather than choking it at the narrow throat, or the next insertion becomes a fight.
- Work a full round before judging. A single yarn under stitch among yarn over stitches looks wrong. Give it a complete round before you decide.
- Compare against a yarn over swatch. Make two small flat-worked squares in the same yarn and hook. Hold them up to a lamp. The difference in light coming through is the entire argument.
- Commit for the whole piece. Once you choose a method, use it for every single crochet in that project, including arms, ears and any separate parts.
The side effects nobody warns you about
Yarn under has real trade-offs. Knowing them in advance is the difference between a technique that helps you and one that quietly ruins a project.
Your gauge changes, so your pattern size changes
Denser stitches are shorter and narrower. The same pattern worked in yarn under comes out smaller than the same pattern worked in yarn over. If a designer wrote and sized a pattern using yarn over and you switch, your finished piece will not match the stated dimensions. That matters most when parts have to fit together — a head that has to sit on a body, a hat that has to fit a head, eyes positioned by round number. Always make a small swatch and check before you assume the measurements still hold.
Counting stitches gets harder
The open V of a yarn over stitch is a gift when you are counting a round. Yarn under compresses that V into a tight X, and on dense light-colored cotton the stitches start to blur together. This is exactly why stitch markers stop being optional and become essential equipment the moment you switch.
The spiral lean gets stronger
All amigurumi worked in a continuous spiral leans slightly, because each round sits a fraction to the side of the one below. The twist in a yarn under loop adds to that bias, so a tall piece can visibly tilt. On a ball you will never notice. On a long cylinder like a leg, an arm or a tall body it can become obvious, and features embroidered on the front can end up drifting off center by the time you reach the top.
It is harder on your hands
The scooping motion asks for more wrist rotation than a flat wrap. Over a long session that adds up. If you already manage hand fatigue, test yarn under in short sessions before building a large project around it.
It does not play well with rows
When you turn your work, yarn under stitches sit at an awkward angle and the edges of the fabric become uneven and difficult to seam. Keep yarn under for pieces worked in continuous rounds, and use standard yarn over for anything flat and turned.
How to tell which one you are already doing
Many crocheters have been doing one or the other for years without knowing which. Two quick checks settle it.
The hook check. Stop mid-stitch, right after the wrap and before you pull through. Look at where the working yarn came from. If it arrived over the top of the hook and lies flat in the throat, that is yarn over. If it came up from underneath and crosses the shaft, that is yarn under.
The fabric check. Look at the front of a finished round. Clear, open, countable V shapes mean yarn over. Tight, closed, slightly slanted X shapes mean yarn under. If you see both in the same piece, you have been switching unconsciously, which is the single most common cause of mysteriously uneven amigurumi surfaces.
If you discover you have been mixing the two, do not panic and do not frog an entire project on principle. Finish the current piece with whichever method you were using most recently, note what happened, and make the next piece deliberately. The habit is easier to fix on a fresh start than mid-round.
A reliable decision rule
If you want one rule that holds up across almost every project: use yarn over by default, and reach for yarn under only when you have a specific density problem that your hook size has failed to solve.
Standard yarn over is the method patterns are written for, the method gauge is measured in, the method that counts easily, the method that works in rows and rounds alike, and the method that is kindest to your hands. It is the default for good reasons. Yarn under is a specialist tool: brilliant at closing gaps in dense amigurumi, unhelpful or actively counterproductive almost everywhere else.
And before you change your wrap at all, rule out the two things that cause far more gapping than wrap direction ever does. First, hook size — amigurumi almost always needs a hook well below the size printed on the yarn label, because the fabric has to be tight enough to hide stuffing. Second, tension consistency — uneven tension creates gaps in patches rather than evenly across the whole surface, and no wrap technique will fix that. Sort both of those out first, and you may find you never needed yarn under in the first place.
Keep exploring

Fix tight, loose and uneven stitches before you blame your wrap direction.
Read the guide →
Shape amigurumi without the bumps that standard decreases leave behind.
Read the guide →
Which fibers hold a shape, hide stuffing and stay comfortable to work.
Read the guide →
Fifty beginner-friendly plushie patterns to practice your new wrap on.
View pattern book →Swatch before you switch
Two small squares in the same yarn and hook tell you more about density than any tutorial can. Hold them to a lamp and look at the light.
Mark every round
Yarn under tightens the stitch shape and makes counting harder. A marker moved at the start of each round removes the guesswork.
Stay consistent
Pick one method per project and use it for every piece, including small parts. Mixing wraps is the most common cause of uneven surfaces.
Check your hook first
Most gapping is a hook size problem, not a wrap problem. Amigurumi usually needs a hook well below the size on the yarn label.
Frequently asked questions
What is the difference between yarn under and yarn over in crochet?
Yarn over wraps the working yarn over the top of the hook from back to front, which is the standard method assumed by every written crochet pattern. Yarn under scoops the yarn under the hook from front to back, adding a half twist to the loop. That twist produces a shorter, tighter stitch and a denser fabric with fewer visible gaps.
Is yarn under better than yarn over for amigurumi?
Not universally. Yarn under is better specifically at closing the gaps that let stuffing show through, which is why it is popular for amigurumi. But it changes your gauge, makes stitches harder to count, increases the spiral lean and is harder on your hands. Use it when you have a density problem your hook size has not solved, not as a default.
Do crochet patterns mean yarn over or yarn under by default?
Yarn over, always. Unless a pattern explicitly says to use yarn under, every instruction to single crochet means a standard yarn over single crochet. Designers write their stitch counts, gauge and finished measurements based on that assumption.
Does yarn under make my amigurumi smaller?
Yes, slightly. Yarn under stitches are shorter and narrower than yarn over stitches worked with the same yarn and hook, so the same pattern produces a smaller finished piece. If parts need to fit together, swatch and measure before you commit rather than assuming the pattern dimensions still apply.
Can I use yarn under for rows and flat pieces?
It is not recommended. When you turn your work, yarn under stitches sit at an awkward angle, the edges become uneven and the fabric is difficult to seam neatly. Keep yarn under for pieces worked in continuous rounds and use standard yarn over for anything flat and turned.
Why does my amigurumi lean more since I switched to yarn under?
All continuous spiral crochet leans slightly because each round sits a fraction to the side of the one below. The twist in a yarn under loop adds to that bias, so the lean becomes more visible. On a round ball it rarely matters, but on tall cylinders like arms, legs or a long body it can be noticeable, and embroidered features may drift off center.
How do I know whether I am already doing yarn under?
Stop right after the wrap and before pulling through. If the yarn came over the top of the hook and lies flat in the throat, that is yarn over. If it came up from underneath and crosses the shaft, that is yarn under. You can also read the finished fabric: open countable V shapes are yarn over, tight closed X shapes are yarn under.
Should I yarn under on both wraps of a single crochet?
No. Use yarn under only for the first wrap, when you draw the loop up through the stitch. Finish the stitch with a standard yarn over for the final pull through both loops. Scooping both wraps creates a hard, over-twisted stitch that is very difficult to work into on the next round.
Will yarn under fix stuffing showing through my amigurumi?
It helps considerably, because the twisted loop closes the small window beneath each stitch. But check your hook size first. Amigurumi almost always needs a hook well below the size printed on the yarn label, and an oversized hook causes far more gapping than wrap direction ever will.
Is yarn under the same as the invisible single crochet?
No, they are different techniques that are often confused. Yarn under changes how the yarn wraps the hook. The invisible single crochet changes where you insert the hook, working into a specific part of the stitch below to reduce visible seams. They can be used together, but they solve different problems.
Does yarn under use more yarn than yarn over?
Slightly less per stitch, because each loop is shorter. However, denser fabric often means you need more stitches to reach the same finished size, so total yarn use for a complete project tends to come out broadly similar. Plan your yarn as you normally would.
Can I switch from yarn over to yarn under in the middle of a project?
You can, but the transition will be visible as a change in surface texture and density, and your stitch size will shift at that point. If you notice mid-project that you have been mixing methods, finish the piece consistently with one of them and start the next piece deliberately rather than frogging everything.
Which method is better for beginners?
Standard yarn over. It is what every pattern assumes, it produces the clear V shapes that make stitch counting straightforward, it works in both rows and rounds, and it puts less strain on your hands. Learn yarn over properly first, then add yarn under later as a specialist tool when a project genuinely calls for it.
Put your new wrap to work
Pick a small, forgiving project, choose one method, and stay with it from the first round to the last. Beginner-friendly amigurumi patterns are the perfect place to feel the difference for yourself.
Browse crochet patterns Get a free pattern