How to Change Yarn Colors in Amigurumi Without a Visible Jog
The invisible color change, the stepped-seam fix, and the carrying rules that keep stripes clean on the right side and tidy on the inside.

The first time you crochet stripes into an amigurumi body, something slightly disappointing happens. The stripes look good from the front, you turn the piece a quarter turn, and there it is: a little staircase running up the side where every color change sits one stitch higher than the last. Nothing is technically wrong. You followed the pattern. And yet the toy has a visible scar down its back.
That staircase has a name. Crocheters call it the jog, or the stepped seam, and it is not a mistake in your tension or your hook size. It is a direct consequence of how amigurumi is built. Once you understand why it appears, you can place it, hide it, or almost eliminate it, and the technique takes about thirty seconds to learn.
This guide covers the mechanics of a clean change, the exact moment to introduce the new yarn, how to decide between cutting and carrying, what to do with the strands trapped inside the toy, and how to handle the three color patterns that give beginners the most trouble: wide bands, narrow stripes, and single-round accents.
The three techniques that fix almost every color change
Master these in order. The first one alone removes most of the mess people blame on their yarn.

Finish the old stitch with the new color
This is the whole trick, and nearly everyone gets it wrong the first time. Do not finish your last cream stitch and then start a green one. Instead, work the last cream single crochet until you have two loops left on the hook. Stop there. Drop the cream, pick up the green, yarn over with green, and pull it through both loops. That final pull is what forms the top of the stitch, which means the stitch you just completed now wears a green hat even though its body is cream.
Why it matters: the top of every stitch is what the next round sits on, and it is what you see from the outside. If you switch after completing the stitch, the first green stitch inherits a cream top and you get a smeared half-and-half stitch at the boundary. Switching one step early makes the color line land exactly where your eye expects it.
Browse beginner-friendly patterns →
Place the stepped seam instead of fighting it
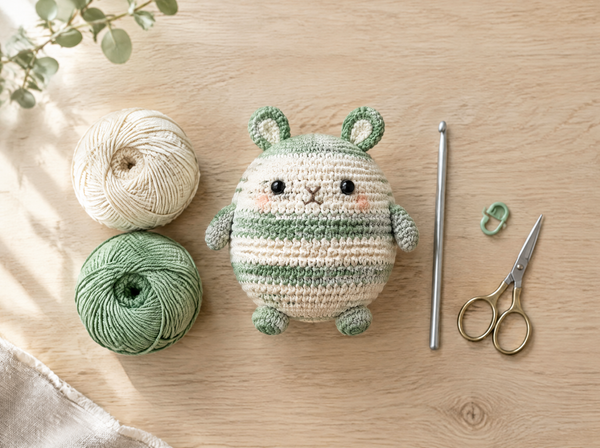
Amigurumi is worked in a continuous spiral, not in joined rounds. There is no slip stitch closing each round, so a round never truly ends. It keeps climbing, like a spiral staircase. That means the point where you switch colors is always one stitch further along than the previous switch, and over four or five color changes those offsets stack into the visible staircase on the left-hand ball above.
You cannot delete the jog from a spiral, but you can make it invisible. Keep a stitch marker in the first stitch of every round so you always know exactly where the round begins, and always change color at that same marked point. The offsets then line up in one straight vertical column rather than wandering around the toy. Position that column at the center back, and it disappears behind the piece. The right-hand ball above was worked that way.
See the no-sew bundle →
Carry the yarn only when the gap is short
When a color returns within a few rounds, cutting and rejoining every time creates a pile of ends. Instead, carry the resting color up the inside of the piece. Because amigurumi is worked with the right side facing out and then stuffed, those floats end up sealed inside the toy where nobody will ever see them, as shown above.
The rule that keeps this tidy: carry across a maximum of two to three rounds. Longer than that and the float sags, pulls the fabric inward, and can show through the stitches as a shadow once the piece is stuffed. For a gap of four rounds or more, cut the yarn, leave a 15 cm tail, and rejoin later. Keep carried floats loose enough that the fabric still stretches, and never pull them tight, or the toy will dimple along the carry line.
Find your next project →How to change color, step by step
- Work to the last stitch of the old color. Check your stitch marker so you know precisely where the round begins and where the change should land.
- Stop one step early. Insert the hook, yarn over with the old color, pull up a loop. You now have two loops on the hook. Do not complete the stitch.
- Drop the old color to the inside. Let it fall toward the back of the work so it is already positioned for carrying or cutting.
- Pick up the new color. Leave a 15 cm tail if you are joining fresh yarn. Yarn over with the new color.
- Pull through both loops. The stitch is now complete with a new-color top. This single move is the invisible color change.
- Work the next stitch normally in the new color. Give the first two or three stitches a slightly firmer tug so the boundary does not gape.
- Decide: carry or cut. Returning within two or three rounds means carry it up the inside. Longer than that means cut, leaving a 15 cm tail.
- Secure the tails. Weave ends into the wrong side before you stuff. Once the piece is stuffed and closed you cannot reach them.
- Check from the right side. Look at the boundary in good light. A clean change shows one crisp line with no half-colored stitches.
| Situation | Carry or cut | Why |
|---|---|---|
| Color returns in 1–3 rounds | Carry inside | Short float stays flat and hidden, no extra ends |
| Color returns in 4+ rounds | Cut and rejoin | Long floats sag, pull the fabric and shadow through |
| Single-round accent stripe | Carry inside | Only one round of float, completely invisible once stuffed |
| Wide band, 6+ rounds | Cut and rejoin | Carrying wastes yarn and adds bulk to one side |
| Final color of the piece | Cut | Nothing left to carry, weave in before closing |
| Open piece that will not be stuffed | Cut | Floats would be visible from inside the finished item |
Small habits that make a visible difference
- Move your stitch marker every single round. The jog alignment depends entirely on knowing where the round starts.
- Change color at the center back of the piece, decided before you start, not halfway through.
- Keep the first stitch after a change slightly firm, then return to normal tension.
- Use the same yarn weight and fiber for every color. A thicker contrast color makes the boundary bulge.
- Weave in all ends before stuffing, never after.
- For narrow stripes, wind a small butterfly bobbin of the second color so the ball does not tangle with the main strand.
- Photograph the piece between color blocks. The camera shows alignment drift your eye misses.
A clean color change is not a harder stitch. It is the same stitch, finished one beat earlier.— Ava, MrsCrochetWorld
Fixing the four problems people actually run into
Once the basic change is in your hands, the remaining difficulties are nearly always one of these four. Each has a specific cause and a specific fix.
The boundary looks blurry, with half-colored stitches
This is the classic symptom of switching too late. You completed the old stitch fully and then started the new color, so the first new stitch is sitting under an old-color top. Go back one step in your routine: stop with two loops on the hook and let the new color make the final pull. The blur vanishes immediately.
The fabric gapes or shows a small hole at the change
The first stitch in a new color is usually a little looser because you have just picked the yarn up and the tension is not yet settled. Tug the new tail gently after the first stitch, then work the next two stitches with slightly firmer tension. If a hole is still visible, you may also be changing color on a decrease stitch, where two stitches are already being pulled together. Shift the change one stitch forward to a plain single crochet.
The toy dimples along one side
Almost always a carried float pulled too tight. Carried yarn should lie relaxed along the inside wall with enough slack that the fabric stretches normally when you press it. If the dimple is already stuffed in, it is worth unstuffing, loosening the floats, and restuffing. The alternative is cutting the float, which leaves two ends to weave but restores the shape.
The stripes drift diagonally around the piece
This means your change point is wandering, which happens when the stitch marker is not moved every round or when the piece is worked without a marker at all. Each missed round shifts the change by an extra stitch, and after ten rounds the stripes spiral visibly. Reset by counting carefully back to the true start of the current round, replace the marker, and keep every subsequent change on that column.
When a pattern says to join rounds instead
A few amigurumi patterns, especially those with very wide stripes or garment-style pieces, ask you to join each round with a slip stitch rather than spiral. In that construction the jog behaves differently and standard jogless-join techniques apply. Check which construction your pattern uses before troubleshooting, because the two require different solutions.
Keep exploring

Fifty beginner-friendly plush patterns with clear color-change notes in every round.
View pattern →
Twenty striped and multi-color animals to practise clean changes on real projects.
View pattern →The marker habit that keeps every color change in one straight line.
Read the guide →Six seamless joining methods for when you cut rather than carry.
Read the guide →The four ideas worth remembering
Everything in this guide, condensed
- Spiral construction. Amigurumi rounds never close, so every color change shifts one stitch forward. Alignment, not elimination, is the realistic goal.
- Two loops, then switch. The final pull through the last two loops decides the color of the stitch top. That single move is the entire invisible change.
- The three-round rule. Carry a resting color across up to three rounds. Beyond that, cut and rejoin so floats cannot sag or shadow through the fabric.
- Weave before stuffing. Once a piece is stuffed and closed, the inside is unreachable. Secure every tail while you can still get to it.
Frequently asked questions
When exactly do I switch to the new yarn color?
Work the last stitch of the old color until two loops remain on your hook, then stop. Drop the old color, yarn over with the new color, and pull it through both loops. The stitch is completed with the new color, which gives it a new-color top. Switching after a stitch is fully finished is what creates a blurry half-colored stitch at the boundary.
Why do my amigurumi stripes have a visible step or staircase?
Amigurumi is worked in a continuous spiral rather than joined rounds, so the round never truly closes. Each color change therefore sits one stitch further along than the previous one, and those offsets accumulate into a stepped seam. It is a property of spiral construction, not an error in your technique.
Can I remove the jog completely in amigurumi?
Not in a true spiral, because there is no join to disguise. What you can do is control it. Change color at the same marked stitch every time so the offsets stack into one straight vertical column, then position that column at the center back of the piece where it is hidden from normal viewing angles.
Should I cut the yarn or carry it up the inside?
Carry it when the color returns within one to three rounds, since a short float lies flat and stays sealed inside the stuffed toy. Cut it when the gap is four rounds or more, because long floats sag, pull the fabric inward, and can shadow through the stitches once the piece is stuffed.
How long should I leave the yarn tails?
Around 15 cm is comfortable for both joining and weaving in. Shorter tails tend to work loose as the toy is handled, and much longer tails simply add bulk inside the piece. Always weave tails into the wrong side before you stuff and close the piece.
Why is there a small hole at my color change?
The first stitch in a new color is often looser because the tension has not settled yet. Tug the new tail gently and work the following two stitches a little firmer. If a hole persists, check whether you are changing color on a decrease stitch, where two stitches are already pulled together, and move the change to a plain single crochet instead.
My toy has a dent along one side. What went wrong?
A carried float was pulled too tight. Carried yarn must lie relaxed along the inner wall with enough slack that the fabric still stretches when pressed. To fix it, unstuff the piece, loosen the floats, and restuff. Alternatively cut the float, which leaves two ends to weave in but restores the shape.
Why are my stripes drifting diagonally around the piece?
Your change point is wandering, which happens when the stitch marker is not moved every round or no marker is used. Each missed round adds an extra stitch of offset, and after about ten rounds the stripes visibly spiral. Count back to the true start of the current round, replace the marker, and keep all later changes on that column.
Do I need to change colors differently for single-round accent stripes?
The technique is identical, but always carry rather than cut for a single round. One round of float is completely invisible once the piece is stuffed, and cutting for a one-round stripe would leave four ends to weave for a very small amount of color.
Can I use different yarn weights for different colors?
It is best avoided. A thicker contrast color makes the boundary bulge outward and changes the stitch count tension across that band, which distorts the shape of the piece. Keep the same weight and ideally the same fiber for every color in one project.
What if my pattern tells me to join each round with a slip stitch?
That is joined-round construction rather than a spiral, and the jog behaves differently there. Standard jogless-join techniques for joined rounds apply instead of the spiral alignment method described here. Check which construction your pattern uses before troubleshooting.
How do I keep two yarn balls from tangling while striping?
Wind a small butterfly bobbin of the secondary color rather than working from the full ball. The bobbin hangs close to the piece, has far less length to twist, and can be unwound in seconds if it does catch. Keeping the two strands on opposite sides of your lap also reduces twisting considerably.
About the author
Ava is the designer behind MrsCrochetWorld and has been writing and testing amigurumi patterns for beginners for more than a decade. Every technique in this guide comes from stitching it repeatedly on real projects, photographing the results, and rewriting the instructions until testers stopped asking the same question. Her patterns are known for no-sew construction, clear round-by-round notes, and plain-English explanations of the moments where beginners most often get stuck.
This guide was reviewed against finished samples worked in cotton and acrylic at the same hook size, so the results shown reflect ordinary home crochet conditions rather than studio-only setups.
Put the technique on a real project
Pick a striped pattern, mark your round, and let the first change be the one you finish early.
Browse all patterns Get a free pattern