Amigurumi Safety Eyes: Complete Guide to Sizes, Placement & Attachment
Everything you need to pick the right safety eye size, place it for the perfect expression, and lock it in like a pro — plus how to fix the most common mistakes.

The eyes are the soul of every amigurumi. You can crochet a flawless body with perfectly even stitches, but if the eyes sit too high, too far apart, or in the wrong size, your cuddly friend can end up looking startled, sleepy, or a little bit "off." Get the eyes right and even a beginner plushie instantly looks polished and full of personality.
Amigurumi safety eyes are the fastest, most reliable way to give your crochet creatures those bright, glossy, professional-looking eyes. They snap in from the front, lock with a washer from the back, and — once placed — they will not fall out, which is exactly why they are the go-to choice for makers who sell their work. But they come in a dizzying range of sizes, and once a washer clicks into place, it is nearly impossible to remove. That makes choosing correctly the first time essential.
In this complete guide you will learn what safety eyes actually are and when to use them (versus glass or embroidered eyes), how to choose the right size for any project with a clear size chart, exactly how to attach them step by step, how to fix the mistakes every crocheter runs into, and the placement tricks designers use to create expressive, irresistible faces. Let's give your amigurumi the eyes they deserve.
Safety Eyes 101: What They Are & Why They Matter

A safety eye is a two-part plastic fitting. The front is a smooth, domed eye with a ridged post sticking out the back; the second part is a washer that slides onto that post and locks in with a one-way ratchet. Once the washer clicks past the ridges, it will not slide back off — that is the "safety" in safety eyes.
They are not the only option, though. Here is when to reach for each type:
Plastic safety eyes — the standard for amigurumi. Glossy, durable, washable, and available in dozens of sizes and colors (solid black, colored irises, cat-slit pupils, glitter). Perfect for toys that will be hugged, played with, or sold.
Glass eyes — flat-backed or wired eyes glued or sewn on. Beautiful realism for collectible teddy bears and display pieces, but they are not child-safe and take more skill to set.
Felt or embroidered (sewn) eyes — cut from felt or stitched directly with yarn. The only truly safe choice for babies and toddlers, and lovely for a soft, hand-made look.
Size Guide: Which Safety Eye Size for Which Project

Safety eyes are measured by their diameter in millimeters. The right size depends on the finished size of your amigurumi and the look you want. As a rule of thumb, use the height of your plushie's head as your guide: the eye diameter should be roughly one-tenth to one-eighth of the head height for a classic cute look, and larger for that big-eyed "kawaii" style.
Here is a practical starting chart based on standard worsted/DK amigurumi worked at typical tension:
| Eye Size | Best For | Typical Project |
|---|---|---|
| 6 mm | Tiny amigurumi, keychains | Micro plushies, finger-sized toys |
| 8 mm | Small amigurumi | Small animals, ~10 cm tall |
| 9 mm | Small–medium | Standard small critters, ~12 cm |
| 10 mm | Medium (most common) | Classic amigurumi, ~15 cm |
| 12 mm | Medium–large | Chunky animals, ~18–20 cm |
| 15 mm | Large | Big plushies, ~25 cm+ |
| 18 mm | Extra large / big-eyed style | Large toys, cartoonish faces |
| 24 mm | Jumbo / statement eyes | Giant amigurumi, mascots |
Species-specific tips
Bears & classic animals: Go slightly smaller for a sweet, gentle look — 9–12 mm on a mid-size bear reads as friendly, not manic.
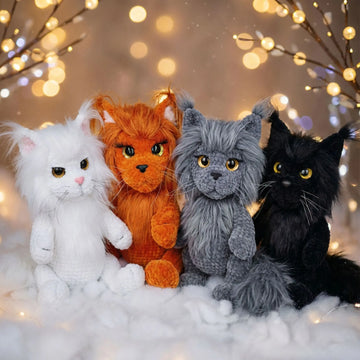
Cats: Colored cat-slit eyes (green, amber, blue) add instant realism; 10–12 mm works beautifully on a mid-size cat like a Maine Coon.
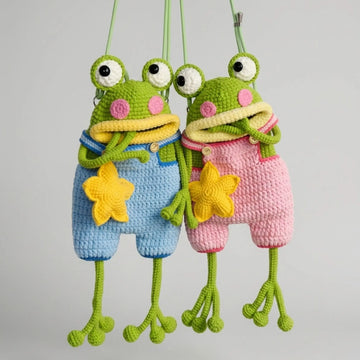
Frogs & bug-eyed creatures: Go big and place the eyes high on separate little bumps — 12–18 mm gives that charming pop-eyed frog look.
Monsters & Halloween pieces: Mismatched sizes, glitter, or a single large eye create character. This is where you can break the rules on purpose.
How to Attach Safety Eyes: Step-by-Step

The golden rule: insert safety eyes BEFORE you stuff and close the piece. Once the head is stuffed and sewn shut, you can no longer reach inside to attach the washer. The washer is permanent, so you only get one chance.
1. Mark the placement first. Use locking stitch markers, straight pins, or scraps of contrasting yarn to test positions. Count your stitches so both eyes are perfectly symmetrical — for example, "7 stitches apart, 2 rounds up from the color change."
2. Make the hole. Gently push the ridged post between two stitches (into a gap, not through a strand of yarn). If it resists, widen the gap slightly with a tapestry needle or the tip of a knitting needle — never force it and never cut your yarn.
3. Push the eye through. Seat the eye from the outside so the domed front sits flush against the fabric.
4. Lock the washer. From the inside, slide the washer (flat side toward the fabric, cupped side out) onto the post and press firmly until it clicks all the way down. Push it as far as it will go for a tight, wobble-free eye.
5. Then stuff and close. Only now do you add fiberfill and sew the piece shut.

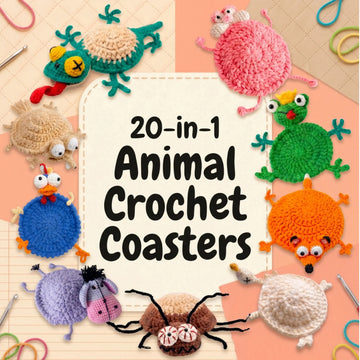
50-in-1 No-Sew Amigurumi Bundle
Fifty beginner-friendly plushies designed for easy safety-eye placement and minimal sewing. The perfect way to practice everything in this guide.
Shop the Bundle →Common Mistakes & How to Fix Them
Even seasoned makers hit these snags. Here is how to spot and solve each one.
Eye too small or too large
A small eye on a big head looks beady and anxious; an oversized eye can look comical. Fix it before locking: dry-fit two sizes and compare from a distance (see the size chart above). If you have already locked an eye that is wrong, see the removal section below.
Uneven placement
The most common giveaway of a rushed plushie. Always place by counting stitches and rounds, not by eye. Mark both positions with pins, then measure the gap on each side from the center before you commit.
Washer won't click or feels loose
Usually the post did not go fully through, or the washer is on backwards. Remove any stuffing, make sure the domed eye is flush against the front, then press the washer straight down with the flat side against the fabric until you feel firm clicks. Press with your thumb against a hard surface for extra force. If the fabric is very thick, the washer may sit higher — that is fine as long as it is locked and cannot pull back off.
Removing a safety eye
Safety eyes are designed not to come off, but it can be done with patience if the piece is still open. From the inside, use flush wire cutters or small pliers to carefully snip or crack the washer off the post — protect the surrounding stitches. Some makers slide a thin flat-head screwdriver under the washer's edge to pry it up ridge by ridge. If the head is already stuffed and closed, removal usually means opening a seam. Work slowly to avoid cutting yarn.
Eye Placement Tips for Expressive Faces
This is where good amigurumi becomes great. Tiny placement changes completely transform a face's personality — and it costs nothing to get right.
Distance between the eyes
Eyes placed closer together read as focused, cute, and baby-like. Eyes placed wider apart read as gentle, calm, or a touch goofy — great for herbivores and friendly monsters. A typical sweet spot for a mid-size amigurumi is about 4–7 stitches between the eyes, but always judge against your specific head size.
Eye height affects mood
Placing eyes lower on the face (leaving more forehead above) is the classic "kawaii" formula and looks adorably innocent. Placing them higher can look more alert or grown-up. For most cuddly amigurumi, err on the low side.
The stitch-marker trick
Before making any holes, clip locking stitch markers where you think the eyes should go. Live with them for a minute, rotate the head, and adjust. Markers let you audition an expression risk-free — the single best habit for consistently charming faces. Snap a quick phone photo too; a face often reads differently on screen than in your hands.

Creepy Cute Amigurumi Book
Halloween-ready patterns where big, glittery and mismatched safety eyes steal the show. Put your new placement skills to spooky-cute use.
Get the Book →
Maine Coon Cat Crochet Pattern
A gorgeous mid-size cat — the ideal project to try colored cat-slit safety eyes and the placement tricks from this guide.
Shop the Pattern →Frequently Asked Questions
What size safety eyes for amigurumi?
For a standard mid-size amigurumi (around 15 cm / 6 inches worked in worsted or DK yarn), 9–12 mm safety eyes are the most popular choice, with 10 mm being the everyday default. Scale down to 6–8 mm for tiny plushies and up to 15–24 mm for large or big-eyed "kawaii" styles. When in doubt, dry-fit two sizes against the head and pick from a few feet away.
When do I put safety eyes in amigurumi?
Always insert and lock safety eyes before stuffing and closing the piece. The washer is applied from the inside, so once the head is stuffed and sewn shut you can no longer attach it. Place the eyes, lock the washers, then add fiberfill and close.
Can I remove safety eyes once attached?
Safety eyes are designed to be permanent, so removal is difficult. If the piece is still open, you can carefully snip or crack the washer off the post from the inside using flush wire cutters or small pliers, or pry it up with a thin flat-head screwdriver. Work slowly to protect your stitches. If the head is already closed, you will usually need to open a seam. This is exactly why we recommend pinning and dry-fitting before locking.
Are safety eyes safe for babies?
For toys intended for children under 3 years old, do not use plastic safety eyes. Even though the washers lock firmly, any small pushed-in component is a potential choking hazard. Instead, embroider the eyes with yarn or securely sew on felt shapes. For older children and display pieces, properly locked safety eyes are very secure.
What are the best safety eyes for amigurumi?
Look for solid, glossy plastic eyes with metal or sturdy plastic washers that click firmly and stay put. Solid black round eyes are the versatile classic; colored iris and cat-slit eyes add realism for cats and creatures; glitter eyes suit festive pieces. Buy a mixed-size assortment kit so you always have the right diameter on hand.
How do I make the hole for safety eyes?
Push the ridged post into the gap between two stitches rather than through a strand of yarn. If it resists, gently widen that gap with a tapestry needle or the tip of a knitting needle. Never cut your yarn to make room and never force the post — a slightly widened stitch gap is all you need.
What if my safety eye won't lock?
First, make sure the domed eye is pushed fully through and sitting flush on the front. Then check the washer orientation — the flat side goes against the fabric, cupped side facing out — and press it straight down until you feel firm clicks. Pressing against a hard surface gives extra force. Thick fabric may leave the washer sitting a little higher, which is fine as long as it is locked and cannot pull back off.
Can I use safety eyes on any yarn?
Yes — safety eyes work with virtually any yarn as long as the fabric is worked at a tight amigurumi tension so stuffing doesn't show and the eye stays anchored. Very bulky or loosely-crocheted fabric may need a slightly larger eye or extra care to keep the post from wobbling. Always crochet amigurumi tightly enough that there are no gaps around the eye.
How far apart should amigurumi eyes be?
It depends on head size, but a common sweet spot for a mid-size amigurumi is about 4–7 stitches between the eyes. Closer together reads cute and baby-like; wider apart reads gentle or goofy. Always place by counting stitches and rounds so both sides are symmetrical, and dry-fit with markers before committing.
What's the difference between safety eyes and regular craft eyes?
Safety eyes have a ratcheting washer that locks permanently from the inside, making them secure for toys. "Wiggle" or glue-on craft eyes simply stick to the surface and can be pulled or fall off — fine for décor but not suitable for anything that will be handled, hugged, or sold as a child's toy. For amigurumi, choose true safety eyes.
How do I stop safety eyes from falling out?
A properly locked washer will not fall out. Make sure you pushed the washer down as far as it will go until it clicks past several ridges, that the eye sits in a snug stitch gap (not an oversized hole), and that your fabric is crocheted tightly. For extra security on heirloom pieces, some makers add a dab of craft glue on the post before locking — though a fully-seated washer is usually enough on its own.
Can I use safety eyes for stuffed animals I sell?
Yes, properly locked safety eyes are the standard for handmade toys sold to older children and adults. However, always label age recommendations clearly, and never use plastic safety eyes for items aimed at children under 3 — use embroidered eyes there. If you sell professionally, check your local toy-safety regulations, as some markets require testing or specific labeling.
Ready to Put Those Eyes to Work?
Browse beginner-friendly amigurumi PDF patterns designed for perfect safety-eye placement — instant download, worked in easy rounds.
Shop Crochet Patterns →