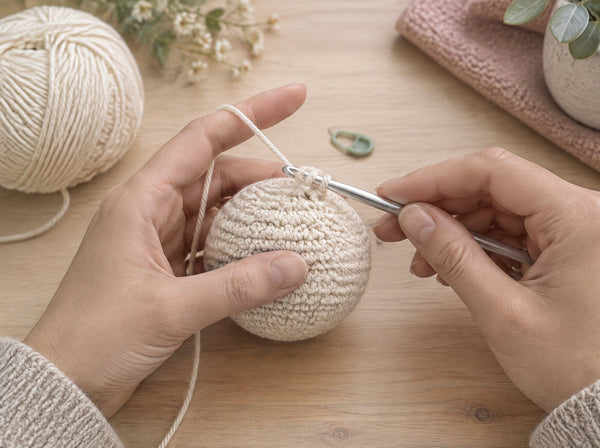
Crochet frog pattern: the complete guide to cute frog amigurumi
Round body, goofy eyes, one cozy evening — here's everything you need to crochet a frog that looks shop-worthy on your very first try.

A good crochet frog pattern is one of the friendliest projects a new maker can pick up — a round body, simple stitches, and those big goofy eyes that make everyone smile. Whether you want a pocket-sized keychain, a plush shelf buddy, or a wearable frog bag, this guide walks you through yarn, stitches, shaping, and finishing so your froggy turns out cute every single time.
What makes a frog such a great first amigurumi?
The frog silhouette is famously forgiving — which is exactly why it became a viral beginner favorite.
Frogs are the perfect amigurumi shape: a rounded body, a wide low-set head, and two dome eyes that sit right on top. Because the silhouette is so forgiving, a frog hides small tension wobbles far better than a sharp-cornered project would. If you're brand new to plushie-making, a frog is the ideal way to learn by doing.
A well-written pattern gives you three things: clear round-by-round stitch counts, a photo or note for eye placement, and a stuffing guide so the body stays firm but not lumpy. Every MrsCrochetWorld froggy is written in US terms with plain-English abbreviations and low-sew construction wherever possible, so a first-timer can follow along without guesswork.
What supplies do you need to crochet a frog?
The shopping list is short — and one skein of each green makes several small frogs.
Most frog projects use worsted-weight (#4) cotton or a cotton blend in two greens — a main body green and a lighter belly green — plus scraps of white, black, and pink for the face. Cotton gives crisp stitch definition and holds its shape better than acrylic, which matters when you want those neat little bumps. Our guide to the best yarn for amigurumi compares both fibers in detail.
- Yarn: worsted-weight cotton in two greens, plus small amounts of white, black, and pink.
- Hook: 3.0–3.5 mm — a half-size below your yarn label keeps stitches tight so stuffing doesn't show.
- Safety eyes: 8–12 mm, or embroider the eyes for a child-safe toy — see how to add safety eyes.
- Extras: fiberfill stuffing, a yarn needle, a stitch marker, and scissors.
Which stitches do frog patterns use?
If you can make a magic ring and a single crochet, you can make a frog.
Almost every crochet frog pattern relies on the same small toolkit: the magic ring to start each round piece without a hole, the single crochet worked in a tight spiral, plus increases and invisible decreases to grow and shape the body. A slip stitch tidies edges and joins. Because frogs are worked in continuous rounds, keep a stitch marker in the first stitch of every round so your count stays honest.
How do you crochet a frog step by step?
Exact stitch counts come from your pattern, but the build order is always the same.
Start the body with a magic ring of 6 single crochet, increase each round (12, 18, 24…) until the frog is as wide as you want, work several even rounds, then decrease to shape the top. Stuff as you go — firm enough to hold shape, soft enough to squish — before the opening gets too small. Understuffing is one of the main reasons amigurumi ends up with holes or a floppy look.
Next come the eyes: two small spheres (or safety eyes on a white crochet base) positioned high on the head so they bulge like a real frog's. Short tube legs sit at the front and tiny arms tuck at the sides — many no-sew designs work these directly into the body. Finish the face with a wide embroidered smile and two nostril dots, then weave in your ends. Don't rush the eyes and smile: that final ten minutes is what turns a green ball into a character. Eye placement, not stitch count, is what gives a frog personality — pin the eyes first and slide them around; moving them just two stitches changes your frog from sweet to silly.
"Every frog I've ever designed was cute because of the last ten minutes — the eyes and the smile are where the magic happens."— Ava Collins, MrsCrochetWorld
Frog-friendly patterns to hop into
Start with a wearable froggy or build your amigurumi basics first — these three are beginner favorites.

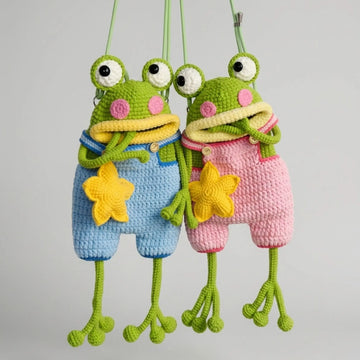
Frog Bag Crochet Pattern
Wearable favoriteA frog that doubles as a small purse — the same round froggy shape scaled up into a statement piece, with every round explained step by step. A confident-beginner project that collects endless compliments, and a natural next step once you've learned crocheting in the round.

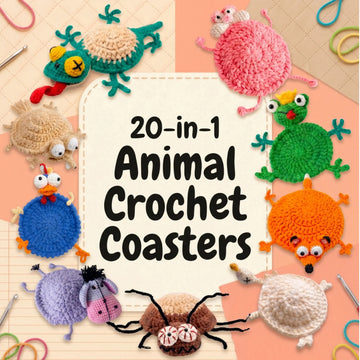
50 No-Sew Amigurumi Patterns Bundle
Best sellerFifty low-sew plushie designs that use exactly the same stitch toolkit as a frog — magic ring, single crochet, increase, decrease. Perfect for building a whole pond of critters once your first froggy is done.

Easy No-Sew Amigurumi Book
Beginner pickFifty super-simple plushies with low stitch counts and minimal assembly — ideal if you want to practice the basics before (or right after) your first frog. The gentlest possible on-ramp to a lifetime of cute makes.
What kinds of crochet frogs can you make?
One basic shape, endless directions — start simple, then level up as your confidence grows.
Mini frog keychains
The fastest, most giftable option. A tiny frog on a clasp works up in 1–2 hours, uses leftover yarn, and makes a perfect first amigurumi — great for craft fairs too.
Classic sitting frog plush
The huggable shelf frog most people picture — round body, dome eyes, little legs. An ideal confidence-builder after your first keychain, taking around 3–5 hours.
Frog bag and purse
A wearable frog that doubles as a small bag, around 6–10 hours with a bit more assembly. Browse more in our bags and accessories collection.
Dressed and themed frogs
Once you're comfortable, add tiny outfits, hats, or seasonal accessories. Themed frogs make wonderful collector pieces and personalized gifts.
A whole pond of friends
Frogs pair beautifully with turtles, axolotls, and other pond critters from our amigurumi collection — a cute matching set grows one evening at a time.
Still learning the basics?
Our complete beginner guide to crochet covers hooks, yarn, tension, and every stitch a frog needs — the perfect prep before round one.
Froggy mistakes to avoid
- Loose tension: a hook that's too big leaves gaps where stuffing peeks through. Size down half a step from the yarn label.
- Skipping the stitch marker: in a continuous spiral it's easy to lose your first stitch and drift off count.
- Eyes too far apart: frogs look best with eyes set close together and high on the head — never on the sides.
- Understuffing: a floppy body reads as unfinished. Firm it up before closing, adding fiberfill in small pieces.
- Sewing before pinning: always place, pin, and check the symmetry of eyes and limbs before you sew anything down.
- Careless ends: anchor and hide yarn tails inside the body so nothing unravels — a blunt yarn needle makes this quick and tidy.
Ready to make your own froggy?
Try a free pattern to learn the round-body shape, or jump straight into a beginner-friendly design with step-by-step photos on every round.
Get a free pattern Shop beginner patternsFrequently asked questions
Is a crochet frog good for beginners?
Yes — frogs are one of the best first amigurumi projects. The round shape is forgiving, the stitches are basic, and a simple frog can be finished in a single evening.
What yarn is best for a crochet frog?
Worsted-weight cotton or a cotton blend in two shades of green. Cotton gives crisp stitches and holds its shape, which keeps stuffing from showing through the fabric.
What size hook do I need for a crochet frog?
A 3.0–3.5 mm hook works well with worsted cotton. Going a half-size smaller than the yarn label recommends keeps the fabric tight so no fluff peeks out.
How long does it take to crochet a frog?
A mini frog keychain takes about 1–2 hours. A classic sitting frog plush takes 3–5 hours, and a frog bag around 6–10 hours depending on your speed.
Do I need safety eyes for a crochet frog?
No. Safety eyes are quick and popular, but you can crochet or embroider the eyes instead — which is the safer choice for toys given to babies and young children.
How do I stuff a crochet frog so it looks smooth?
Add fiberfill in small pieces as you go, firm enough to hold shape but soft enough to squish. Overstuffing stretches the stitches open, while understuffing looks floppy.
Why do my frog's eyes look wrong?
Almost always placement. Frog eyes sit high and close together on top of the head. Pin them before sewing and adjust until the expression looks right to you.
Can I make a no-sew crochet frog?
Yes. Many modern frog designs are low-sew or no-sew, working the legs and features directly into the body so there is minimal assembly at the end.
Can I sell frogs I make from a pattern?
With MrsCrochetWorld patterns you are welcome to sell your finished handmade items. You may not resell or share the pattern file itself. See our full guide on selling items made from patterns.
What skills do I need before starting a frog?
Just four moves: magic ring, single crochet, increase, and decrease. If you can do those, you can complete a frog — and each one is covered in our free stitch tutorials.