Crochet Plushie for Beginners: Easy Step-by-Step Guide 2026
Five stitches, one magic ring, one weekend — that is genuinely all it takes to finish your first cuddly crochet plushie. This guide walks you through the hook, the yarn, the universal sphere recipe, and the exact first project that will not end up in the unfinished basket.

Making your first crochet plushie feels intimidating from the outside — all those perfect round heads and tiny paws on Pinterest look like expert work. Here is the secret every amigurumi maker eventually discovers: almost every plushie in the world is built from the same handful of moves, repeated in a spiral. Once you understand five core techniques and the magic ring, you can finish a huggable little animal in a single afternoon.
What is a crochet plushie, exactly?
A plushie, a stuffie, an amigurumi — three names for the same lovable thing.
A crochet plushie is a small stuffed toy crocheted in a tight spiral of single crochet stitches. You will often see it called amigurumi, from the Japanese words "ami" (crocheted) and "nuigurumi" (stuffed doll) — the style known for round bodies, oversized heads, and irresistibly cute faces. If you want the full backstory, our guide to what amigurumi is covers the history and the craft in depth.
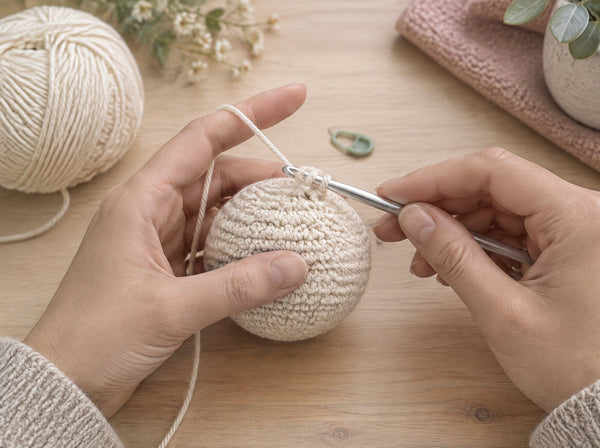
Unlike a flat scarf or granny square, a plushie is worked three-dimensionally. You begin at the top of the head with a magic ring, increase stitches to grow a sphere, work even rounds for height, then decrease to close the shape — stuffing as you go. Most beginner plushies use just one stitch for the entire toy: the humble single crochet.
The big trend that makes 2026 the easiest year ever to start is no-sew amigurumi: legs, ears, and arms are crocheted directly onto the body as you work, so there is nothing to sew on at the end. No lopsided ears, no dangling limbs, no assembly frustration — the single most common reason beginners give up simply disappears.
The six supplies you actually need
You do not need a craft-store haul to start. Six items cover your first three plushies, and none of them need to be fancy:
- Crochet hook, 3.0–3.5mm. A smaller-than-usual hook keeps stitches tight so stuffing never peeks through. Aluminum works; an ergonomic handle is kinder on your hand.
- Worsted weight (#4) yarn. Cotton holds shape beautifully and looks polished; acrylic is cheaper, softer, and more forgiving on tension. Our comparison of cotton vs acrylic for amigurumi breaks down when to use which.
- Polyester fiberfill. Lightweight, washable, and springy — the standard plushie stuffing.
- Safety eyes, 6mm or 8mm. Pop-in plastic eyes with locking washers give an instant professional face with zero sewing.
- Yarn needle. A blunt, large-eye tapestry needle for weaving in tail ends.
- Stitch markers. Two or three plastic loop markers to flag the start of each round — non-negotiable for spiral work.
One tip that saves twenty hours of squinting: skip dark yarn at first. Stitches vanish in black or navy, and you cannot fix what you cannot see. Pastel pink, mint, cream, or mustard will show every stitch clearly while you learn.
The five stitches that make every plushie
Here is the good news that surprises everyone: most beginner amigurumi patterns use only five techniques. Learn these and you can read 90% of the plushie patterns ever written.
- Magic ring (MR). The adjustable loop that starts every piece. Pull the tail and the center closes tight with no hole. Our step-by-step magic ring tutorial gets most makers there in one evening.
- Single crochet (sc). The workhorse. Insert hook, yarn over, pull up a loop, yarn over, pull through both loops. That is the whole stitch — master it with our single crochet guide.
- Increase (inc). Two single crochets worked into the same stitch. This is how a flat circle grows into a sphere.
- Decrease (invisible decrease or sc2tog). Two stitches merged into one, used to curve the shape closed. Both are covered in our guide to increasing and decreasing in amigurumi.
- Slip stitch and fasten off. How you finish a piece and secure the tail before weaving it in.
That is the entire vocabulary. If pattern shorthand like "inc x6" or "FLO" still looks like code, keep our free crochet abbreviations chart open in a tab while you work.
The universal amigurumi sphere: your first shape in 10 rounds
Every plushie head and nearly every round body in the world starts with the same recipe. Memorize this once and you are 80% of the way to reading any pattern:
- Round 1: Magic ring, 6 sc in ring (6 stitches)
- Round 2: Increase in every stitch (12)
- Round 3: *1 sc, inc* repeat 6 times (18)
- Round 4: *2 sc, inc* repeat 6 times (24)
- Round 5: *3 sc, inc* repeat 6 times (30)
- Rounds 6–10: 1 sc in every stitch (30 per round)
- Closing rounds: Reverse the increase pattern with decreases, stuffing firmly before the opening gets too small to reach into.
Add safety eyes between rounds 6 and 7, embroider a tiny mouth with black yarn, and you have a finished ball buddy. The technique never changes from here — only the stitch counts, colors, and built-on details do. If you lose track mid-round, our guide on counting stitches and rows shows exactly how to find your place again.
"Your first plushie will not be perfect — it will be loved. Wonky is just handmade with a personality."— Ava Collins, MrsCrochetWorld
What is the best first plushie project?
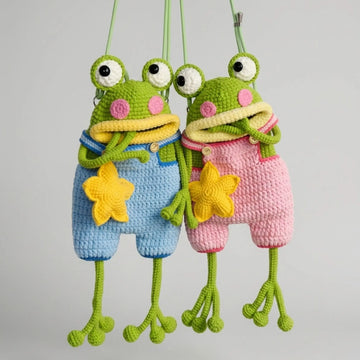
The best first project is a round-body animal with no separate limbs — a mini frog, a little octopus, a friendly ghost. Skip anything with sewn-on ears, arms, or legs for attempt number one; assembly is where beginner plushies go sideways. A single-piece pattern lets you practice the sphere, the eyes, and the stuffing without juggling parts.
Ball-shaped animals are also fast: 2–3 hours for most new makers, which means you get the "I actually made this!" moment on day one instead of day ten. Once the first one is done, a curated list like our top 10 easy amigurumi patterns for beginners gives you a graded path forward, and the free pattern collection lets you test the waters without spending a cent.
How do you stuff a plushie cleanly?
Stuffing is where most beginner plushies quietly go wrong — lumpy bellies, sagging heads, stuffing showing through the fabric. Three rules fix nearly all of it:
Stuff in small pinches, not handfuls. Use walnut-sized pieces of fiberfill and push them into curves with the back end of your hook. Big wads create lumps that never smooth out.
Stuff firm, not bursting. A finished plushie should feel like a stress ball — squeezable but shape-holding. Underfilled toys slump; overfilled ones stretch the stitches until stuffing shows. If you can see white through the fabric, either remove some fill or drop a hook size next time. Uneven stitches make this worse, so it pays to work on even crochet tension early.
Stop before you close. Leave room for the final decrease rounds to pull tight, then top up through the last small opening. And remember the golden rule of faces: safety eyes go in before stuffing — you cannot push a post through a head full of fiberfill. Our safety eyes tutorial shows placement, washers, and child-safe alternatives.
Beginner-tested plushie patterns to start with
Three no-fuss picks from our shop, sorted by how new you are — every one uses only the five core skills from this guide.

Easy No-Sew Amigurumi Book for Beginners
Best first bookFifty super-simple plushie patterns sorted easiest to hardest, with step-by-step photos and zero sewing. Because every limb is crocheted on as you go, you can follow along even before you feel confident — perfect right after your first ball plushie. Pair it with our guide on how to read amigurumi patterns and the shorthand will click instantly.

50-in-1 No-Sew Amigurumi Pattern Bundle
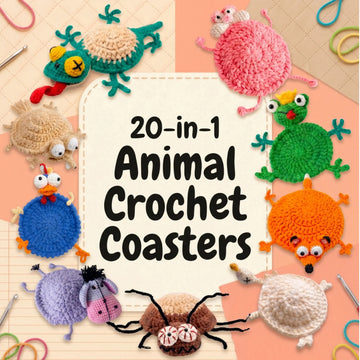
Instant downloadThe digital version of variety: fifty no-sew plushie patterns as instant PDF downloads, so you can pick whichever animal makes you smile today. Ideal once the amigurumi sphere feels automatic and you want to explore shapes, colors, and characters without buying patterns one by one.

Care Bears Crochet Pattern — 4 Teddy Bears
Next stepFour classic teddy-bear plushies with detailed photo tutorials — the perfect confidence project once single-piece animals feel easy. Bears introduce simple shaping and color changes while staying firmly in beginner territory, and they make the kind of gift people keep forever.
Six beginner mistakes that flatten your plushie
Every one of these is fixable in under a minute — and knowing them in advance means your first plushie skips the classic heartbreaks.
Loose tension
If stuffing peeks through your stitches, do not crochet tighter — switch to a hook one size smaller. The fabric closes up instantly.
Skipping stitch markers
Without a marker in the first stitch of the round, you will lose count by round 6 and the head goes lopsided. Move the marker up every round.
Eyes after stuffing
Safety eye posts cannot be pushed through fiberfill. Always place eyes and washers before you stuff the head — no exceptions.
Starting with chunky yarn
Bulky yarn looks beginner-friendly but hides your stitches and balloons the toy. Stick with worsted #4 for your first five plushies.
Chain-2 instead of magic ring
A chain-start leaves a small hole in the top of every head. Learn the magic ring on day one — it takes ten minutes and fixes this forever.
Skipping the fundamentals
Ten minutes with the complete beginner guide to crochet — hooks, yarn, first stitches — makes every pattern below it easier.
Ava's first-plushie survival tips
- Read the whole pattern first. Abbreviations and special stitches are defined at the top of the PDF — two minutes of reading prevents an hour of frogging.
- Count at the end of every round. The stitch count in parentheses is your safety net; if it matches, you cannot be far wrong.
- Take a break every 30 minutes. Hand cramps are the number-one reason beginners quit. Stretch your fingers, then come back.
- Photograph your progress. Comparing round 5 to round 15 shows how fast your tension evens out — great motivation on wobbly days.
- Keep the tail ends long. A 20 cm tail is easy to weave in; a 5 cm tail is a fight with a needle.
- Finish, do not perfect. A completed wonky plushie teaches you more than three abandoned perfect starts ever will.
Ready to make your first plushie this weekend?
Grab a free pattern, follow the sphere recipe from this guide, and by Sunday night there will be a small handmade friend sitting on your shelf. Every pattern in our beginner range uses only the five core skills you just learned.
Get a free patternShop beginner patternsFrequently asked questions
How long does it take to crochet a plushie as a beginner?
A small no-sew beginner plushie (10–15 cm tall) takes most new makers 2 to 4 hours of active crochet time, usually spread across a weekend. Larger plushies with sewn-on parts take 8 to 15 hours, which is why single-piece patterns are the recommended starting point.
What size crochet hook is best for plushies?
A 3.0mm or 3.5mm hook paired with worsted weight (#4) yarn is the universal beginner combination. It produces tight stitches that hide the stuffing without being painful to work, even for brand-new hands.
Can I learn to crochet a plushie in a week?
Yes. Most beginners finish their first simple ball plushie within about 5 days if they practice 30 to 60 minutes per day. The magic ring usually clicks on day 2 or 3, and everything after that is repetition of the single crochet stitch.
Is cotton or acrylic yarn better for amigurumi?
Cotton holds its shape better and gives crisper stitch definition, but it is firmer on the hands. Acrylic is cheaper, softer, and more forgiving of uneven tension, which makes it a great choice for your first three plushies before switching to cotton.
Do I need safety eyes or can I embroider the eyes?
Safety eyes give a cleaner, more professional look and lock in place permanently. Embroidered eyes are the safer choice for plushies given to children under 3 years old. Both are valid — safety eyes are simply easier for beginners to finish neatly.
What does no-sew amigurumi actually mean?
No-sew means every body part — arms, legs, ears, tail — is crocheted directly onto the main body while you work the pattern, instead of being made separately and sewn on afterwards. It removes the most frustrating step for beginners: attaching parts evenly.
Why is my plushie lopsided?
The two most common causes are skipping the stitch marker, so you lose track of where each round starts, and uneven tension between sessions. Use a contrasting stitch marker, move it up every round, and pause every 5 rounds to count your stitches.
How do I read an amigurumi pattern?
Amigurumi patterns are written in rounds (R1, R2, R3) with the finished stitch count in parentheses at the end of each line. Asterisks mark a sequence to repeat. Always read the abbreviations key at the top of the PDF before you begin the first round.
Can left-handed crocheters use the same plushie patterns?
Yes. Single crochet, increases, and decreases work identically in either direction. Left-handed makers simply work the spiral as a mirror image, and the stitch counts and shaping stay exactly the same.
What is the easiest plushie pattern for a complete beginner?
A single-piece, ball-shaped animal such as a mini frog, octopus, or friendly ghost. These use only the universal amigurumi sphere and need no assembly, so you practice the core skills without juggling separate parts. Free beginner downloads are available in the MrsCrochetWorld free pattern collection.