Rainbow Bear Crochet Pattern: Make 4 Cuddly Amigurumi Bears (2026 Guide)

A rainbow bear crochet pattern is one of the happiest ways to use up a basket of pastel yarn. Picture four soft, round teddy bears side by side in blush pink, butter yellow, mint and lilac, or one bold bear striped in every shade of the rainbow. This guide covers everything you need for your own set: yarn and hook, color planning, step-by-step construction, safe eyes for little ones and the finishing habits that make a handmade bear look gift-shop ready.
What is a rainbow bear crochet pattern?
A rainbow bear crochet pattern is a written amigurumi tutorial for a small, rounded teddy bear in soft pastel or bright rainbow shades. Some makers crochet each bear in one gentle color and build a set; others stripe a single bear through the whole spectrum. Underneath, it is the classic teddy shape: a round head, a pear-shaped body, little ears, stubby arms and legs, and a contrasting muzzle.
Amigurumi is the Japanese craft of crocheting small stuffed toys. The pieces are worked in a continuous spiral, so the round shapes have no visible seams, and you stuff as you go. Because a teddy bear is mostly spheres and short tubes, it is one of the friendliest amigurumi projects for newer crocheters.
The "make 4" idea is simple: crochet one base bear pattern four times in four colors. The shared shape keeps the family looking like it belongs together, while the colors give each bear its own personality. A set of four makes a lovely shelf display, a baby-shower gift or a sweet surprise for siblings.
Do I need experience to crochet a rainbow bear?
Not much. A teddy bear is an advanced-beginner project: if you can work a magic ring, single crochet in the round, increase and decrease, you already have every core skill. Solid-color bears need no colorwork at all; striped bears add the color change, which is easy to learn on a small practice swatch.
| Skill needed | Used for | Difficulty |
|---|---|---|
| Magic ring | Starting the head, body, ears and limbs | Easy |
| Single crochet (sc) | Almost the entire bear | Easy |
| Increase / decrease (inc/dec) | Shaping round heads and bodies | Easy |
| Color change | Rainbow stripes and contrast pieces | Medium |
| Assembly / sewing | Joining head, ears, limbs and muzzle | Medium |
If you have never made amigurumi before, crochet one bear before you commit to the full set. Once the first one clicks, the next three feel almost automatic because they share the same base body.
What supplies do I need for rainbow amigurumi bears?
You don't need a fancy kit. Everything here is standard amigurumi gear you will reuse for many projects.
- Yarn: Medium-weight (#4, worsted) acrylic or cotton in your bear colors, plus white or cream for the muzzles. Acrylic is soft and washable; cotton gives crisp stitches and a firmer feel.
- Crochet hook: A hook smaller than the yarn label recommends, so the fabric is tight enough to hide the stuffing. With worsted yarn, many amigurumi makers use 3.5 mm (E) or 4 mm (G).
- Safety eyes: Black safety eyes in a size that suits the head, or embroidery floss for stitched eyes.
- Polyester fiberfill: For firm, huggable stuffing.
- Stitch markers: To mark the first stitch of each round.
- Yarn needle: For sewing the pieces together and weaving in ends.
- Embroidery floss: Black or dark brown for the nose and mouth.
- Optional: A little pink yarn or blush for the cheeks.
Small bears often need only part of a skein per color, so leftovers from earlier projects can stretch across a whole rainbow. That makes rainbow bears a fantastic scrap-buster.
How do you plan rainbow and pastel colors?
Color is where a rainbow bear comes to life, and a little planning keeps the set looking soft and coordinated rather than random. There are three easy approaches:
- Solid pastel set: Each bear is one soft color, with a shared white or cream muzzle. It is the most beginner-friendly option, because there is no colorwork inside the pieces.
- Striped rainbow bear: Change color every few rounds and work through red, orange, yellow, green, blue and purple, or a pastel version of the same order.
- Color-blocked bear: Crochet each piece in a different shade, for example a pink head, a mint body and lilac arms and legs. It looks playful and needs no color changes in the middle of a piece.
For a cohesive set of four, pick shades with a similar softness. Four pastels (or four brights) look calm together, while one neon among three pastels makes one bear shout louder than the rest. Buy all the yarn for each color at once if you can, so a dye-lot difference does not show halfway through a bear.
How do you change colors for neat stripes?
In spiral rounds, a color change leaves a small step where the round begins, often called the "jog". You can make it far less visible:
- Change color on the final yarn over of the last stitch before the new round, so the new color starts cleanly.
- Work the first stitch of the new color as a slip stitch to soften the step, then continue in single crochet.
- Keep every color change in a line at the back of the bear, where the transition stays out of sight.
- For narrow stripes, carry the unused yarn loosely up the inside of the piece; for wide stripes, cut the yarn and tie the ends on the inside before stuffing.
How do you crochet a rainbow bear step by step?
Most teddy bear amigurumi patterns follow the same repeatable flow:
- Head: Start with a magic ring, increase into a sphere, work a few even rounds, then decrease to close. Insert the safety eyes before the head is closed and stuffed.
- Body: Work a slightly larger, pear-shaped piece and stuff it firmly as you go.
- Ears: Two small rounded cups. Flatten them gently before sewing for a softer look.
- Arms and legs: Four short tubes, stuffed lightly near the top so they can bend.
- Muzzle: A small white or cream oval worked around a short foundation chain, sewn on below the eyes and padded with a pinch of fiberfill.
- Assembly: Pin everything first, sew the head to the body, attach the arms, legs and ears, then embroider the nose and mouth.
Because each piece is worked in a continuous spiral, a stitch marker in the first stitch of each round is your best friend. Move it up as you go and you will never lose count. Stuff firmly, but not so tightly that the stitches gape; the fabric should feel springy, like a real plush toy.
Bear patterns to start your set
If you would rather follow a ready-made pattern than draft your own bear, these designs from the shop are a good place to start. Each one is a digital PDF, so you can begin right away.

Rainbow Belly Bears: 4-in-1 Amigurumi Bundle
A soft pastel bear family in one digital PDF: 4 teddy bear amigurumi patterns built on one base doll pattern, each bear with its own belly appliqué. You get detailed instructions for each bear design, material guidance, abbreviations, assembly details, step-by-step photos and a bonus gift pattern.
Brownie Plush Teddy Bear with Clothes: 5-in-1 Bundle
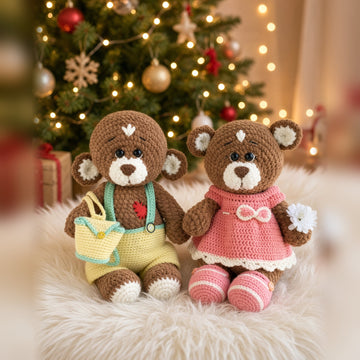
If you love dressing up your bears, meet Brownie: a soft, round, fluffy plush teddy bear about 10 in / 25 cm tall, with a little wardrobe that includes shorts, a backpack, a dress, booties, a bodysuit and more. The 5-in-1 bundle comes as 3 PDF patterns, mostly crochet plus 2 knitted outfits, with step-by-step photos and US terms. Instant PDF download: nothing is shipped.

20-in-1 Cuddly Animals Crochet Pattern Bundle
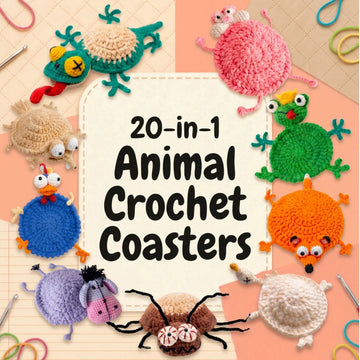
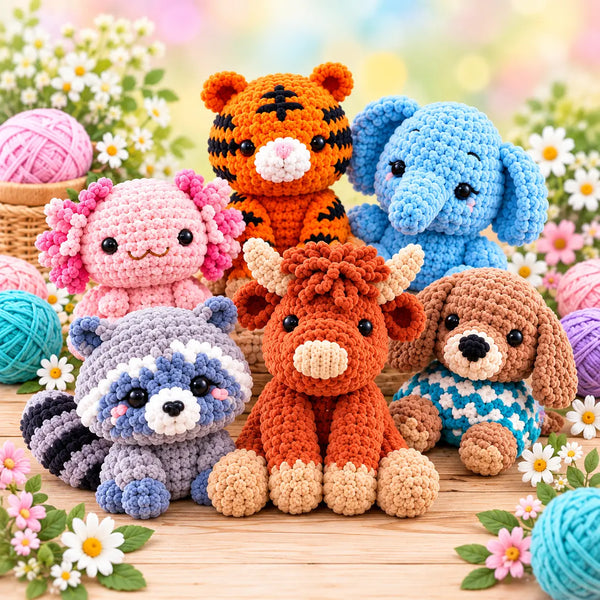
Ready to give your bears some friends? This bundle collects 20 amigurumi animal patterns in one digital PDF download, with step-by-step instructions in US crochet terms. The animals in the product photos include a highland cow, platypus, capybara, raccoon, tiger, unicorn, elephant and hippo: farm friends, wild animals and a little bit of magic.
Common mistakes to avoid
Most "why doesn't my bear look right" problems come down to a handful of fixable habits:
- Loose tension: If stuffing shows through the stitches, drop a hook size. Amigurumi needs a tight fabric.
- Skipping the stitch marker: Losing the start of the round is a very common cause of lopsided spheres.
- Under-stuffing: A floppy bear looks unfinished. Firm stuffing keeps the round shape crisp.
- Adding eyes too late: Safety eyes go in before you close the head, because the backs cannot be attached once it is stuffed and sewn shut.
- Off-center muzzle: Pin it and check the symmetry before sewing.
- Loose ends: Bury ends deep inside the stuffing so they never pop out.
- Wrong yarn weight: Bulky yarn makes a bigger bear with a different look; keep the same weight across the set so all four bears match.
Why crochet rainbow bears in 2026?
Rainbow and pastel bears hit three sweet spots at once: they are cute, they are personal (you choose every color), and they are beginner-achievable. A handmade bear makes a standout birthday, baby-shower or "just because" gift, and a matching set of four looks lovely on a nursery shelf.
They are also efficient. Because the set shares one base body, each additional bear takes less effort than the first. That suits a small craft-fair stock just as well as a cozy weekend project.
Which color should you make first?
Matching a shade to the person you are making it for turns a plush toy into a thoughtful gift. Here are a few pastel pairings that work well:
| Bear color | Accent for muzzle and inner ears | Great gift for |
|---|---|---|
| Blush pink | Cream | Valentine's Day, anniversaries, "thinking of you" |
| Sky blue | White | Baby showers, calm nursery decor |
| Butter yellow | White | Get-well wishes, sunny personalities |
| Mint green | Cream | Gender-neutral baby gifts |
| Rainbow stripes | White | Kids who love every color |
For a first attempt, a solid pastel bear is the easiest because there is no colorwork to manage. Once you are comfortable, a fully striped rainbow bear is the biggest eye-catcher and photographs beautifully for craft-fair listings or social posts.
How to make your bears look professional
The gap between a homemade-looking bear and a boutique-quality one comes down to finishing touches, not fancy stitches:
- Symmetrical assembly: Pin ears and limbs before sewing, and count rounds from a fixed reference point so both sides match.
- Eye placement: Set the eyes fairly low and wide for a younger, softer expression, and test the position with pins first.
- Blush cheeks: A whisper of pink adds sweetness; use a little pink yarn, cosmetic blush or a colored pencil.
- Neat nose: Embroider the nose in smooth satin stitch and take your time, because it is the focal point of the face.
- Deep-buried ends: Thread every tail deep into the stuffing so nothing works loose over years of hugs.
These details take minutes, but they are exactly what gift recipients notice first.
Frequently asked questions
Is a rainbow bear a good first amigurumi project?
Yes. It is an advanced-beginner project. If you can work a magic ring, single crochet in the round, and basic increases and decreases, you can make a teddy bear. Start with a solid pastel bear before you try stripes.
What yarn is best for rainbow and pastel bears?
Medium-weight (#4) acrylic is soft, comes in many pastel shades and is easy to wash. Cotton gives crisp stitch definition and a firmer bear. Use the same yarn weight for every bear in the set so they match.
What hook size should I use?
Use a hook smaller than the yarn label recommends so the fabric hides the stuffing. With worsted yarn, many makers use a 3.5 mm (E) or 4 mm (G) hook. If you crochet loosely, go down another size.
How do I make rainbow stripes without a visible jog?
Change color on the final yarn over of the last stitch of the round, work the first stitch of the new color as a slip stitch, and keep all color changes in a line at the back of the bear.
Are safety eyes safe for babies?
For babies and children under three, embroider the eyes with yarn or floss instead of using safety eyes, and sew every part on securely. Small parts that come loose can be a choking hazard.
How do I keep four bears the same size?
Use the same yarn, hook and pattern for all four, crochet the bodies back to back so your tension stays even, and count your rounds with a stitch marker.
How many colors do I need for a set of four bears?
Plan one main color per bear, plus a shared white or cream for the muzzles and a dark color for the nose and mouth. A striped rainbow bear needs only a little of each stripe color.
How do I wash a crocheted bear?
Spot-clean small marks with a damp cloth. For a full wash, hand-wash the bear gently in cool water, press the water out in a towel without wringing, and let it air-dry. Check the yarn label first.
Can I crochet clothes for my bears?
Yes. Little outfits are a lovely way to personalize each bear. If you want a ready-made wardrobe, the Brownie plush teddy bear bundle includes outfits such as shorts, a backpack, a dress, booties and a bodysuit.
Summary
A rainbow bear crochet pattern is one of the most rewarding amigurumi projects for advanced beginners: cute, colorful, gift-ready and built on repeatable stitches. Plan your colors first, choose medium-weight yarn and a hook small enough for a tight fabric, add safety eyes before closing the head (or embroider them for babies), and stuff firmly. Crochet the four bodies in a batch, keep your color changes at the back, and finish with a neat muzzle and nose.
Ready to crochet your bear family?
Start with a pattern that walks you through every step, then make it your own with your favorite pastel and rainbow colors.
See the bear patterns →