How to Crochet a Triangle: The Flat Triangle Formula
One repeatable increase rhythm that gives you a flat, straight-edged crochet triangle in any size, any yarn and any stitch height.

A crochet triangle looks like the simplest shape in the whole craft, and then you make one and the edges curl, the point goes lopsided, and the thing refuses to lie flat on the table. The problem is almost never your stitches. It is the rhythm of your increases. A triangle is a shape with a mathematically fixed rate of growth, and once you know that rate, every triangle you make afterwards comes out straight, flat and predictable.
That is the whole secret in one paragraph, but the useful part is everything around it: which direction to work in, how to keep the corners crisp instead of rounded, what changes when you swap stitch heights, and how to adapt the rate when you want a tall narrow triangle instead of a wide squat one. This guide walks through all of it, with a worked pattern you can follow immediately and a troubleshooting section for the four problems that catch almost everyone.
I have taught this shape to hundreds of beginners through our pattern support inbox, and the same four mistakes come up every single time. By the end of this page you will recognise all four on sight and know exactly which row caused them.
The two ways to build a crochet triangle
Both directions produce the same finished shape. They behave very differently while you work, so pick the one that suits your project.

Increasing: start tiny, grow outward
You begin with two or three stitches, then add one stitch at each end of every row. Each row is two stitches wider than the one before it, so the piece fans outward into two straight diagonal edges. This is the method I recommend for beginners, because you can simply stop whenever the piece looks big enough. No maths, no planning, no counting backwards from a target. It is also the right choice when you do not yet know the final size, for example when you are using up a single yarn ball and want to crochet until it runs out.
See the flat square formula →
Decreasing: start wide, taper to a tip
You chain the full width of the base first, then remove one stitch at each end of every row until a single stitch remains. The advantage is exact sizing: because you set the base width on row one, the finished triangle is guaranteed to measure what you planned. That matters enormously for bunting panels, shawl sections, garment gussets and anything that has to match a second piece. The trade-off is that your very first row is the longest and most tedious one, and a miscounted foundation chain means starting over.
Compare the flat circle method →
Which one should you actually use
Use the increase method for practice swatches, scrap-yarn projects, amigurumi ears, shawl bodies and anything decorative where a few millimetres either way do not matter. Use the decrease method when the triangle is a component that must fit something else. If you are making a set of matching bunting flags, the decrease method will save you hours of reworking, because every flag starts from an identical chain count and therefore ends up identical.
Browse beginner patterns →The increase formula, step by step
This is the version I teach first. It uses single crochet, worked in rows, turning after each row. All abbreviations are US terms.
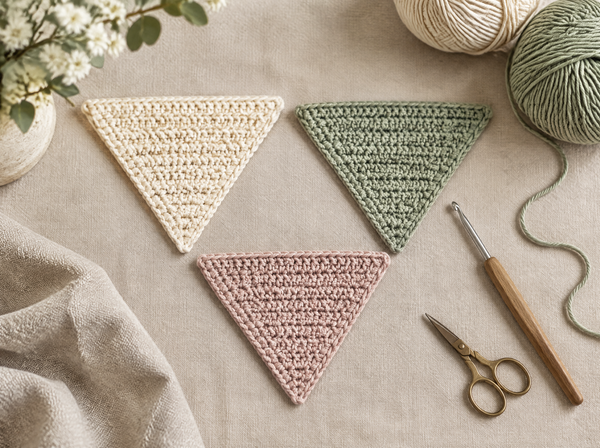
- Foundation. Chain 4. Single crochet into the second chain from the hook and into each remaining chain. You now have 3 stitches. This tiny row is the tip of your triangle.
- Turn. Chain 1 and turn your work. The chain 1 does not count as a stitch in this pattern, which keeps the edges much neater than a counted turning chain.
- Increase row. Work 2 single crochet into the first stitch. Single crochet into every stitch across until one stitch remains. Work 2 single crochet into that last stitch. You have added exactly 2 stitches.
- Repeat. Chain 1, turn, and repeat the increase row. Every row grows by 2 stitches: 3, 5, 7, 9, 11, 13 and onward in odd numbers.
- Measure as you go. Lay the piece flat every few rows. The two sloping sides should be straight lines, not curves and not steps.
- Finish. When the base edge reaches your target width, chain 1, turn, and work one plain row with no increases. This locks the top edge straight. Fasten off and weave in the ends.
The stitch count after any row is easy to predict: start with 3 and add 2 per row. After 10 increase rows you have 23 stitches. After 20 rows you have 43. If your count ever breaks that odd-number pattern, you missed or doubled an increase, and the side will show a visible dent or bulge at exactly that row.
How stitch height changes the angle
Here is the part most tutorials skip. Adding 2 stitches per row only produces a 60 degree equilateral triangle in single crochet, because a single crochet stitch is roughly as tall as it is wide. Taller stitches are much taller than they are wide, so the same increase rate makes the triangle grow upward faster than outward, and you get a narrow, steep shape instead.
| Stitch | Increase per row | Resulting shape | Best for |
|---|---|---|---|
| Single crochet | 2 (1 each end) | Wide, near equilateral | Bunting, amigurumi parts, coasters |
| Half double crochet | 2 (1 each end) | Slightly steep | Scarves, dense shawls |
| Half double crochet | 4 (2 each end) | Wide and fast | Large shawls, blankets |
| Double crochet | 2 (1 each end) | Tall and narrow | Pennants, long shawl wings |
| Double crochet | 4 (2 each end) | Near equilateral | Fast lightweight shawls |
So the complete rule is not simply add two per row. It is: match your increase rate to your stitch height. If your triangle is coming out too narrow and pointy, increase more per row. If it is coming out too wide and flat, increase less, or work two plain rows between increase rows to slow the growth down.
Four fixes for the problems everyone hits
- Edges curling inward: your increases are too few for the stitch height. Switch from 2 per row to 4 per row, or drop to a shorter stitch.
- Edges ruffling and waving: too many increases. Work one plain row between increase rows and the ripple flattens out immediately.
- Sloping sides look like stair steps: you are working the increases into the second and second-to-last stitch instead of the true first and last. Count carefully at both ends.
- One side straight, one side bulging: a turning chain is being counted as a stitch on one side only. Use chain 1 and never count it as a stitch.
Keeping the point sharp
A crochet triangle that starts from a chain-4 foundation has a slightly blunt tip, which is fine for most projects. If you need a genuinely sharp point, start instead with a magic ring and work 3 single crochet into it, then pull the ring tight before beginning your increase rows. The gathered centre pulls the first stitches together and closes the tip completely. This is the trick I use for amigurumi ears, where a visible hole at the tip would ruin the face.
For the two base corners, the opposite problem applies: they want to round off. Work your final plain row with a slip stitch into each of the two end stitches rather than a single crochet, and the corner tightens into a crisp angle instead of a soft curve.
Blocking makes the difference
Cotton and cotton blends hold a blocked shape beautifully, and an unblocked triangle almost always looks worse than the same piece pinned and dried. Dampen the finished triangle, pin all three corners to a towel or blocking mat with the sides pulled straight, check the angles with the edge of a book or a ruler, and let it dry completely. Acrylic will not hold blocking the same way without heat, so for acrylic triangles it is better to get the increase rate right than to rely on blocking to rescue the shape.
If you are matching multiple triangles, block them all at once, side by side, using the first one as the template. Any size drift between pieces becomes obvious while they are still wet and fixable.
A triangle is not a hard shape. It is an honest one: every skipped increase shows up on the edge, which is exactly why it makes you a better crocheter.— Ava, MrsCrochetWorld
What to make with your triangles
Once the shape is reliable, it turns up everywhere in crochet. These are the projects where the formula pays off fastest.

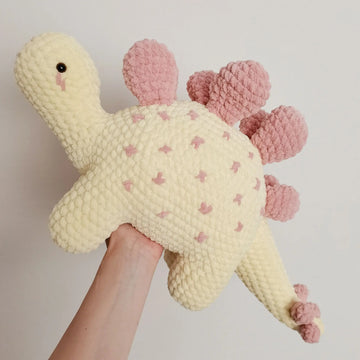
A low-sew amigurumi built around a row of flat crochet triangles along the back.
View pattern →
The corner increase formula, the companion shape to this triangle guide.
Read the guide →
Measure once and your triangles come out the size you actually planned.
Read the guide →
Five triangles sharing one centre, using the same increase logic.
Read the guide →Bunting flags
Identical panels, joined along a chain.
Amigurumi ears
Cat, fox and bunny ear shapes.
Shawl wings
One big triangle, worked outward.
Patchwork
Two triangles make one square.
A worked example: a 20 cm bunting flag
Here is the decrease method applied to a real, measurable project, so you can see how the sizing maths works in practice. Materials: worsted weight cotton, a 4 mm hook, US terms, single crochet throughout.
- Swatch first. Work a small square and count how many single crochet fit into 10 cm. Suppose you get 18 stitches.
- Calculate the base. For a 20 cm wide flag you need 18 divided by 10, multiplied by 20, which is 36 stitches. Round to an odd number so the taper ends in a single stitch: use 37.
- Foundation. Chain 38, single crochet into the second chain from the hook and across. You have 37 stitches.
- Decrease row. Chain 1, turn. Single crochet two together, single crochet across until two stitches remain, single crochet two together. You now have 35.
- Repeat. Continue decreasing 2 stitches per row: 35, 33, 31 and so on down to 3 stitches.
- Close the point. Chain 1, turn, single crochet all three remaining stitches together. Fasten off and pull the tail through.
- Edge and join. Work a round of single crochet around all three sides for a tidy finish, then chain between flags to string them together.
Because every flag starts from the same chain 38, all of them come out identical without any measuring during the work. That is the whole argument for the decrease method in one project.
If you want a longer, more dramatic flag, decrease 2 stitches every second row instead of every row. The taper becomes gentler and the triangle stretches downward. If you want a short squat flag, decrease 4 stitches per row and it closes quickly.
Working triangles in the round
Everything above assumes rows worked back and forth. You can also build a triangle in the round, which is how triangular motifs and granny-style triangles are made. The principle is the same but the increases concentrate at three fixed corner points instead of two row ends. Work your stitches evenly along each side, and at each of the three corners place a multiple of stitches into the same space, typically three single crochet or a cluster of double crochet separated by a chain. Mark all three corners before you start, because losing track of a corner is the single most common failure in round-worked triangles.
The round method gives you a triangle with a visible decorative centre and is much better suited to joining motifs edge to edge. The row method gives you a smooth, solid fabric and is better for anything that needs to look plain.
Frequently asked questions
How many stitches do I increase per row for a crochet triangle?
Two stitches per row, one at each end, worked into the first and last stitch. This is correct for single crochet. For double crochet you usually need four per row, two at each end, because the stitch is much taller than it is wide.
Why does my crochet triangle curl at the edges?
Curling means the piece is growing too slowly for the height of your stitches. The fabric cannot lie flat so it pulls inward. Increase more stitches per row, or switch to a shorter stitch such as single crochet.
Why does my crochet triangle ruffle and wave?
Ruffling is the opposite problem: too many increases for the stitch height. The edge has more fabric than the shape needs. Work one plain row between your increase rows and the waving disappears.
Should I start a crochet triangle at the point or the base?
Start at the point when you do not need an exact size and want to stop whenever the piece looks right. Start at the base when the triangle must match a specific measurement or a second piece, because the foundation chain fixes the width precisely.
How do I get a sharp point instead of a blunt tip?
Begin with a magic ring, work three single crochet into it and pull the ring closed before your first increase row. The gathered centre removes the small hole that a chain foundation leaves behind.
Does the turning chain count as a stitch?
In this method, no. Chain one at the start of every row and never work into it. Counting a turning chain as a stitch is the usual cause of one straight side and one bulging side.
How do I make a crochet triangle an exact size?
Crochet a swatch, count how many stitches fit into ten centimetres, then multiply that rate by the width you want. Use that number as your foundation chain and work the decrease method down to a point.
Can I crochet a triangle in the round?
Yes. Work increases at three fixed corner points rather than at two row ends, placing a group of stitches or a cluster into each corner space. Mark all three corners so you do not lose one as the motif grows.
What yarn works best for flat crochet triangles?
Smooth cotton or a cotton blend, because it shows stitch definition clearly and holds a blocked shape. Acrylic works but will not block as permanently, so your increase rate has to be accurate from the start.
How do I stop the base corners rounding off?
Work the two end stitches of your final row as slip stitches instead of single crochet. The shorter stitches pull the corners in tightly and the angle stays crisp.
How many rows does a triangle need?
There is no fixed number. With single crochet starting at three stitches, you gain two stitches per row, so after fifteen rows you have thirty-three stitches across the base. Measure the base edge as you work and stop at your target width.
Why do my sloping sides look like stair steps?
The increases are landing in the second stitch and the second-to-last stitch rather than the true first and last. Count both ends of every row carefully, and use a stitch marker in the first stitch until the rhythm becomes automatic.
Put the triangle formula to work
Every shape in amigurumi and home decor is built from a handful of repeatable formulas. Pick a pattern and practise the rhythm on a real project.
Browse amigurumi patterns Browse beginner patterns