How to Crochet a Flat Square: The Corner Increase Formula
One repeatable formula turns a magic ring into a perfectly flat square with sharp corners — in any yarn, in any size, every single time.

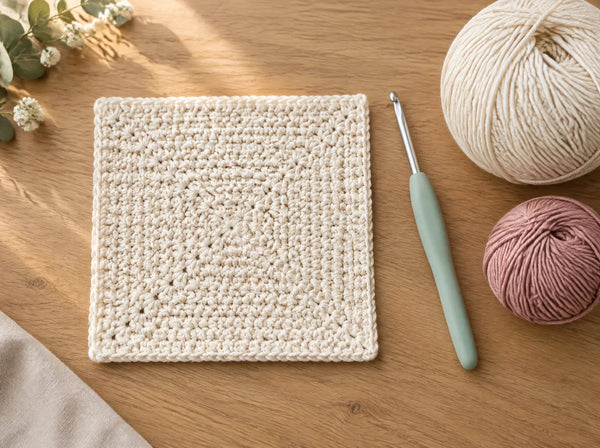
A crocheted square looks like the simplest shape in the craft. Four sides, four corners, done. Then you work your first one in the round, lay it on the table, and the corners curl up like a shallow bowl — or the sides ripple and wave as if the square cannot decide how big it wants to be. The shape is not wrong because you are a beginner. It is wrong because a square needs a very specific amount of extra stitches in very specific places, and almost nobody explains where that number comes from.
That is the whole formula. Everything else in this guide is about understanding why it works, how to keep your corners from drifting, and what to do when a square refuses to lie flat despite following the numbers. Once the logic clicks, you will never need a written square pattern again — you will be able to crochet a coaster, a dishcloth, a blanket block or an amigurumi base from memory, in any yarn weight you happen to have in your basket.
This guide follows the same approach as the rest of our shape-formula series. We explain the geometry in plain language, give you a round-by-round table you can actually use, and then troubleshoot the three failures that send most crocheters back to frogging: cupping, ruffling, and corners that slowly rotate out of alignment.
The three things that make a square lie flat
Flat crochet is arithmetic, not luck. These three ideas cover every flat square you will ever make.

Three stitches in one corner stitch
A corner is a 90-degree turn, and a turn needs extra fabric on the outside of the bend. Working 3 stitches into a single corner stitch adds exactly the two extra stitches that corner needs — one for the side arriving, one for the side leaving. Work fewer and the corner pinches into a curve. Work more and the corner flares into a frill. In single crochet, three-in-one is the number that produces a genuine right angle.
Browse all crochet patterns →
Plus 8 stitches per round, always
Four corners, two extra stitches each, equals eight new stitches per round. That number never changes, no matter how large the square becomes. Round 1 has 8 stitches, round 2 has 16, round 3 has 24, and so on. If your square cups like a shallow dish, you are adding fewer than 8. If the edges ripple and refuse to sit still, you are adding more than 8 — usually by increasing beside the corner as well as in it.
Learn how to check your gauge →
The formula scales to every project
Because the increase is positional rather than numerical, you never recalculate. A coaster stops at round 6, a dishcloth at round 14, a blanket block at round 20, and the maths is identical throughout. Switch from cotton to chunky wool and the square simply grows faster per round. This is why learning the square formula is worth far more than memorising any single square pattern.
See our coaster patterns and books →The flat square formula, round by round
Work in continuous rounds with single crochet in US terms. Do not join or chain between rounds unless you specifically want a visible seam. Use four stitch markers from the very beginning — one in each corner stitch — and move them up as you go.
- Make a magic ring. Work 8 single crochet into the ring and pull it closed. These 8 stitches are your four corners plus one stitch between each pair. Place a marker in stitches 1, 3, 5 and 7.
- Round 2 sets the corners. Work 3 single crochet into each marked corner stitch, and 1 single crochet into each unmarked stitch. You now have 16 stitches. Re-mark the centre stitch of each three-stitch corner cluster.
- Round 3 and every round after. Work 3 single crochet into each marked corner stitch, and 1 single crochet into every other stitch all the way round. Move each marker up into the centre stitch of the new cluster.
- Keep the markers honest. The marker always belongs in the middle stitch of the corner group. If it drifts to the left or right, the corner will visibly rotate and your square turns into a pinwheel.
- Stop when the size is right. Measure the square flat rather than counting rounds blindly, because yarn weight and tension change how fast it grows.
- Finish the edge. Slip stitch into the next stitch, cut the yarn, and pull it through. For a crisper outline, add one final round of single crochet without any increases except 3 in each corner.
| Round | Stitch count | Stitches per side | Typical size in worsted cotton |
|---|---|---|---|
| 1 | 8 | 1 | Under 1 inch |
| 2 | 16 | 2 | 1.25 inches |
| 3 | 24 | 4 | 1.75 inches |
| 4 | 32 | 6 | 2.25 inches |
| 5 | 40 | 8 | 2.75 inches |
| 6 | 48 | 10 | 3.25 inches — coaster |
| 8 | 64 | 14 | 4.25 inches |
| 10 | 80 | 18 | 5.25 inches |
| 14 | 112 | 26 | 7.5 inches — dishcloth |
| 20 | 160 | 38 | 10.5 inches — blanket block |
Quick checks while you work
- Total stitches should always equal round number multiplied by 8.
- Stitches per side should always be an even number, growing by 2 each round.
- Lay the square flat every few rounds. Problems are far easier to fix three rounds back than fifteen.
- Use a contrasting marker colour for the first corner so you always know where the round begins.
- Count the stitches between two corners rather than the entire round — it is faster and catches errors sooner.
A square is just a circle that was told exactly where to turn.— Ava, MrsCrochetWorld
Why squares go wrong — and how to rescue them
Almost every failed square falls into one of four categories. Each has a distinctive look, which makes diagnosis quick once you know the symptoms.
The square cups into a bowl
You are increasing too little. This usually happens when the corner marker slips and you work only 2 stitches into the corner, or when you miss a corner entirely because you lost track of where the round started. Count your round: if the total is below round number times eight, you have found your culprit. Frog back to the last round with a correct count and rebuild from there. Cupping never fixes itself in later rounds; it only gets more pronounced.
The edges ruffle and wave
You are increasing too much. The most common cause is working 3 stitches into the corner and then also increasing in the stitch immediately before or after it. Another frequent cause is treating the first and last stitch of a corner cluster as a new corner on the following round, which quietly doubles your corner count. Recount a single side: it should contain an even number of plain stitches between two corner clusters.
The corners rotate into a pinwheel
Your markers are drifting. Each round, the marker must move into the exact centre stitch of the new three-stitch cluster. Placing it in the first or last stitch of the cluster shifts every corner by one stitch per round, which produces a slow and surprisingly pretty spiral — lovely by accident, frustrating when you wanted a square. Locking stitch markers help far more than scrap yarn here.
The square is square but the fabric is stiff or holey
This is a hook and tension issue rather than a counting issue. A hook that is too small for your yarn makes a board-like fabric that will not drape; a hook that is too large leaves gaps that look careless in a coaster or blanket block. For amigurumi bases you want the tight end of that range, because stuffing should never show through. For dishcloths and blankets, go up a size for softness.
A note on double crochet squares
Everything above assumes single crochet. Taller stitches need more fabric to turn a corner, so the corner cluster changes: in double crochet, work 3 double crochet, chain 2, then 3 double crochet into each corner space. That chain-2 space is the corner, and the next round works its cluster into that space. The underlying logic is identical — the corner gets extra fabric, the sides get one stitch per stitch.
What to make with your flat squares
The square is a foundation shape. Once it is reliable, a surprising number of projects open up.
Coasters and mug rugs
Six rounds in cotton yarn gives a practical coaster. Make a set of four in a graded colour palette for a quick, genuinely useful handmade gift.
Dishcloths and washcloths
Around fourteen rounds in cotton produces a dishcloth that scrubs well and dries fast. These are also perfect for practising even tension.
Blanket blocks
Twenty rounds creates a solid block that joins neatly to its neighbours. Solid squares make an excellent calm contrast to lacier blocks.
Amigurumi bases
Any boxy plushie, cushion or bag starts with a flat square base. Stop increasing and keep working even to turn the square into a cube.
Pouches and bags
Two squares joined around three sides make a simple lined pouch. A square base with straight sides becomes a structured tote.
Stash-busting samplers
Squares are the ideal way to use up odd metres of yarn. Change colour every round or two and let the leftovers decide the palette.
Keep exploring the shape formulas

The six-stitch increase rule that keeps every circle flat, and how it differs from the square.
Read the guide →
Which markers hold their place, and how to use four of them to keep square corners aligned.
Read the guide →
The two-ended increase formula behind every bag base and slipper sole.
Read the guide →
Why your square finishes a different size than the table says, and how to correct it.
Read the guide →How the square compares to other flat shapes
Every flat shape in crochet obeys the same principle: the fabric must grow at the same rate as its own circumference. What changes is where the growth is placed. A circle spreads its increases evenly so the edge curves smoothly. A square concentrates all of its growth in four fixed points so the edge stays straight between them and turns sharply at the corners. A hexagon uses six points and grows by twelve stitches per round. A triangle uses three points and grows by six.
This is why a square and a circle worked in the same yarn to the same number of rounds end up roughly the same width across, but look entirely different. It is also why mixing up the two formulas produces such recognisable failures: a circle with concentrated increases becomes a lumpy polygon, and a square with evenly spread increases becomes a soft-edged blob.
| Shape | Increase points | Growth per round | Starting ring |
|---|---|---|---|
| Circle | Evenly spread | 6 stitches | 6 stitches |
| Triangle | 3 corners | 6 stitches | 6 stitches |
| Square | 4 corners | 8 stitches | 8 stitches |
| Hexagon | 6 corners | 12 stitches | 12 stitches |
Notice that the starting ring always matches the growth number. That is not a coincidence — it is the same rule applied to round one. Internalise that single relationship and you can derive the formula for any regular flat shape on your own, including ones no pattern has bothered to write down.
Frequently asked questions
How many stitches do I increase per round on a crochet square?
Eight stitches per round. You work 3 single crochet into each of the four corner stitches, which adds two extra stitches at each corner. Four corners multiplied by two extra stitches equals eight new stitches every round, regardless of how large the square has grown.
Why does my crochet square curl up at the corners?
You are not increasing enough. Usually a corner marker has slipped and you worked only two stitches into that corner, or you missed a corner completely. Count your total stitches: it should equal the round number multiplied by eight. If it is lower, frog back to the last correct round, because cupping only worsens as the square grows.
Why are the edges of my square wavy and ruffled?
You are increasing too much. The usual cause is working the corner cluster and also increasing in the stitch directly beside it, or mistaking the outer stitches of a corner cluster for new corners on the next round. Count a single side — it should have an even number of plain stitches between the two corner clusters.
Should I start a crochet square with a magic ring or a chain?
A magic ring is better because it closes completely and leaves no hole in the centre, which matters for coasters and amigurumi bases. If you find magic rings fiddly, chain 4 and slip stitch into the first chain to form a loop, then work your 8 stitches into that loop. The small hole can be tightened later with the tail.
How many stitches should I start a crochet square with?
Eight stitches in the magic ring. This matches the growth rate of eight stitches per round, which is what keeps the proportions correct from the very first round. Some patterns start with 12 for a slightly more open centre, but 8 is the cleanest starting point for a solid single crochet square.
Do I need stitch markers to crochet a square?
Strongly recommended. You need four markers, one in the centre stitch of each corner cluster, moved up every round. Without them the corners drift sideways and the square slowly turns into a pinwheel. Locking markers work far better than scrap yarn because they do not slide out of a worked stitch.
How do I crochet a square with double crochet instead of single crochet?
Taller stitches need more fabric to turn a corner. Work 3 double crochet, chain 2, then 3 double crochet into each corner space. On the following round, the corner cluster goes into that chain-2 space. Sides are still worked one stitch into each stitch. The square grows much faster because each round is taller.
How big will my square be after a certain number of rounds?
That depends entirely on your yarn weight and tension, which is why the table gives typical sizes in worsted cotton rather than guarantees. A worsted cotton square grows roughly half an inch per round. Measure the square flat as you go rather than trusting a round count from a different yarn.
Can I use this square formula for a granny square?
Not directly. A traditional granny square is built from clusters of double crochet separated by chain spaces, so its increase logic lives in the corner chain spaces rather than in individual stitches. The solid square in this guide is the single crochet version, which gives a denser fabric with no gaps.
Why does my square look like a pinwheel or spiral?
Your corner markers have drifted. The marker must sit in the exact centre stitch of each three-stitch corner cluster. If it ends up in the first or last stitch instead, every corner shifts by one stitch per round and the whole square rotates. Reset all four markers carefully and the corners will straighten out.
How do I join squares together into a blanket?
Work one final round of single crochet on each square so the edges match exactly, then join with a slip stitch seam for a flat join or a whipstitch for an invisible one. Make sure every square has the same final stitch count per side, otherwise the joins will pucker along the blanket.
What hook size should I use for a flat crochet square?
Use a hook at or slightly below the size printed on your yarn label. For coasters, dishcloths and blanket blocks a standard hook size gives good drape. For amigurumi bases go down a size or two so the fabric is dense enough that stuffing never shows through the stitches.
Put the formula to work
Our pattern books and bundles are written in US terms with clear round-by-round counts, so the shapes you learn here carry straight into real projects.
Browse crochet pattern books Visit the stitch library