How to Crochet a Sphere: The Amigurumi Ball Formula
One repeatable increase-and-decrease formula that turns a magic ring into a smooth, perfectly round amigurumi ball in any size you need.

The sphere is the single most useful shape in amigurumi, and almost nobody teaches it as a formula. Heads, bellies, snouts, berries, baubles, cat bodies, pumpkin bases, snowman tiers, bag charms: strip away the ears and the embroidery and you are looking at a ball. Learn to crochet a sphere properly and you stop being dependent on somebody else's stitch counts, because you can build the exact size your project needs from scratch.
That one sentence is the whole secret, and it is the part most beginners never hear. They are handed a pattern that says "Rnd 1-6: increase, Rnd 7-12: sc around, Rnd 13-18: decrease" and they follow it without noticing the structure underneath. Once you see the structure, you can scale it. You can make a ball the size of a blueberry or the size of a melon using the same three-phase recipe, and you will never again have to guess why your amigurumi head came out looking like a pear.
In this guide I will walk you through the formula itself, the exact numbers for the five sizes you will actually use, the four technique choices that decide whether your sphere looks handmade-lovely or handmade-lumpy, and the fixes for every common way a ball goes wrong. Everything here uses US crochet terms and single crochet worked in continuous spirals, which is the standard for amigurumi.
The three phases of every crochet sphere
Increase, hold, decrease. Every ball you will ever crochet is built from these three blocks, in this order, in equal measure.

The increase phase builds the bottom hemisphere
Start with a magic ring of 6 single crochet. Then increase by 6 stitches on every round, spacing the increases evenly so the fabric fans out into a flat-ish disc that gradually cups. Round 2 is 12 stitches, round 3 is 18, round 4 is 24, and so on, adding 6 each time. The important part is where you place those increases: push them all together and you get a visible ridge or a hexagonal outline; spread them out and the curve stays smooth. Each round you work, the gap between increases grows by one stitch, which is exactly how the flat circle formula works. The increase phase is your entire bottom half, so the number of rounds you spend here decides the finished diameter.
Read the flat circle increase formula →
The straight phase sets the widest point
Once you have reached your target stitch count, stop increasing and work plain single crochet around, one stitch in each stitch, with no shaping at all. This is the equator of your ball. Work the same number of straight rounds as you worked increase rounds and your sphere comes out genuinely round. Work fewer and you get a squashed disc, like a macaron. Work more and you get a capsule or a sausage, which is sometimes exactly what you want for a body or a limb, but not for a head. This phase is also where colour changes, stripes and embroidery placement live, because it is the only part of the ball with a predictable, unchanging stitch count.
Compare it with the half-sphere dome →
The decrease phase mirrors the increase phase exactly
Now run the increase phase backwards. If your last increase round was "1 sc, inc" repeated, your first decrease round is "1 sc, dec" repeated. Take 6 stitches away per round until you are back down to 6, stuffing as you go. Use the invisible decrease rather than a standard sc2tog, because a normal decrease leaves a small raised bump and on the top of a head those bumps read as a dotted line. Stuff firmly before the hole gets too small to work through, then close the last 6 stitches with a yarn needle. Mirror symmetry is non-negotiable here: an asymmetric decrease is the number one cause of an egg-shaped amigurumi.
Learn the invisible decrease →The sphere formula, round by round
Here is the complete written pattern for a six-round sphere, which is the workhorse size for amigurumi heads at worsted weight. Work in a continuous spiral, do not join rounds, and keep a stitch marker in the first stitch of the current round. "Inc" means two single crochet in the same stitch. "Dec" means one invisible decrease.
- Round 1. Magic ring, 6 sc into the ring. (6 stitches)
- Round 2. Inc in every stitch, six times. (12)
- Round 3. Work (1 sc, inc) six times. (18)
- Round 4. Work (2 sc, inc) six times. (24)
- Round 5. Work (3 sc, inc) six times. (30)
- Round 6. Work (4 sc, inc) six times. (36)
- Rounds 7 to 12. Sc in every stitch around, six rounds total, no shaping. (36)
- Round 13. Work (4 sc, dec) six times. (30)
- Round 14. Work (3 sc, dec) six times. (24)
- Round 15. Work (2 sc, dec) six times. (18)
- Round 16. Work (1 sc, dec) six times. (12) Begin stuffing now if you have not already.
- Round 17. Dec six times. (6) Top up the stuffing, shape the ball in your palms.
- Finish. Fasten off leaving a tail, thread it through the front loops of the final 6 stitches, pull tight, and bury the tail inside.
Read rounds 13 to 17 against rounds 6 down to 2 and you will see they are the same instructions with "inc" swapped for "dec". That is the mirror. Whenever you design your own sphere, write the increase half first, then simply reverse it.
Five sphere sizes you can copy
The only variable you change is how many increase rounds you work. Everything else follows automatically. Diameters below assume worsted weight acrylic or cotton with a 3.0 mm hook, firmly stuffed, which is the tension amigurumi makers usually aim for.
| Increase rounds | Widest stitch count | Straight rounds | Total rounds | Approx. diameter | Typical use |
|---|---|---|---|---|---|
| 3 | 18 | 3 | 9 | 3 cm / 1.2 in | Berries, noses, tiny charms |
| 4 | 24 | 4 | 12 | 4 cm / 1.6 in | Small heads, baubles, beads |
| 5 | 30 | 5 | 15 | 5.5 cm / 2.2 in | Keychain heads, snowman tiers |
| 6 | 36 | 6 | 18 | 7 cm / 2.8 in | Standard amigurumi head |
| 8 | 48 | 8 | 24 | 9.5 cm / 3.7 in | Large heads, round animal bodies |
To scale beyond this, keep the pattern going: ten increase rounds give you 60 stitches and roughly 12 cm, twelve give you 72 and roughly 14 cm. Every added increase round adds about 1.2 to 1.5 cm of diameter at worsted weight. If you switch to DK or sport weight, the stitch counts stay identical and only the diameter shrinks, which is a handy way to make a matched set of different-sized balls from one set of instructions.
Four habits that separate a round ball from a lumpy one
- Stagger your increases. If round 4 puts its increases on stitches 3, 6, 9, 12, 15 and 18, do not let round 5 stack its increases on the same columns. Working the increase one stitch earlier or later each round breaks up the six radiating seams that otherwise make a ball look faceted.
- Go down a hook size. Use a hook one or two sizes smaller than the yarn label suggests. A 3.0 mm or 3.5 mm hook with worsted yarn produces dense fabric that hides stuffing and holds its shape. Loose fabric makes stuffing show through no matter how round your shaping is.
- Mark round one, every single time. A locking stitch marker in the first stitch of each round is the difference between a 36-stitch round and an accidental 35-stitch round. In a spiral there is no join to count from, so the marker is your only reference.
- Stuff in layers, not in one lump. Push small pinches of fiberfill in and distribute them with the back of your hook before adding more. One big wad creates a hard core with soft, dentable edges, which is exactly how a ball loses its roundness after a week on a shelf.
Why your sphere came out the wrong shape
Almost every misshapen ball traces back to one of six causes, and all six are quick to diagnose once you know the formula.
It looks like an egg. Your increase and decrease phases are not mirrored. Count your rounds: if you increased over six rounds and decreased over four, the top is steeper than the bottom and you have built an egg. Rip back and match them.
It looks like a hexagon or a star. Your increases are stacked in columns. Stagger them, and if the pattern is already written with stacked increases, shift the start of each round by one stitch to break up the lines.
It is flat and wide, like a cushion. Not enough straight rounds in the middle. Add rounds until the straight count matches the increase count.
It is long and tubular. Too many straight rounds. This is a cylinder with domed ends, not a sphere. Reduce the straight phase.
Stuffing shows through the fabric. Either your hook is too large for the yarn, or your tension is loose, or you used a long-fibre stuffing that wisps. Drop a hook size, and consider lining the inside with a scrap of the same colour before stuffing a pale ball with white fiberfill.
There is a visible slant or seam running up one side. That is the natural spiral jog of continuous rounds, not a mistake in your sphere formula. It becomes invisible once the piece is a head with a face on the other side, and there are specific tricks to minimise it.
A sphere is just an increase phase, held, then run backwards. Once you can see that, you can crochet any size you want without a pattern.— Ava, MrsCrochetWorld
Working the sphere into real projects
The formula earns its keep the moment you stop making practice balls and start making things. Here is how it adapts.
Amigurumi heads. Use a six or eight round sphere and place safety eyes during the straight phase, usually between the second and third straight round, spaced six to eight stitches apart. Inserting eyes while the hole is still open and the piece is unstuffed is far easier than fighting a finished ball. Embroider the muzzle before you close the top so you can reach inside to secure your knots.
Round animal bodies. Take the sphere to eight or ten increase rounds, then flatten the bottom deliberately by working the last two decrease rounds in back loop only. That creates a crisp base edge so the finished plush sits upright on a shelf instead of rolling.
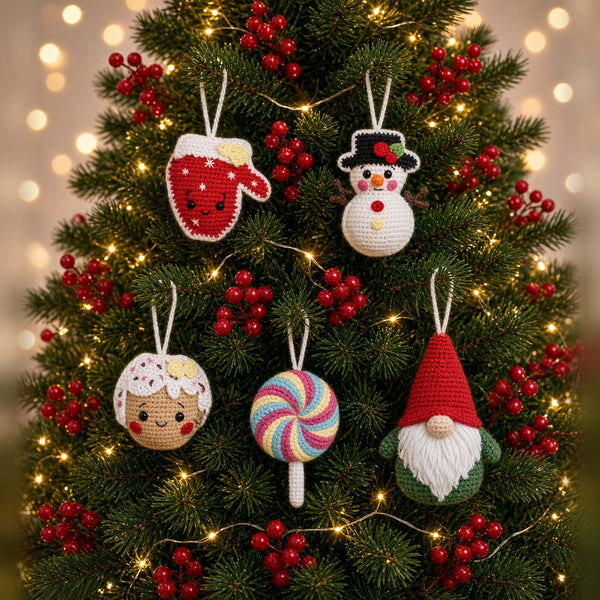
Baubles and hanging ornaments. Make a four or five round sphere, stuff it lightly so it stays soft, and attach a chain loop at the final closure. Work them in cotton rather than acrylic if you want crisp stitch definition and a shape that holds up year after year in storage.
Fruit and vegetables. A six round sphere in red becomes an apple with a brown chain stem and two leaf shapes. Pull a long tail of yarn vertically through the finished ball from top to bottom and cinch it to create the dimple in a pumpkin or a tomato. Repeat at six evenly spaced points and you have a segmented squash.
Beads and garlands. Three round spheres threaded onto cord make a nursery garland or a chunky necklace. Because the formula is proportional, a row of three, four and five round spheres reads as a deliberate graduated set rather than a mismatch.
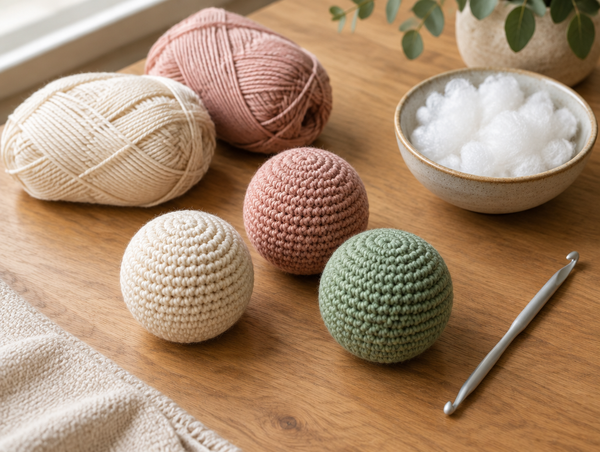
Yarn, hook and stuffing choices
Spheres are unforgiving about materials in a way that flat projects are not, because the fabric is under constant outward pressure from the stuffing.
Yarn. Smooth, tightly plied yarn shows your even rounds and resists pilling. Mercerised cotton gives the crispest, most sculptural sphere and the best stitch definition. Acrylic is softer, more forgiving of uneven tension, and the better choice for anything a child will handle. Avoid single-ply, loosely spun and fuzzy yarns for your first spheres, because they hide your stitches and make counting miserable.
Hook. Go one to two sizes below the label. For worsted weight that usually means 3.0 mm to 3.5 mm. If you can see stuffing through the fabric when you hold the piece up to a window, the hook is still too big.
Stuffing. Polyester fiberfill is the standard: it is washable, springy and holds shape. Use the siliconised kind if you can find it, because it clumps less. For tiny spheres under 4 cm, tease the fiberfill apart thoroughly first, otherwise a single clump will flatten one side.
Tension. The single biggest variable is you. Work a practice sphere before committing to a project, and if your fabric feels floppy, tighten your grip on the working yarn rather than changing hooks again.
Ready-made patterns that use this shape
If you would rather follow a complete project than design from the formula, our beginner pattern collections lean heavily on sphere construction, which means every one of them is good practice for exactly this skill.

Fifty beginner plushies built from spheres and simple shapes, with almost no sewing required.
View pattern →
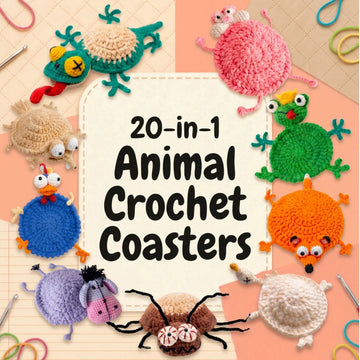
Twenty amigurumi animals whose heads and bodies are all variations on the sphere formula.
View pattern →The companion guide to this one: no lumps, no gaps, no stuffing showing through.
Read the guide →How to cinch those final six stitches so the top of your sphere disappears completely.
Read the guide →Start with the magic ring
A tight, gap-free centre is the foundation of a round sphere. If your starting ring loosens, the whole bottom hemisphere sags.
Try yarn under
Working single crochet with the yarn drawn under rather than over tightens your stitches and produces noticeably denser amigurumi fabric.
Check your right side
In a spiral it is easy to flip the work inside out without noticing. Decide early which side faces out and keep it consistent.
Each of those three habits has a full guide of its own: the magic ring guide covers starting rings that never loosen, the yarn under versus yarn over comparison explains the tension difference, and the right side versus wrong side guide shows you how to tell at a glance. If you are fighting a diagonal line up your ball, the spiral seam fix is the one to read next, and stitch markers for amigurumi will stop the miscounts before they start.
About the technique, and about this guide
I have been designing amigurumi patterns for MrsCrochetWorld for years, and the sphere is the shape I have written and rewritten more than any other. Every head in every animal pattern we publish starts from the three-phase formula above, and the numbers in the size table are the ones our pattern testers work to, not theoretical calculations. The staggered-increase tip in particular came out of testing feedback: makers kept reporting hexagonal heads, and stacked increases turned out to be the cause in nearly every case. The instructions here use US crochet terminology throughout, worked in continuous spiral rounds, which is the convention for amigurumi worldwide.
Frequently asked questions
What is the basic formula for crocheting a sphere?
Increase 6 stitches per round for a set number of rounds, work the same number of plain rounds with no shaping, then decrease 6 stitches per round in the exact mirror image of your increases. Six increase rounds need six straight rounds and six decrease rounds. That three-phase symmetry is what produces a round ball rather than an egg or a disc.
How many rounds do I need for a specific ball size?
At worsted weight with a 3.0 mm hook, three increase rounds give roughly 3 cm, four give 4 cm, five give 5.5 cm, six give 7 cm and eight give about 9.5 cm. Each extra increase round adds roughly 1.2 to 1.5 cm of diameter. Multiply your increase round count by three to get the total round count.
Why does my crochet ball look like an egg instead of a sphere?
Your increase and decrease phases are not mirrored. If you increased over six rounds but decreased over four, the top half is steeper than the bottom half and the shape reads as an egg. Count both phases and make them match exactly, round for round.
Why does my sphere look hexagonal or star-shaped?
Your increases are stacked in the same six columns on every round, which creates visible radiating seams and pulls the outline into a hexagon. Stagger the increase placement by shifting it one stitch earlier or later each round so the extra stitches are distributed around the fabric instead of in straight lines.
Should I use invisible decrease or sc2tog on a sphere?
Use the invisible decrease. A standard sc2tog leaves a small raised bump, and because the decrease phase concentrates those bumps near the top of the ball they read as a dotted ring. The invisible decrease, worked through the front loops of the next two stitches, keeps the surface smooth.
What hook size should I use for amigurumi spheres?
Go one to two sizes smaller than the yarn label suggests. For worsted weight yarn that usually means a 3.0 mm or 3.5 mm hook. The goal is fabric dense enough that stuffing cannot show through when you hold the piece up to a light source.
When should I start stuffing the sphere?
Begin during the decrease phase, once the opening has narrowed but is still wide enough for your fingers, usually around the round where you are down to 18 or 12 stitches. Add stuffing in small pinches and distribute each one before adding the next, then top up at the very end and shape the ball between your palms.
Can I crochet a sphere in joined rounds instead of a spiral?
You can, but it leaves a visible vertical seam of slip stitches running up the side of the ball. Continuous spiral rounds are the amigurumi standard precisely because they avoid that seam. If you do work joined rounds, place the seam where it will be hidden, such as the back of a head.
How do I crochet a flattened or squashed sphere?
Reduce the straight phase and work the final one or two decrease rounds in back loop only. Fewer straight rounds compress the shape vertically, and the back-loop rounds create a crisp folded edge that keeps the flattened base from rolling.
Does the sphere formula work with any yarn weight?
Yes. The stitch counts and round counts stay exactly the same across yarn weights, and only the finished diameter changes. A six round sphere in sport weight might measure 5 cm while the same instructions in chunky yarn produce 11 cm, which makes the formula a reliable way to produce matched sets in different sizes.
How do I stop stuffing showing through a pale sphere?
Tighten your fabric by dropping a hook size, and line the inside of the ball with a small scrap of yarn or fabric in the same colour as your shell before adding white fiberfill. Siliconised polyester stuffing also wisps less than cheaper grades, which reduces the fuzzy halo effect through the stitches.
How many stitches should the widest round of my sphere have?
Six times the number of increase rounds you worked. Three increase rounds give 18 stitches, four give 24, six give 36 and eight give 48. That widest count then stays constant through the whole straight phase before the decrease phase takes it back down to 6.
Put the sphere formula to work
Browse beginner-friendly amigurumi patterns built on exactly the shaping you just learned, with written instructions and step photos for every round.
Browse amigurumi patterns Browse beginner patterns